1
1
|
| E |
|
|
|
|
|
|
|
| 4 |
|
|
|
|
|
|
|
| 3 |
|
|
|
|
|
|
| ON |
|
|
| ||||
|
| 2 |
|
|
|
|
|
|
|
| 1 |
| 1 | 2 | 3 | 4 |
|
Tx IR OUT | GND | IR IN | GND + 12V | |||||
1
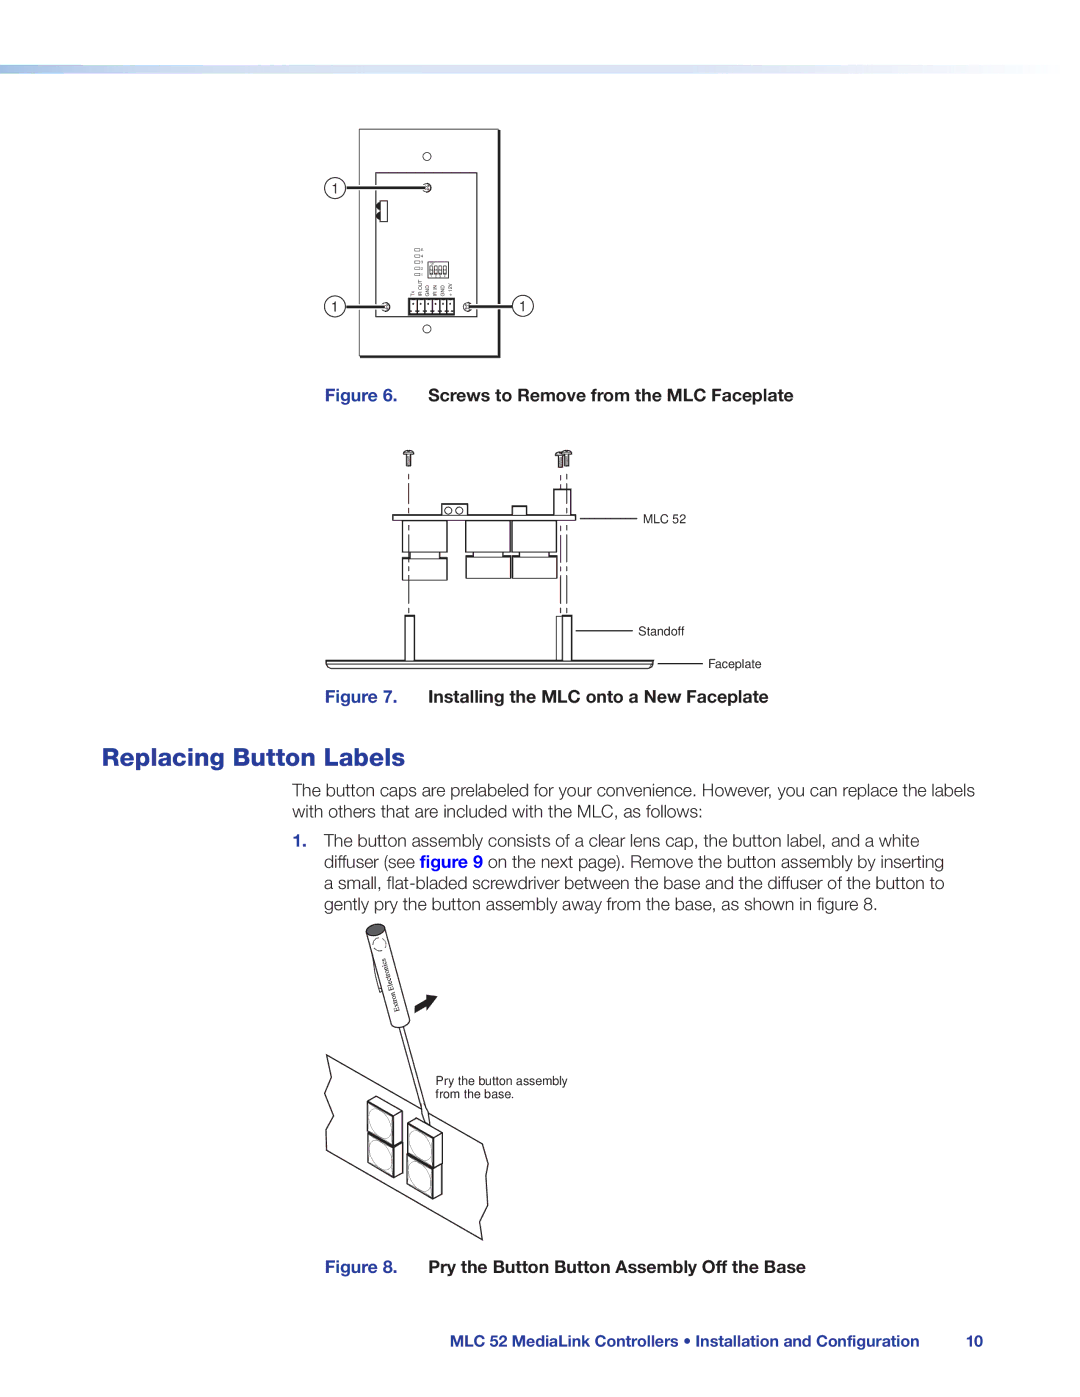
Figure 6. Screws to Remove from the MLC Faceplate
MLC 52
Standoff
Faceplate
Figure 7. Installing the MLC onto a New Faceplate
Replacing Button Labels
The button caps are prelabeled for your convenience. However, you can replace the labels with others that are included with the MLC, as follows:
1.The button assembly consists of a clear lens cap, the button label, and a white diffuser (see figure 9 on the next page). Remove the button assembly by inserting a small,
Pry the button assembly from the base.
Figure 8. Pry the Button Button Assembly Off the Base
MLC 52 MediaLink Controllers • Installation and Configuration | 10 |