DISPLAY | |
ON | OFF |
VOLUME | |
| PC |
VIDEO | |
Extron | |
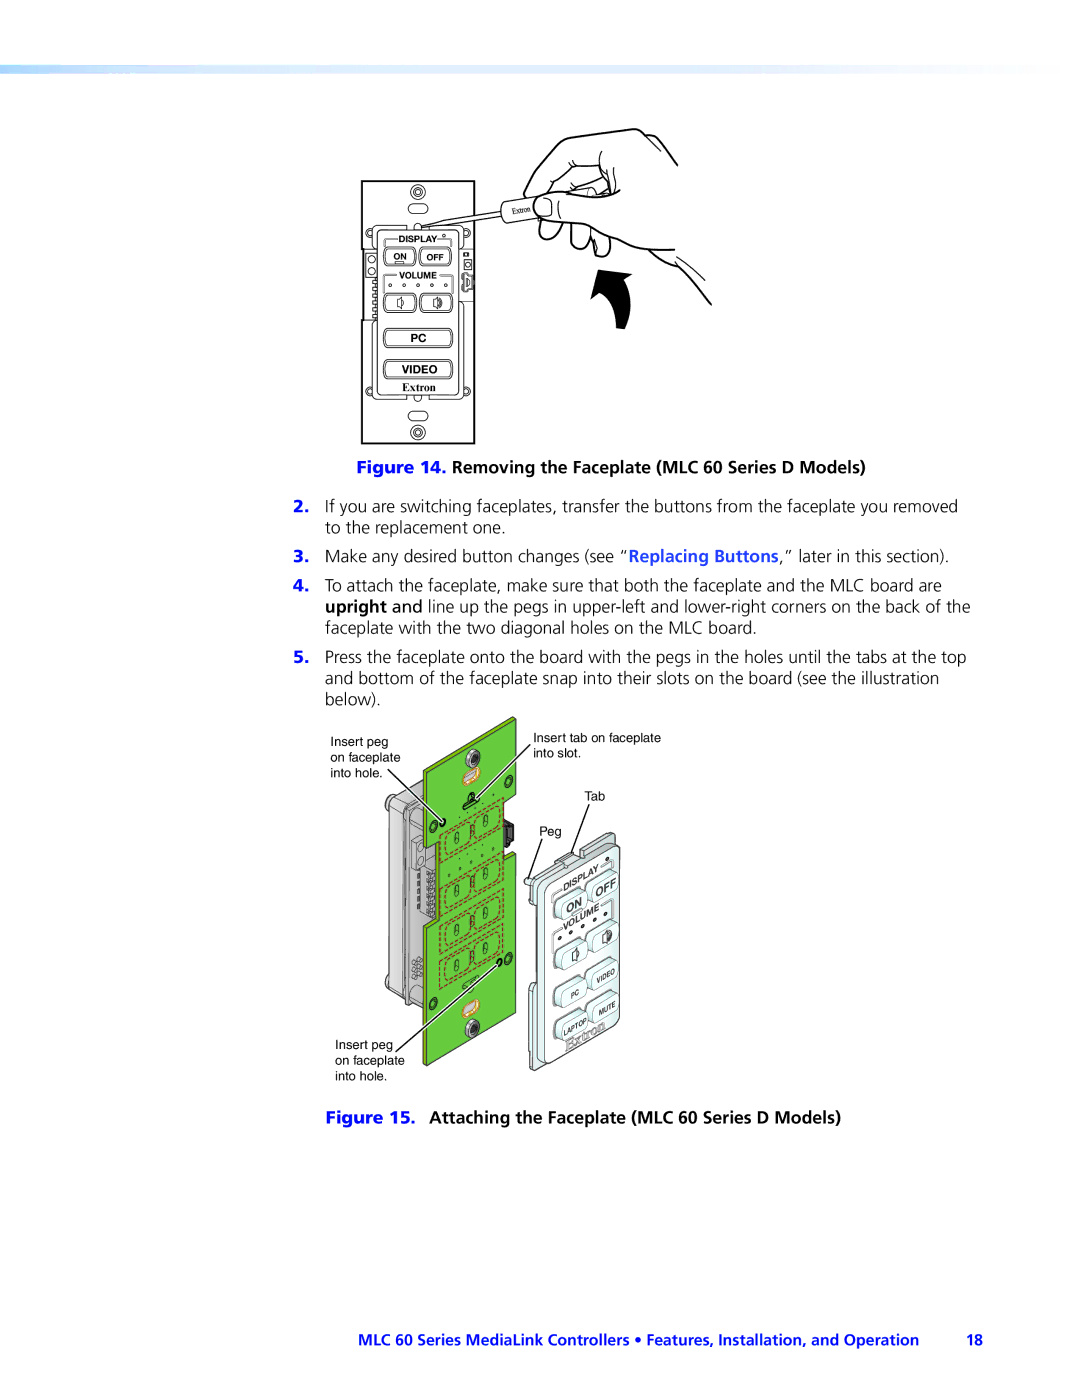
Figure 14. Removing the Faceplate (MLC 60 Series D Models)
2.If you are switching faceplates, transfer the buttons from the faceplate you removed to the replacement one.
3.Make any desired button changes (see “Replacing Buttons,” later in this section).
4.To attach the faceplate, make sure that both the faceplate and the MLC board are upright and line up the pegs in
5.Press the faceplate onto the board with the pegs in the holes until the tabs at the top and bottom of the faceplate snap into their slots on the board (see the illustration below).
Insert peg on faceplate into hole.
Insert peg on faceplate into hole.
Insert tab on faceplate into slot.
Tab | |
Peg |
|
Y | |
DISPLA | OFF |
| |
ON |
|
VOLUME | |
| O |
| VIDE |
PC |
|
| MUTE |
LAPTOP |
|
Figure 15. Attaching the Faceplate (MLC 60 Series D Models)
MLC 60 Series MediaLink Controllers • Features, Installation, and Operation | 18 |