VOLUME
MUTE
Figure 17. Removing the MLC 64 Volume Control Module Faceplate
3.Making sure that both the faceplate and the volume control module board are upright, line up the pegs in the
4.Press the faceplate onto the board until the tabs at the top and bottom of the faceplate snap into their slots on the board.
Removing and replacing the MLC 62 RS EU and MK faceplates
The MLC 62 RS EU and MK are each provided with an
1.Remove the MLC 62 RS EU or MLC 62 RS MK faceplate as follows:
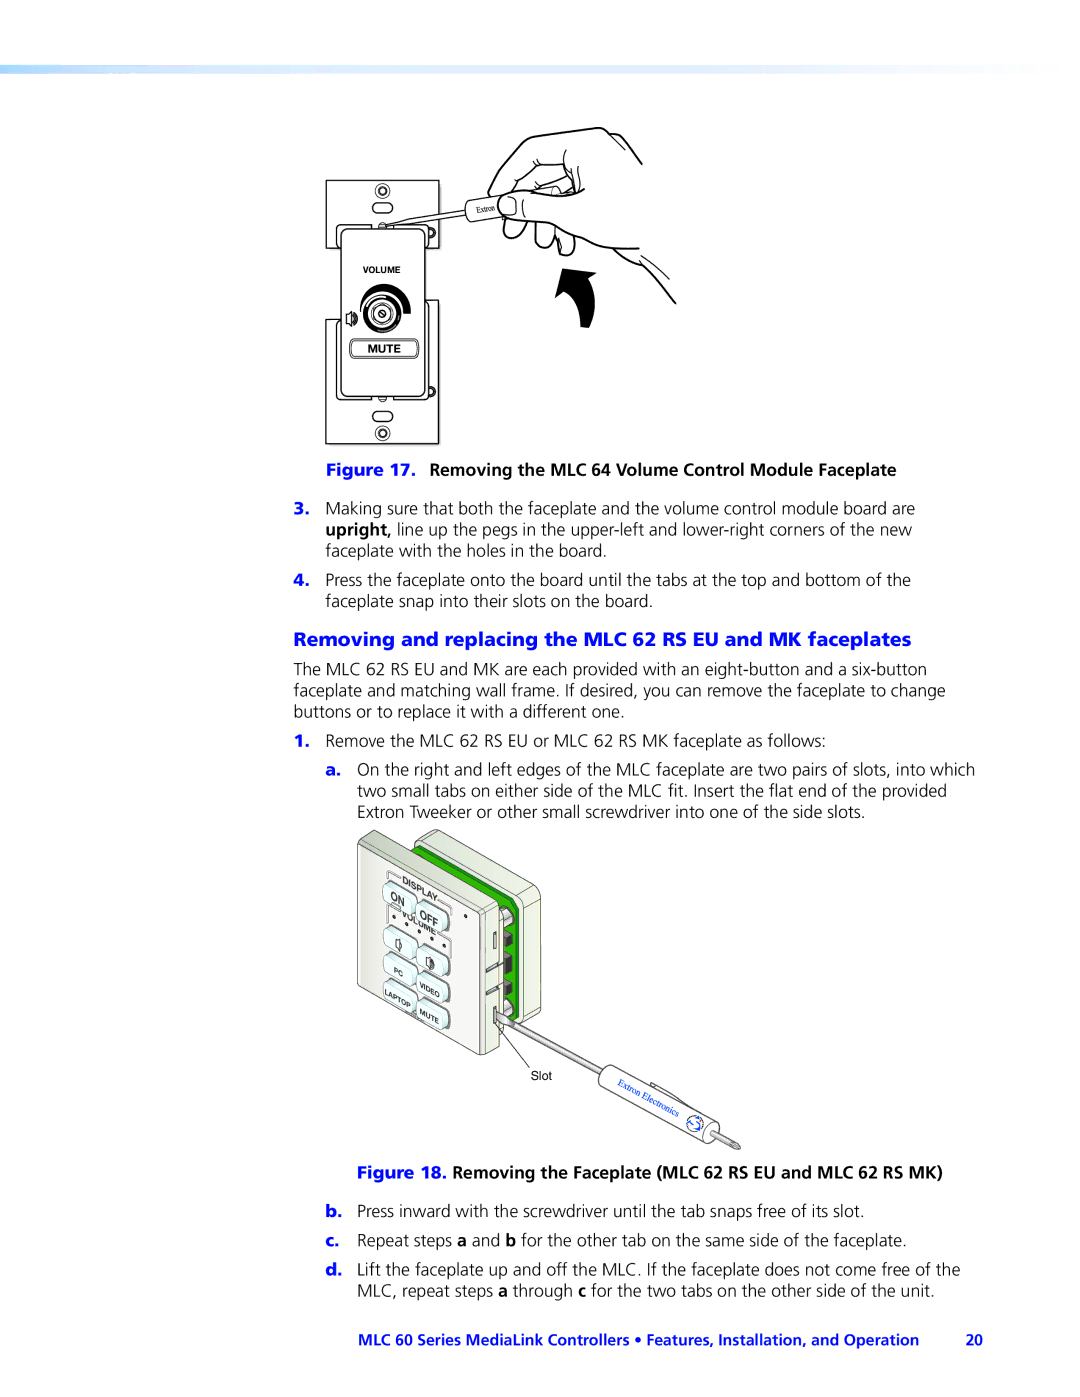
a.On the right and left edges of the MLC faceplate are two pairs of slots, into which two small tabs on either side of the MLC fit. Insert the flat end of the provided
Extron Tweeker or other small screwdriver into one of the side slots.
DISPLA | ||
ON | Y | |
OFF | ||
| ||
VOLUME | ||
PC |
| |
LAPTOP | VIDEO | |
MUTE | ||
|
Slot
Figure 18. Removing the Faceplate (MLC 62 RS EU and MLC 62 RS MK)
b.Press inward with the screwdriver until the tab snaps free of its slot.
c.Repeat steps a and b for the other tab on the same side of the faceplate.
d.Lift the faceplate up and off the MLC. If the faceplate does not come free of the MLC, repeat steps a through c for the two tabs on the other side of the unit.
MLC 60 Series MediaLink Controllers • Features, Installation, and Operation | 20 |