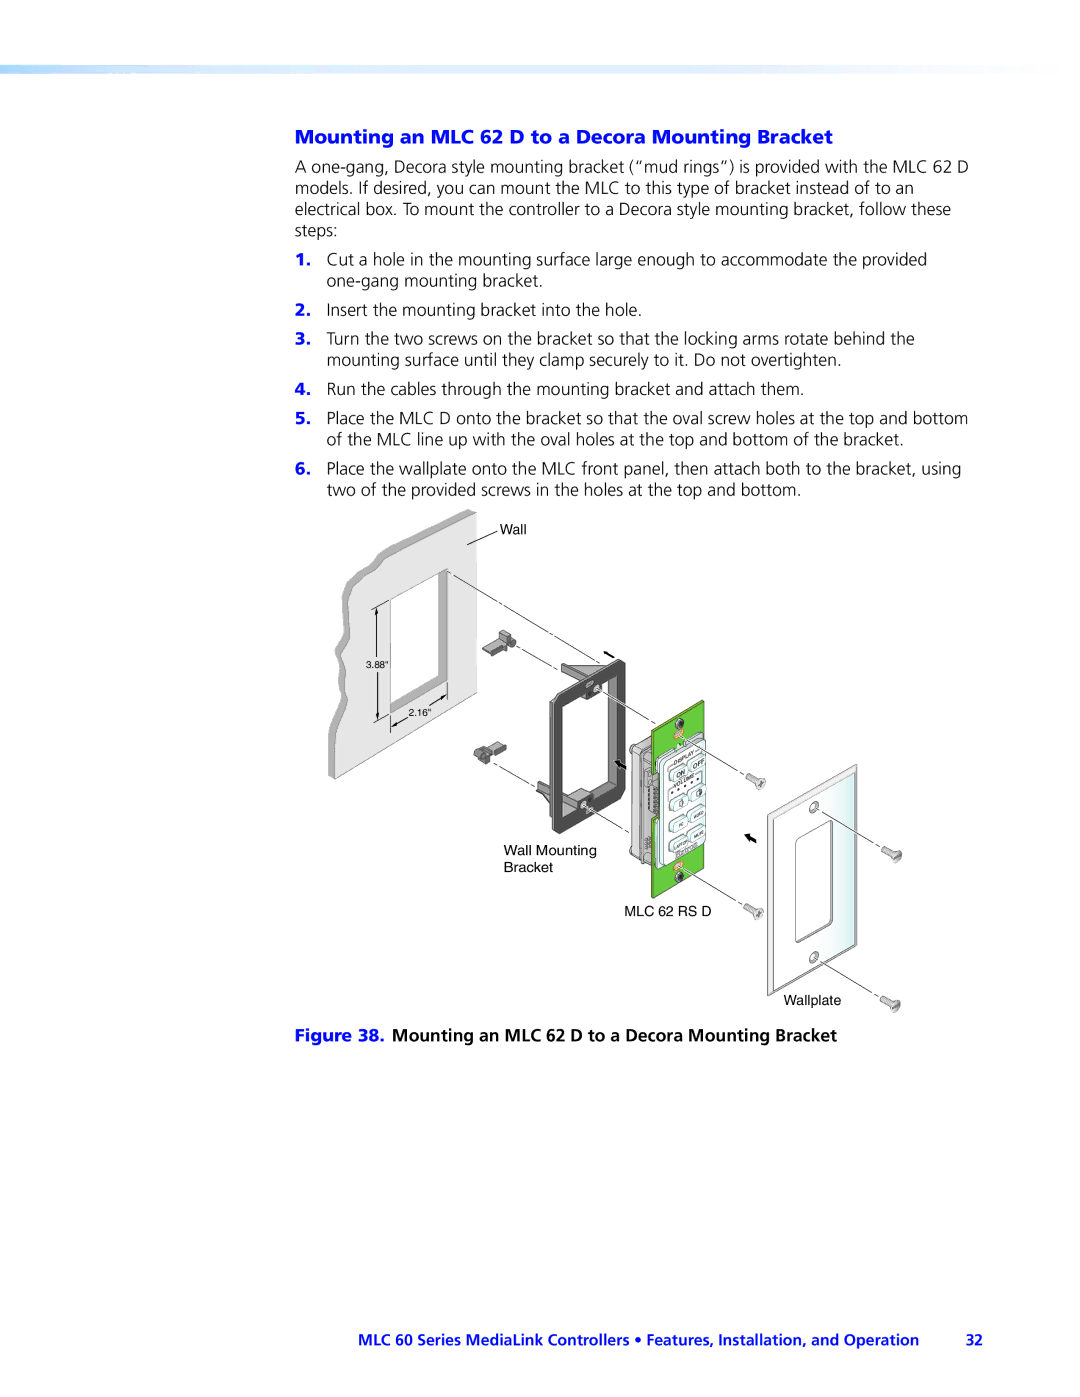
Mounting an MLC 62 D to a Decora Mounting Bracket
A
1.Cut a hole in the mounting surface large enough to accommodate the provided
2.Insert the mounting bracket into the hole.
3.Turn the two screws on the bracket so that the locking arms rotate behind the mounting surface until they clamp securely to it. Do not overtighten.
4.Run the cables through the mounting bracket and attach them.
5.Place the MLC D onto the bracket so that the oval screw holes at the top and bottom of the MLC line up with the oval holes at the top and bottom of the bracket.
6.Place the wallplate onto the MLC front panel, then attach both to the bracket, using two of the provided screws in the holes at the top and bottom.
Wall
3.88"
2.16"
Wall Mounting
Bracket
Y |
| |
DISPLA | OF | F |
|
| |
ON | E |
VOLUM |
|
VIDEO
PC
MUTE
LAPTOP![]()
![]()
![]()
MLC 62 RS D
Wallplate
Figure 38. Mounting an MLC 62 D to a Decora Mounting Bracket
MLC 60 Series MediaLink Controllers • Features, Installation, and Operation | 32 |
