Installing a Memory Module
1Turn off power to your LifeBook notebook and remove any power adapter.
2Make sure that all the connector covers are closed.
3Turn the LifeBook notebook bottom side up, with the front panel toward you.
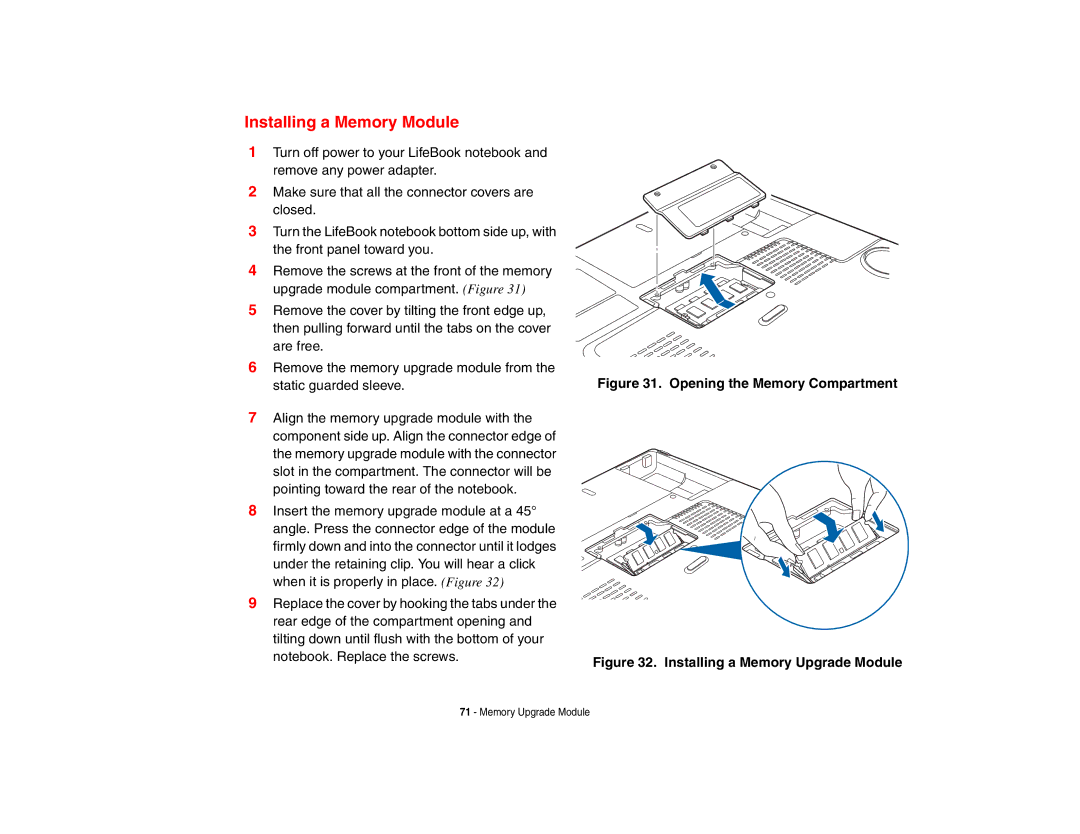
4Remove the screws at the front of the memory upgrade module compartment. (Figure 31)
5Remove the cover by tilting the front edge up, then pulling forward until the tabs on the cover are free.
6Remove the memory upgrade module from the static guarded sleeve.
7Align the memory upgrade module with the component side up. Align the connector edge of the memory upgrade module with the connector slot in the compartment. The connector will be pointing toward the rear of the notebook.
8Insert the memory upgrade module at a 45° angle. Press the connector edge of the module firmly down and into the connector until it lodges under the retaining clip. You will hear a click when it is properly in place. (Figure 32)
9Replace the cover by hooking the tabs under the rear edge of the compartment opening and tilting down until flush with the bottom of your notebook. Replace the screws.
Figure 31. Opening the Memory Compartment
Figure 32. Installing a Memory Upgrade Module
71 - Memory Upgrade Module