Preparation
NOTE:
For proper ventilation, your
Your
If you already own a VCR, take a few minutes to note how the VCR is hooked up. Then simply swap the
Here are some things you should take note of in your current hookup:
1.Which cable attaches to the VCR’s ANTENNA IN jack on the back of the VCR.
2.Which cable attaches to the TV OUT jack on the back of the VCR.
3.Which channel your TV is tuned to (to watch the VCR).
4.Which channel (3 or 4) is set on the back of your VCR.
5.If you have a cable converter box leading into your VCR, you will need to note which channel (2, 3 or 4) your VCR is tuned to.
Note: Your exact hookup will depend on whether or not you subscribe to cable TV and whether you have a cable converter box or other equipment (such as laser disc player, satellite receiver, etc.).
6.Be sure to insert the two supplied AA batteries in the remote cont![]() rol
rol![]()
![]()
![]()
![]()
![]()
![]()
![]()
![]()
![]()
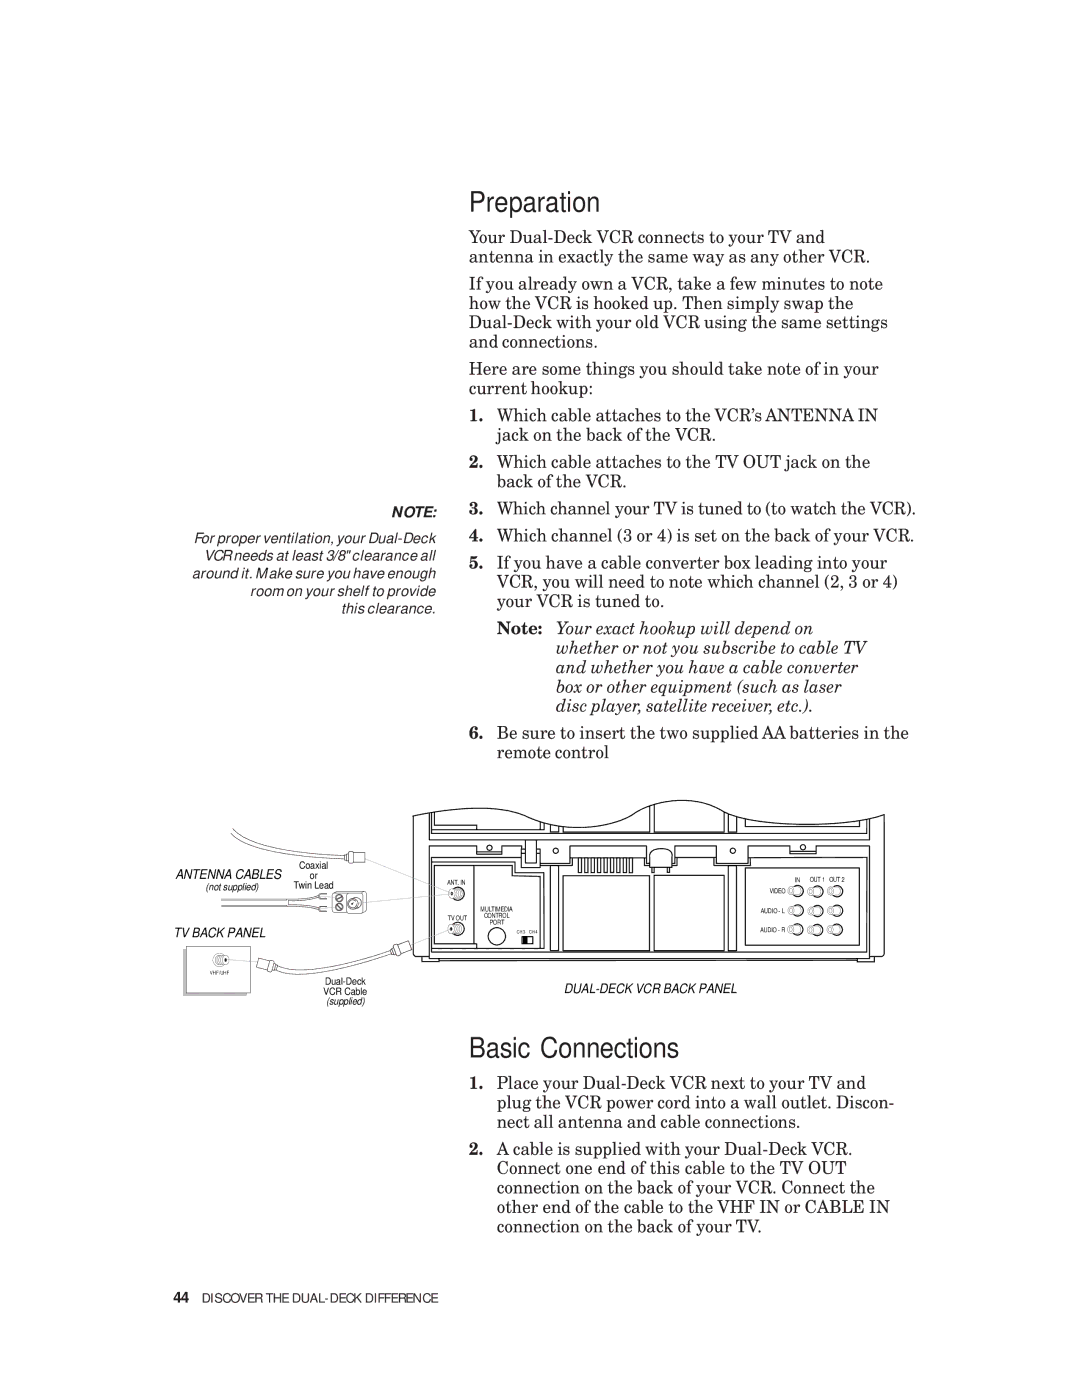
ANTENNA CABLES | Coaxial |
or | |
(not supplied) | Twin Lead |
TV BACK PANEL
VHF/UHF
VCR Cable
(supplied)
ANT. IN |
| IN OUT 1 OUT 2 |
|
| VIDEO |
| MULTIMEDIA | AUDIO - L |
TV OUT | CONTROL |
|
PORT |
| |
| AUDIO - R | |
| CH 3 CH 4 |
Basic Connections
1.Place your
2.A cable is supplied with your