TIP:
If you are not getting a good picture, try changing the switch on the back of the VCR to CH 4 and then changing your TV to channel 4. If you have a local channel 3, channel 4 might work better for you.
TIP:
If you don’t see a menu, look on the front panel display to see if the VCR indicator is lit. If it’s not lit, press the TV/VCR key on your remote control to enter VCR mode.
3.Attach the cable from your antenna or cable TV service to the ANT IN connection on the back of your VCR. (If you have a cable converter box, refer to page 43. If you antenna cable is
4.Make sure the switch on the back of the VCR is set to 3.
5.Turn on the power for your VCR and your TV.
6.Turn your TV to channel 3.
7.Press the MENU key on your VCR remote control. You should see a menu. Set the language, date and time now. See page 15. Press MENU again to exit the menu.
8.Use the number keys on your remote control to change to a channel (below 13) in your area. You should be getting a picture.
9.Refer to page 17 on programming your local TV channels into memory.
Twin Lead
or
Coaxial
ANTENNA CABLES Combiner
(not supplied)
TV BACK PANEL
VHF/UHF
VCR Cable
(supplied)
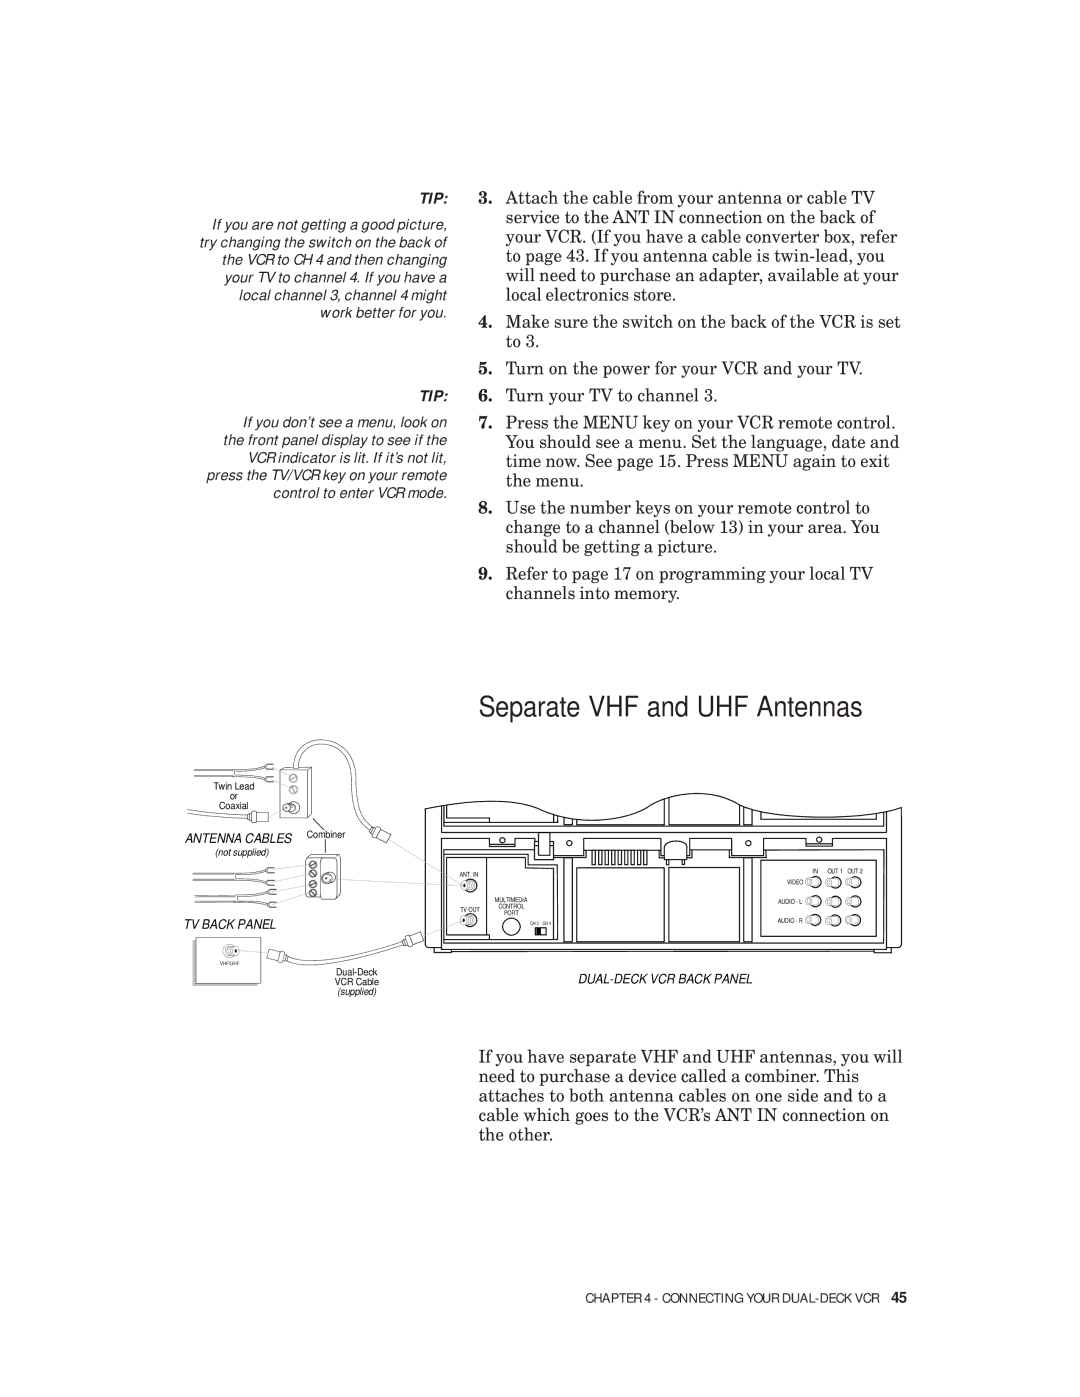
Separate VHF and UHF Antennas
ANT. IN |
| IN OUT 1 OUT 2 |
| VIDEO | |
|
| |
| MULTIMEDIA | AUDIO - L |
TV OUT | CONTROL |
|
PORT |
| |
| AUDIO - R | |
| CH 3 CH 4 |
If you have separate VHF and UHF antennas, you will need to purchase a device called a combiner. This attaches to both antenna cables on one side and to a cable which goes to the VCR’s ANT IN connection on the other.
CHAPTER 4 - CONNECTING YOUR