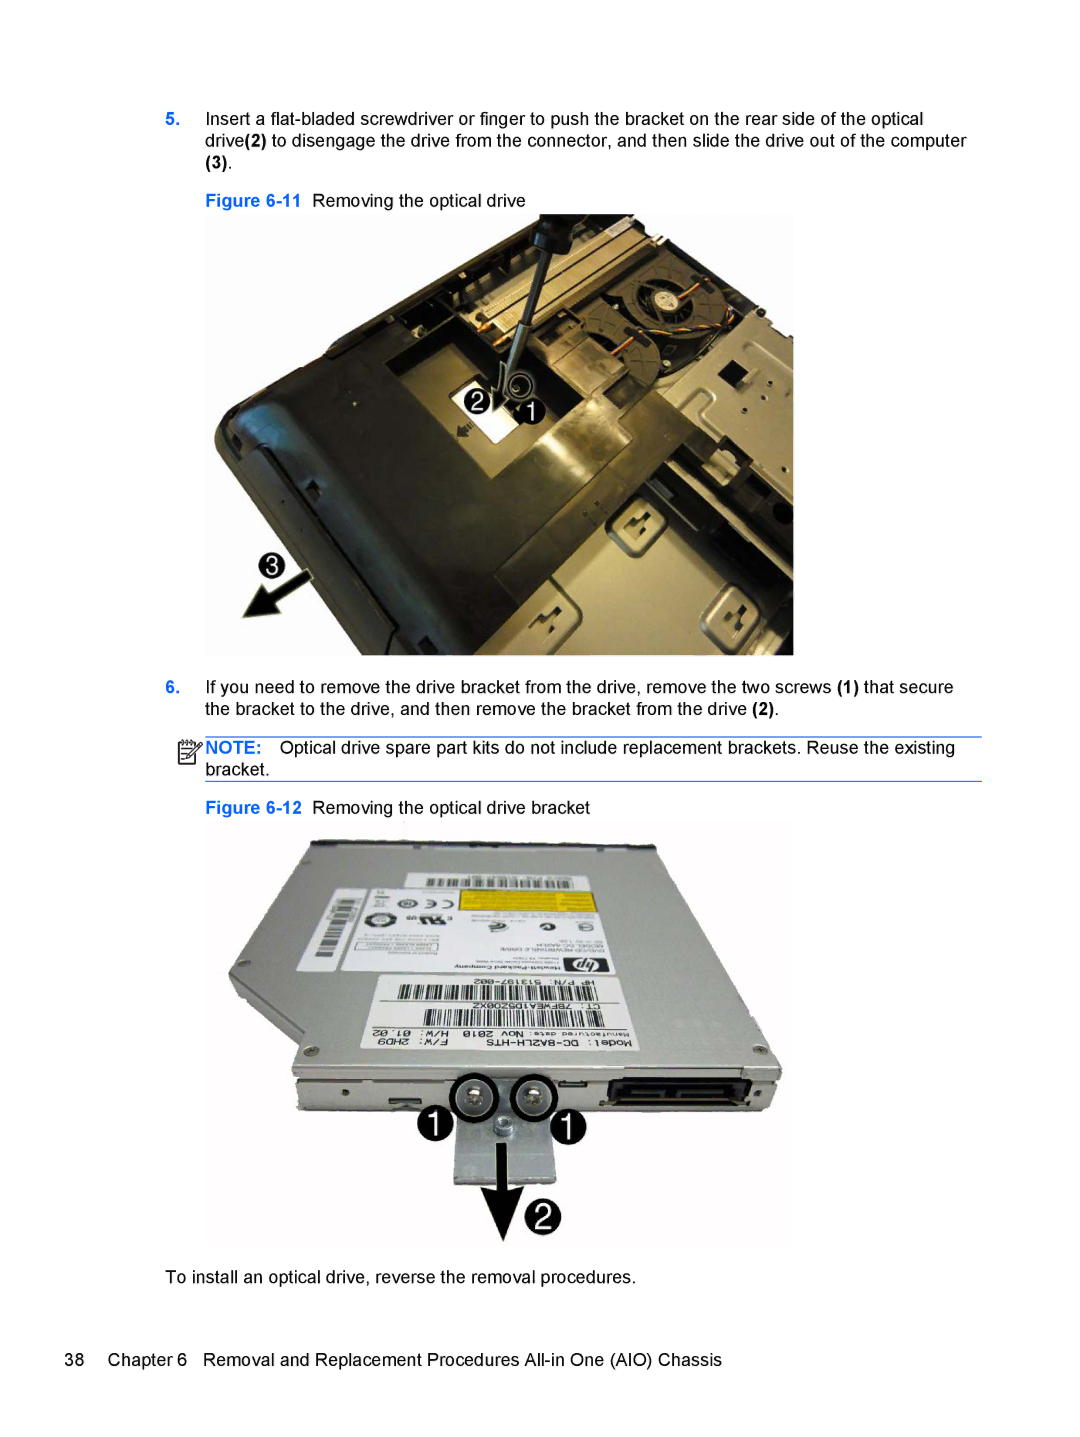
5.Insert a
(3).
Figure 6-11 Removing the optical drive
6.If you need to remove the drive bracket from the drive, remove the two screws (1) that secure the bracket to the drive, and then remove the bracket from the drive (2).
![]()
![]()
![]()
![]() NOTE: Optical drive spare part kits do not include replacement brackets. Reuse the existing bracket.
NOTE: Optical drive spare part kits do not include replacement brackets. Reuse the existing bracket.