Fan Assembly

The fan assembly consists of two fans located near the top of the computer below the heat sink. The assembly is secured with four Torx screws (two per fan) and connects to the system board using two separate connectors. You do not have to remove the heat sink to remove the fans.
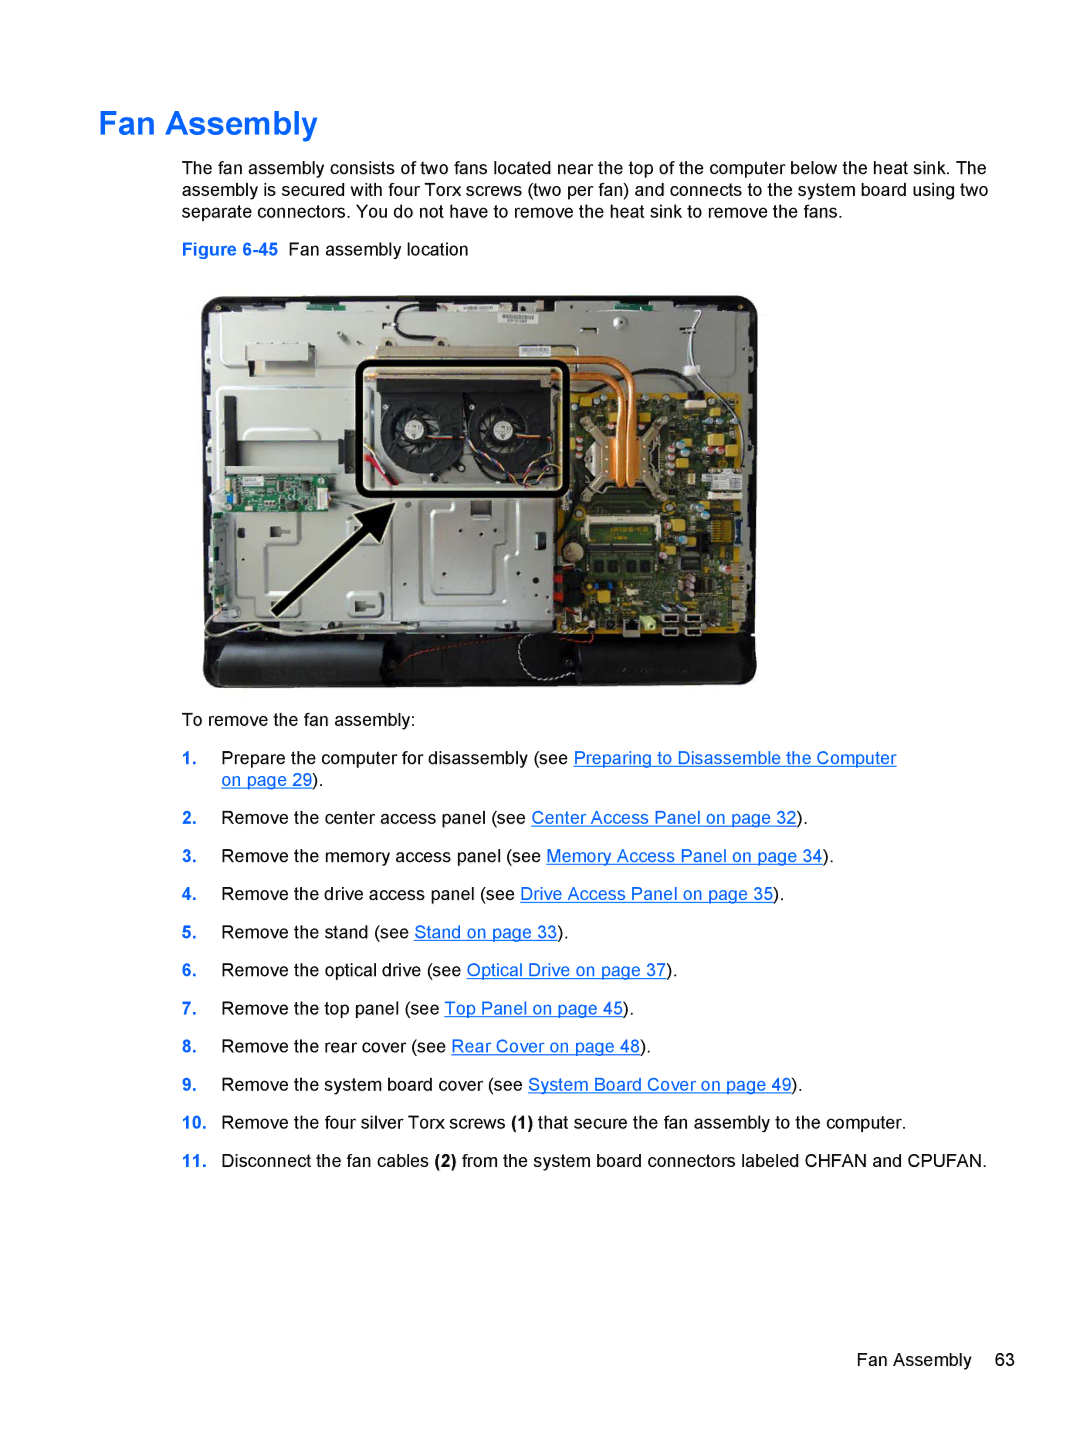
Figure 6-45Fan assembly location

To remove the fan assembly:

1.Prepare the computer for disassembly (see Preparing to Disassemble the Computer on page 29).

2.Remove the center access panel (see Center Access Panel on page 32).

3.Remove the memory access panel (see Memory Access Panel on page 34).

4.Remove the drive access panel (see Drive Access Panel on page 35).

5.Remove the stand (see Stand on page 33).

6.Remove the optical drive (see Optical Drive on page 37).

7.Remove the top panel (see Top Panel on page 45).

8.Remove the rear cover (see Rear Cover on page 48).

9.Remove the system board cover (see System Board Cover on page 49).

10.Remove the four silver Torx screws (1) that secure the fan assembly to the computer.

11.Disconnect the fan cables (2) from the system board connectors labeled CHFAN and CPUFAN.

Fan Assembly 63

Page 71
Image 71
HP 8200 SM774UP manual Fan Assembly