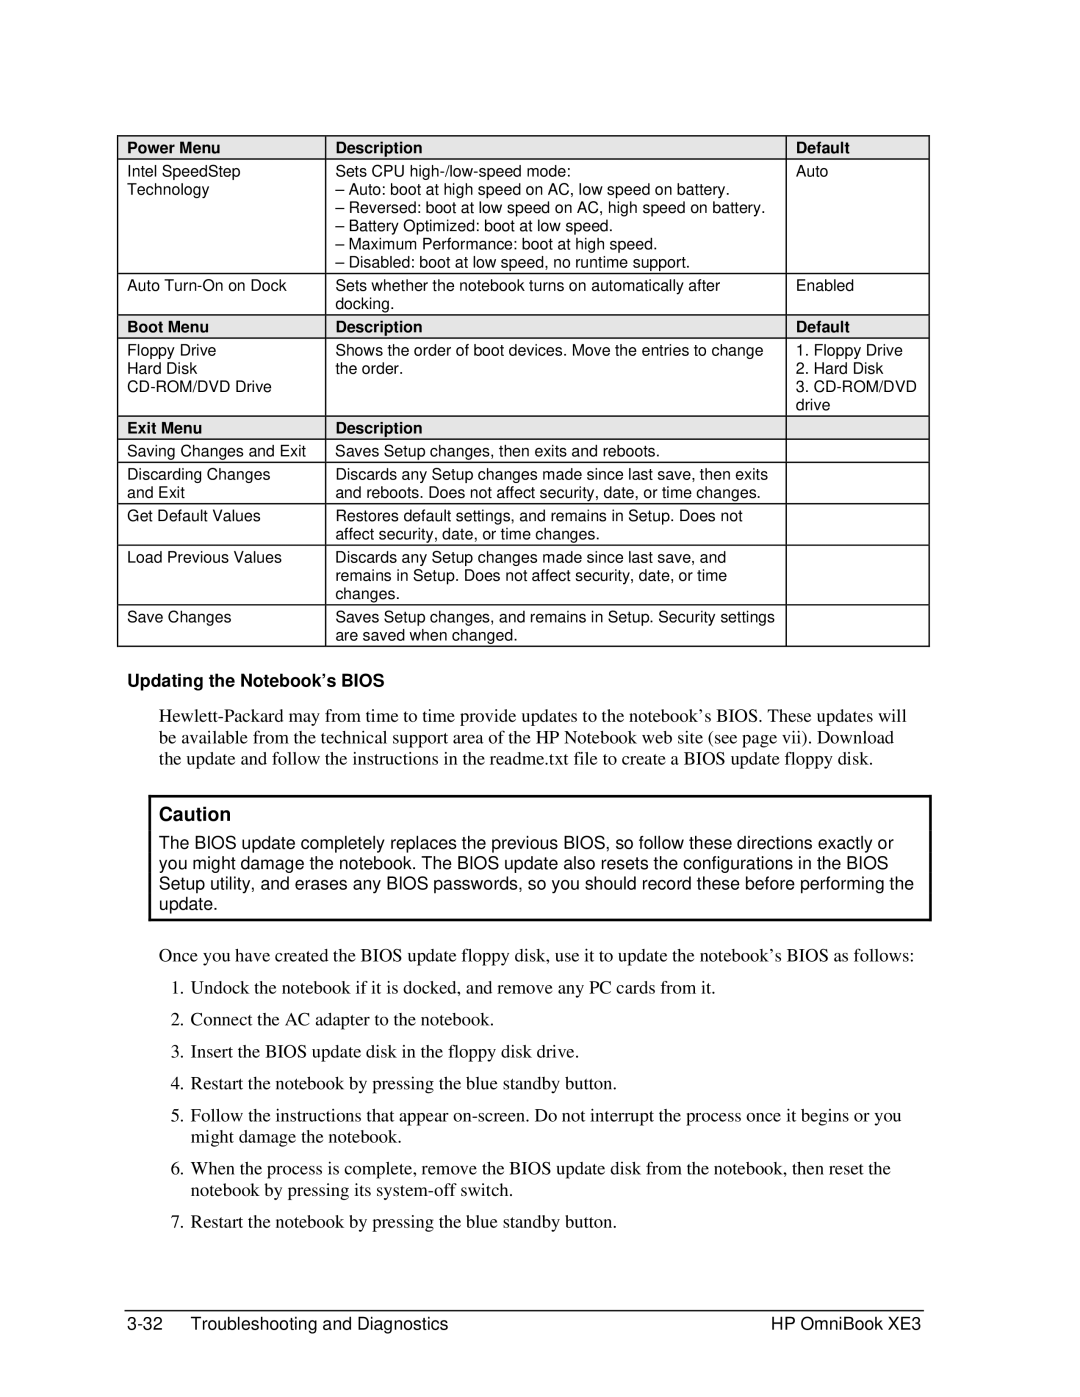
Power Menu
Intel SpeedStep
Technology
Auto
Boot Menu
Floppy Drive
Hard Disk
Exit Menu
Saving Changes and Exit
Discarding Changes and Exit
Get Default Values
Load Previous Values
Save Changes
Description
Sets CPU
–Auto: boot at high speed on AC, low speed on battery.
–Reversed: boot at low speed on AC, high speed on battery.
–Battery Optimized: boot at low speed.
–Maximum Performance: boot at high speed.
–Disabled: boot at low speed, no runtime support.
Sets whether the notebook turns on automatically after docking.
Description
Shows the order of boot devices. Move the entries to change the order.
Description
Saves Setup changes, then exits and reboots.
Discards any Setup changes made since last save, then exits and reboots. Does not affect security, date, or time changes.
Restores default settings, and remains in Setup. Does not affect security, date, or time changes.
Discards any Setup changes made since last save, and remains in Setup. Does not affect security, date, or time changes.
Saves Setup changes, and remains in Setup. Security settings are saved when changed.
Default
Auto
Enabled
Default
1.Floppy Drive
2.Hard Disk
3.
Updating the Notebook’s BIOS
Caution
The BIOS update completely replaces the previous BIOS, so follow these directions exactly or you might damage the notebook. The BIOS update also resets the configurations in the BIOS Setup utility, and erases any BIOS passwords, so you should record these before performing the update.
Once you have created the BIOS update floppy disk, use it to update the notebook’s BIOS as follows:
1.Undock the notebook if it is docked, and remove any PC cards from it.
2.Connect the AC adapter to the notebook.
3.Insert the BIOS update disk in the floppy disk drive.
4.Restart the notebook by pressing the blue standby button.
5.Follow the instructions that appear
6.When the process is complete, remove the BIOS update disk from the notebook, then reset the notebook by pressing its
7.Restart the notebook by pressing the blue standby button.
HP OmniBook XE3 |