(continued)
4Media width guide – Adjusts to accommodate different media sizes. Slide to the right to accommodate narrow media. This automatically slides the narrow media guide to the left to ensure that media is aligned for correct print margins.
5Narrow media guide – When you move the media width guide to the right, this guide automatically slides to the left to accommodate narrower media.
6Print cartridge latches – Lift these latches for easy removal and insertion of print cartridges.
7![]() Print cartridge cradle compartments – Holds the print cartridges.
Print cartridge cradle compartments – Holds the print cartridges.
8Front access cover – Provides access to the print cartridges and for clearing paper jams. This cover must be closed before printing can begin.
9![]() Output slot – Media exits the device from here.
Output slot – Media exits the device from here.
10Output door – Drops open automatically when the device is turned on. Allows media to exit the device.
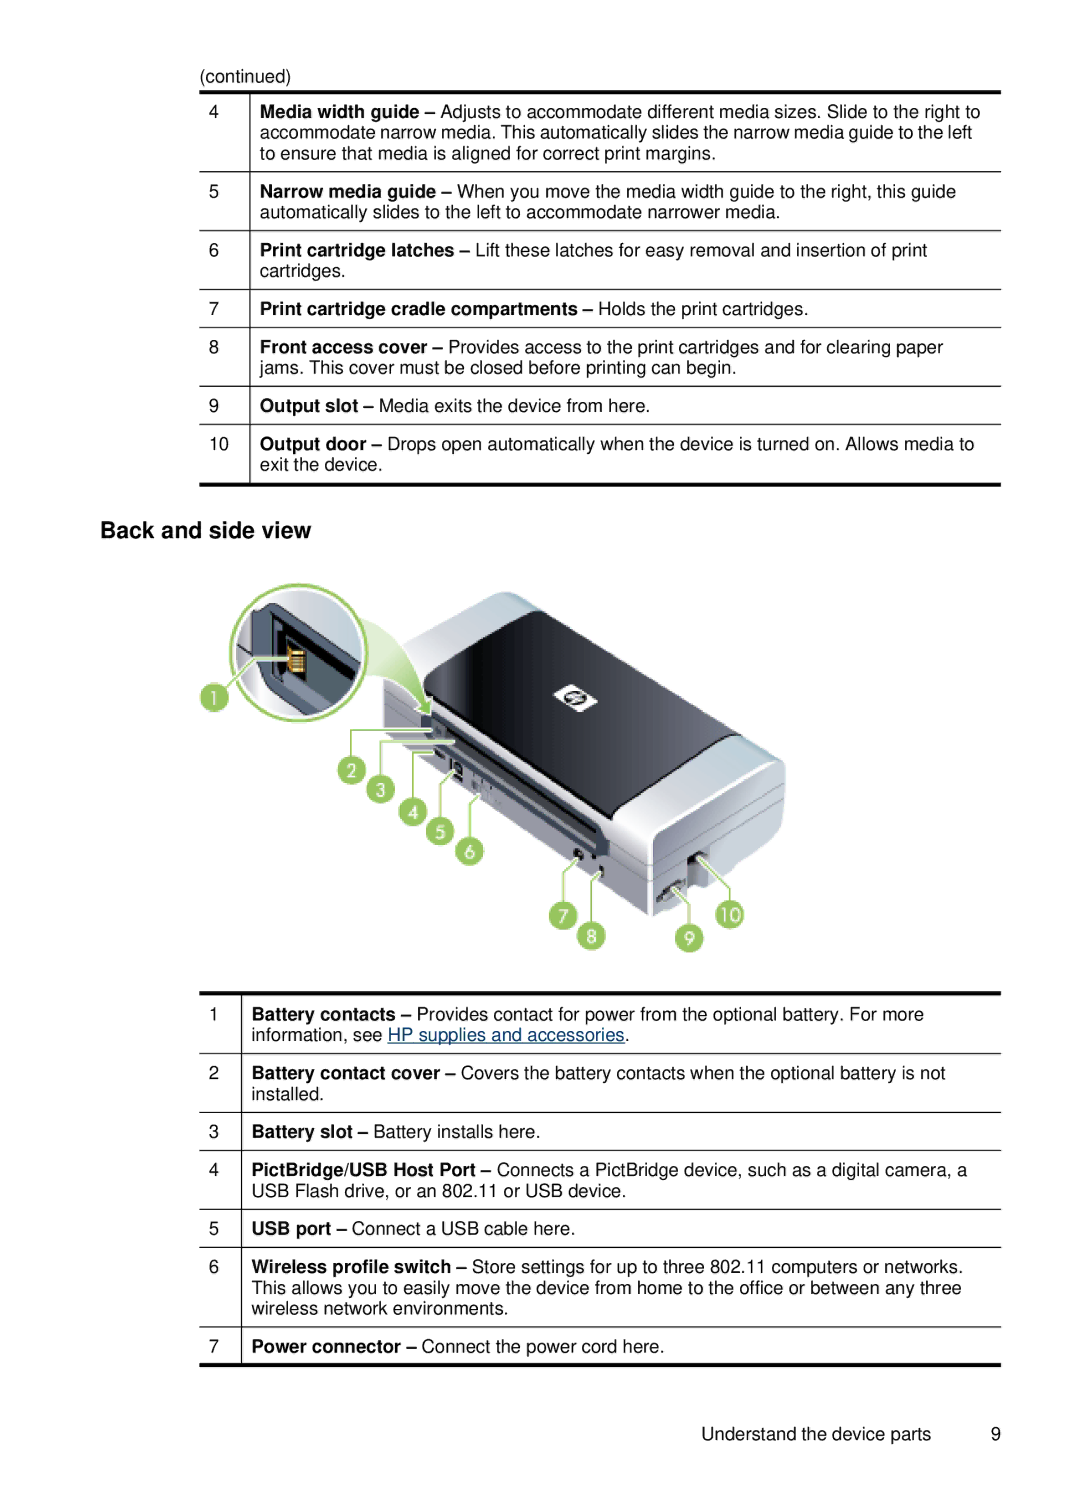
Back and side view
1Battery contacts – Provides contact for power from the optional battery. For more information, see HP supplies and accessories.
2Battery contact cover – Covers the battery contacts when the optional battery is not installed.
3![]() Battery slot – Battery installs here.
Battery slot – Battery installs here.
4PictBridge/USB Host Port – Connects a PictBridge device, such as a digital camera, a USB Flash drive, or an 802.11 or USB device.
5![]() USB port – Connect a USB cable here.
USB port – Connect a USB cable here.
6Wireless profile switch – Store settings for up to three 802.11 computers or networks. This allows you to easily move the device from home to the office or between any three wireless network environments.
7![]() Power connector – Connect the power cord here.
Power connector – Connect the power cord here.
Understand the device parts | 9 |