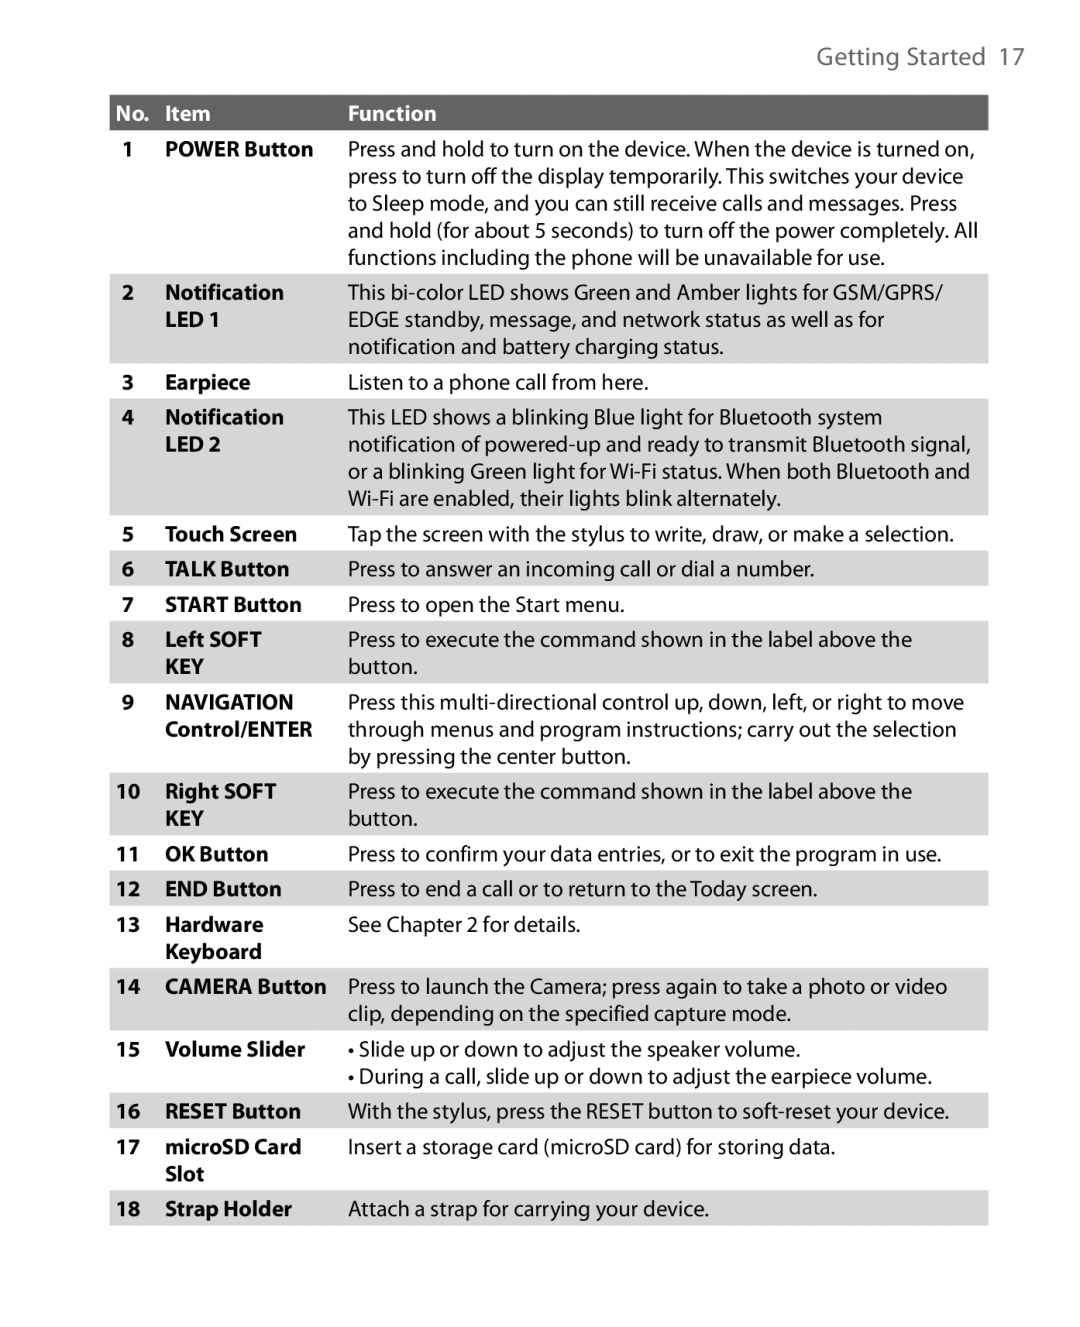
Getting Started 17
No. Item | Function |
1POWER Button Press and hold to turn on the device. When the device is turned on, press to turn off the display temporarily. This switches your device to Sleep mode, and you can still receive calls and messages. Press and hold (for about 5 seconds) to turn off the power completely. All functions including the phone will be unavailable for use.
2Notification This
LED 1 | EDGE standby, message, and network status as well as for |
| notification and battery charging status. |
3 Earpiece | Listen to a phone call from here. |
4Notification This LED shows a blinking Blue light for Bluetooth system
LED 2 | notification of |
| or a blinking Green light for |
|
5Touch Screen Tap the screen with the stylus to write, draw, or make a selection.
6TALK Button Press to answer an incoming call or dial a number.
7START Button Press to open the Start menu.
8 Left SOFT | Press to execute the command shown in the label above the |
KEY | button. |
9NAVIGATION Press this
by pressing the center button.
10 | Right SOFT | Press to execute the command shown in the label above the |
| KEY | button. |
11 | OK Button | Press to confirm your data entries, or to exit the program in use. |
12 | END Button | Press to end a call or to return to the Today screen. |
13 | Hardware | See Chapter 2 for details. |
| Keyboard |
|
14CAMERA Button Press to launch the Camera; press again to take a photo or video clip, depending on the specified capture mode.
15Volume Slider • Slide up or down to adjust the speaker volume.
•During a call, slide up or down to adjust the earpiece volume.
16RESET Button With the stylus, press the RESET button to
17microSD Card Insert a storage card (microSD card) for storing data.
Slot
18Strap Holder Attach a strap for carrying your device.