Maintenance
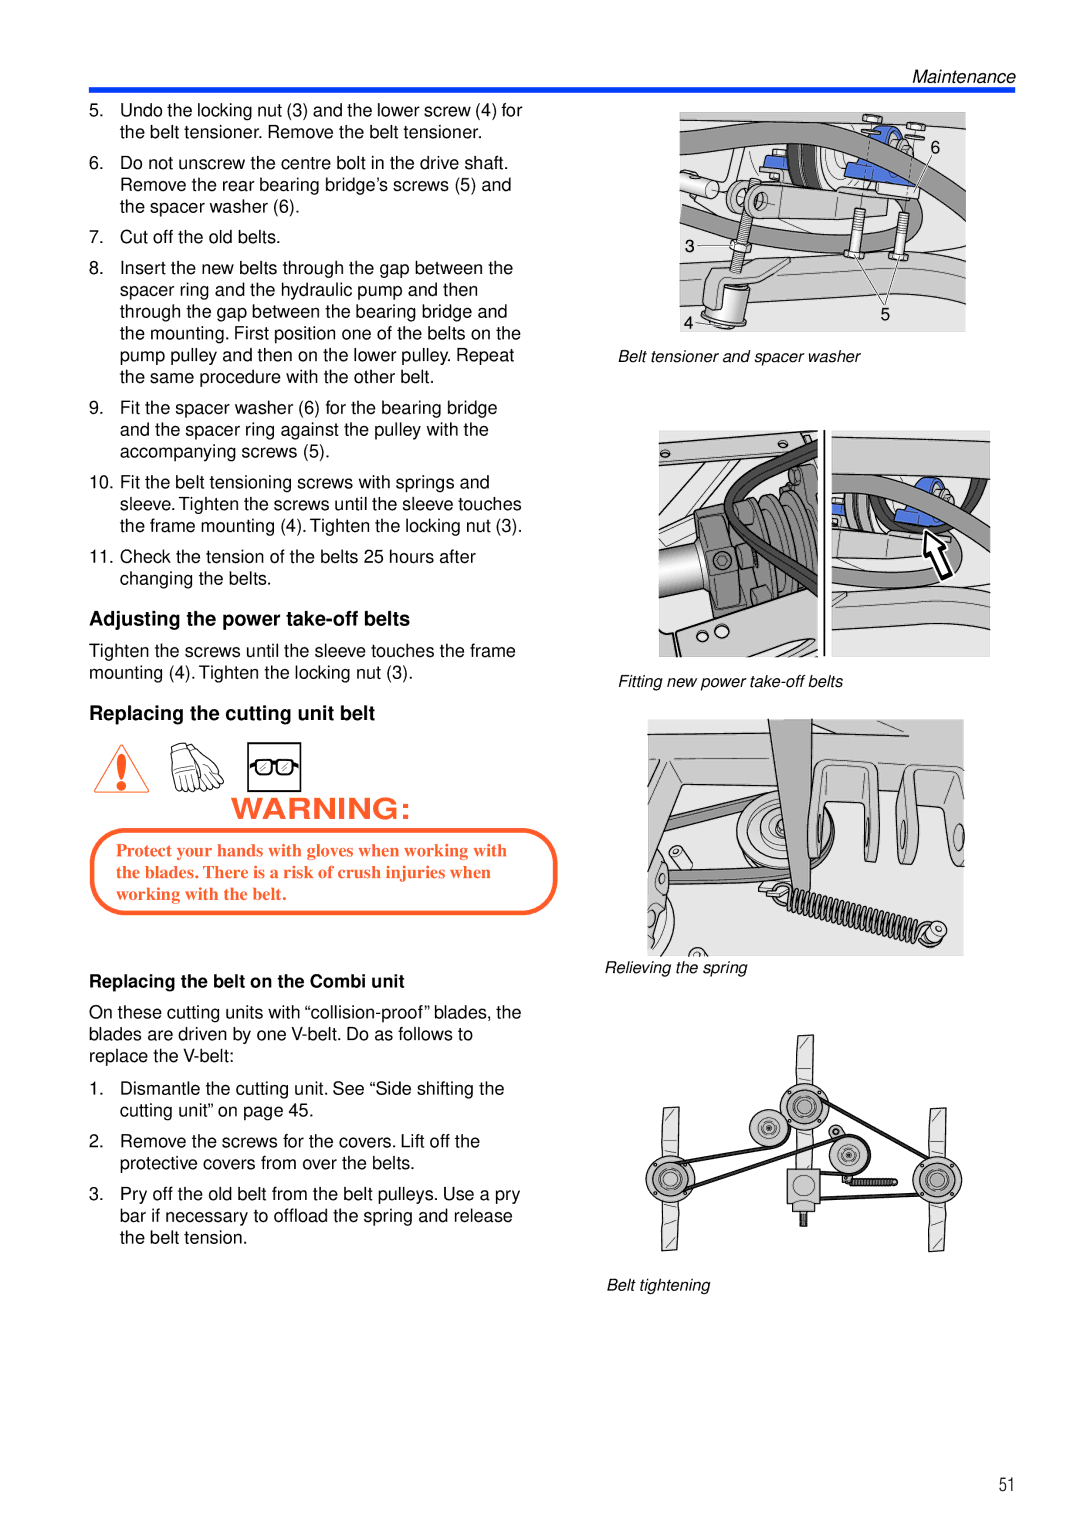
5.Undo the locking nut (3) and the lower screw (4) for the belt tensioner. Remove the belt tensioner.
6.Do not unscrew the centre bolt in the drive shaft. Remove the rear bearing bridge’s screws (5) and the spacer washer (6).
7.Cut off the old belts.
8.Insert the new belts through the gap between the spacer ring and the hydraulic pump and then through the gap between the bearing bridge and the mounting. First position one of the belts on the pump pulley and then on the lower pulley. Repeat the same procedure with the other belt.
9.Fit the spacer washer (6) for the bearing bridge and the spacer ring against the pulley with the accompanying screws (5).
10.Fit the belt tensioning screws with springs and sleeve. Tighten the screws until the sleeve touches the frame mounting (4). Tighten the locking nut (3).
11.Check the tension of the belts 25 hours after changing the belts.
Adjusting the power take-off belts
Tighten the screws until the sleeve touches the frame mounting (4). Tighten the locking nut (3).
Replacing the cutting unit belt
WARNING:
Protect your hands with gloves when working with the blades. There is a risk of crush injuries when working with the belt.
Replacing the belt on the Combi unit
On these cutting units with
1.Dismantle the cutting unit. See “Side shifting the cutting unit” on page 45.
2.Remove the screws for the covers. Lift off the protective covers from over the belts.
3.Pry off the old belt from the belt pulleys. Use a pry bar if necessary to offload the spring and release the belt tension.
6
5
Belt tensioner and spacer washer
Fitting new power
Relieving the spring
Belt tightening
51
