Getting Started - RAID Array 410 for Windows NT – Intel
2.For this example, select RAID 1 - Mirrorset, then, in the Set Name box, supply (enter) a name for the Mirrorset. For our example, the name is “ Mirr1”. Click on OK when fin- ished.
The RAID Manager responds by displaying a message window advising you to click on at least two disks (in our physical view) to use for the Mirrorset.
3.Select the disks to use for the Mirrorset. In our example, we select (click on) the three remaining disks in the bottom row of the enclosure. When finished, click on Create in the message window.
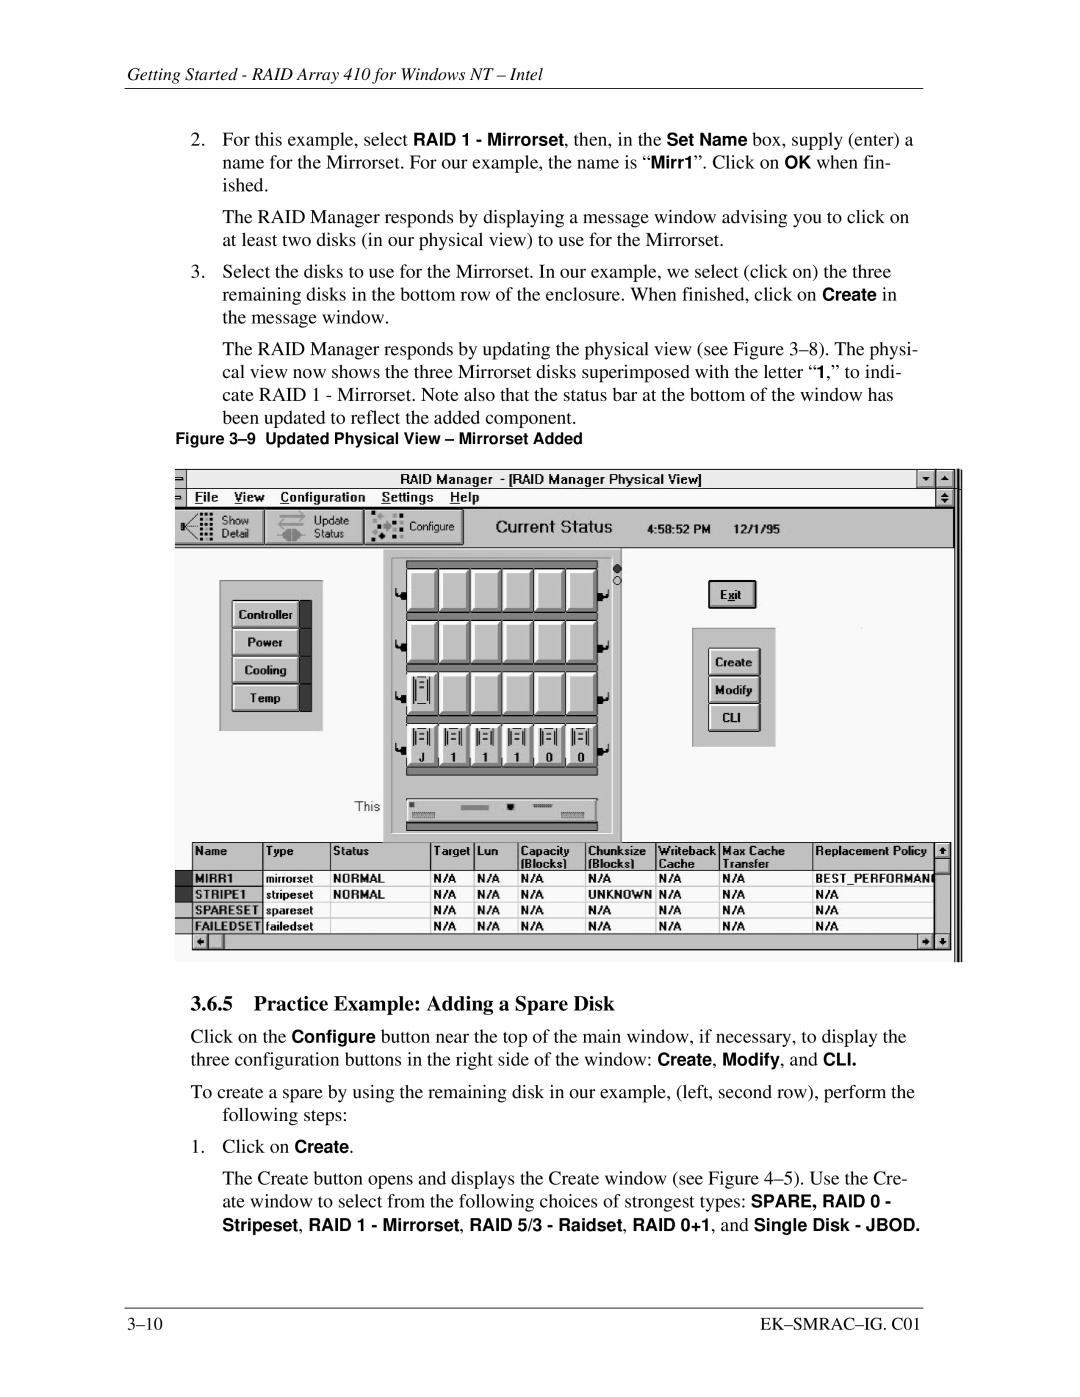
The RAID Manager responds by updating the physical view (see Figure
been updated to reflect the added component.
Figure 3–9 Updated Physical View – Mirrorset Added
3.6.5 Practice Example: Adding a Spare Disk
Click on the Configure button near the top of the main window, if necessary, to display the three configuration buttons in the right side of the window: Create, Modify, and CLI.
To create a spare by using the remaining disk in our example, (left, second row), perform the following steps:
1.Click on Create.
The Create button opens and displays the Create window (see Figure
|