Getting Started - RAID Array 410 for Windows NT – Intel
2.For this example, select Single Disk - JBOD and choose a target ID (by default you can create up to eight logical units under a single ID). Click on OK.
The RAID Manager responds by displaying a message window advising you to click on the disk we wish to use (in our physical view) for the single disk. In our example, we select (click on) the disk in the lower, left corner of the physical view.
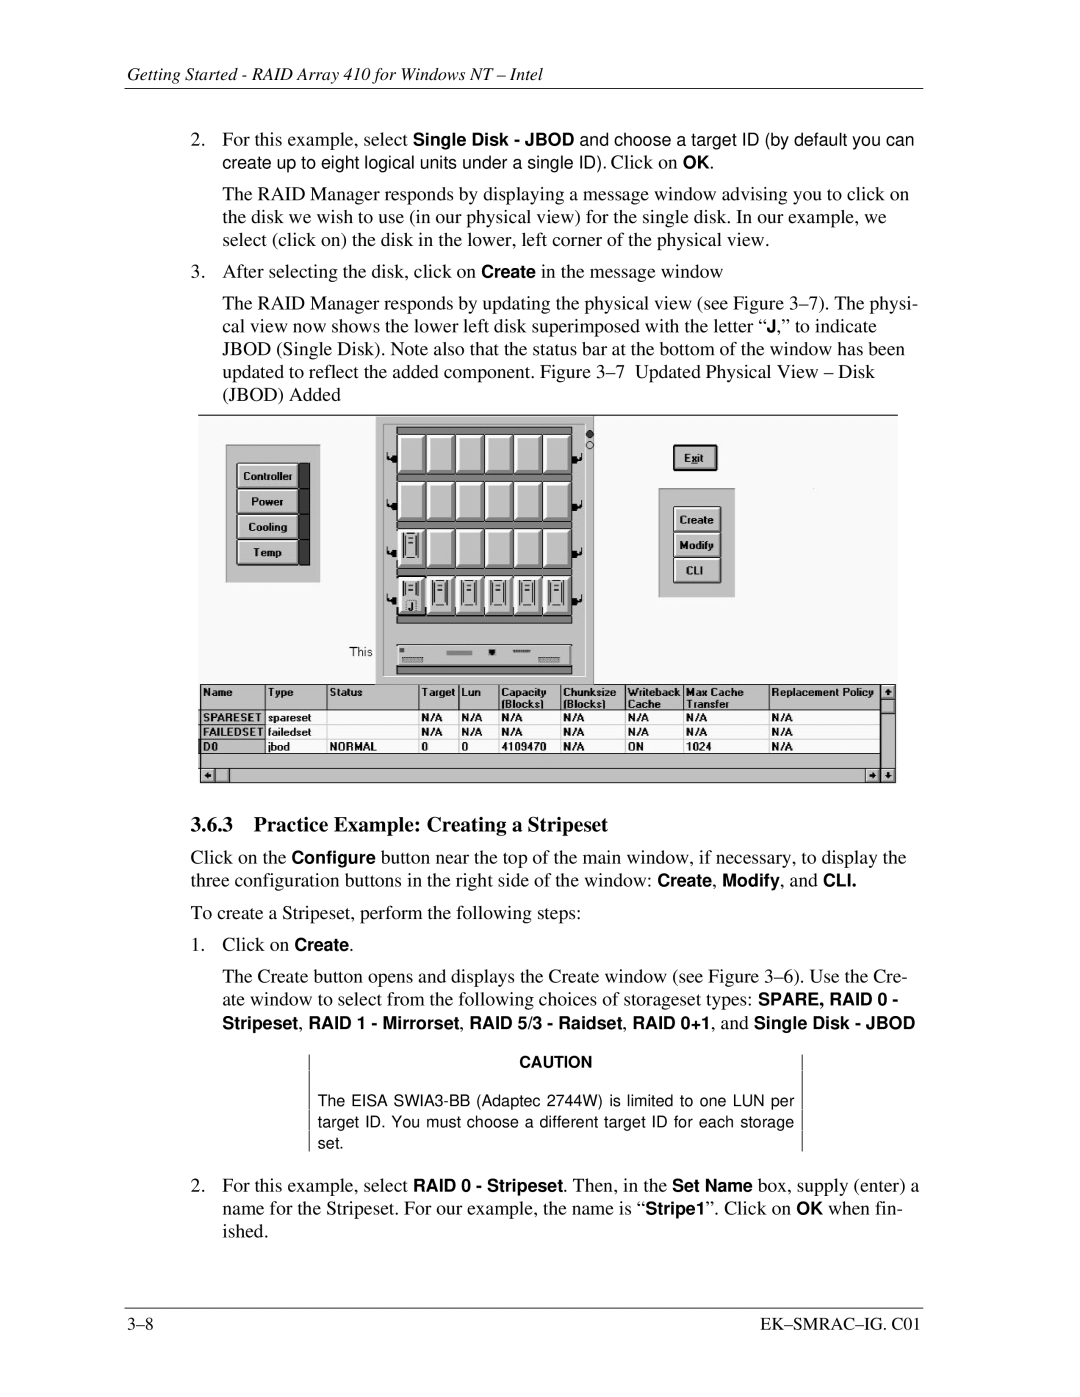
3.After selecting the disk, click on Create in the message window
The RAID Manager responds by updating the physical view (see Figure
3.6.3 Practice Example: Creating a Stripeset
Click on the Configure button near the top of the main window, if necessary, to display the three configuration buttons in the right side of the window: Create, Modify, and CLI.
To create a Stripeset, perform the following steps:
1.Click on Create.
The Create button opens and displays the Create window (see Figure
CAUTION
The EISA
2.For this example, select RAID 0 - Stripeset. Then, in the Set Name box, supply (enter) a name for the Stripeset. For our example, the name is “ Stripe1”. Click on OK when fin- ished.
|