CONNECTION
Connecting the AC adapter
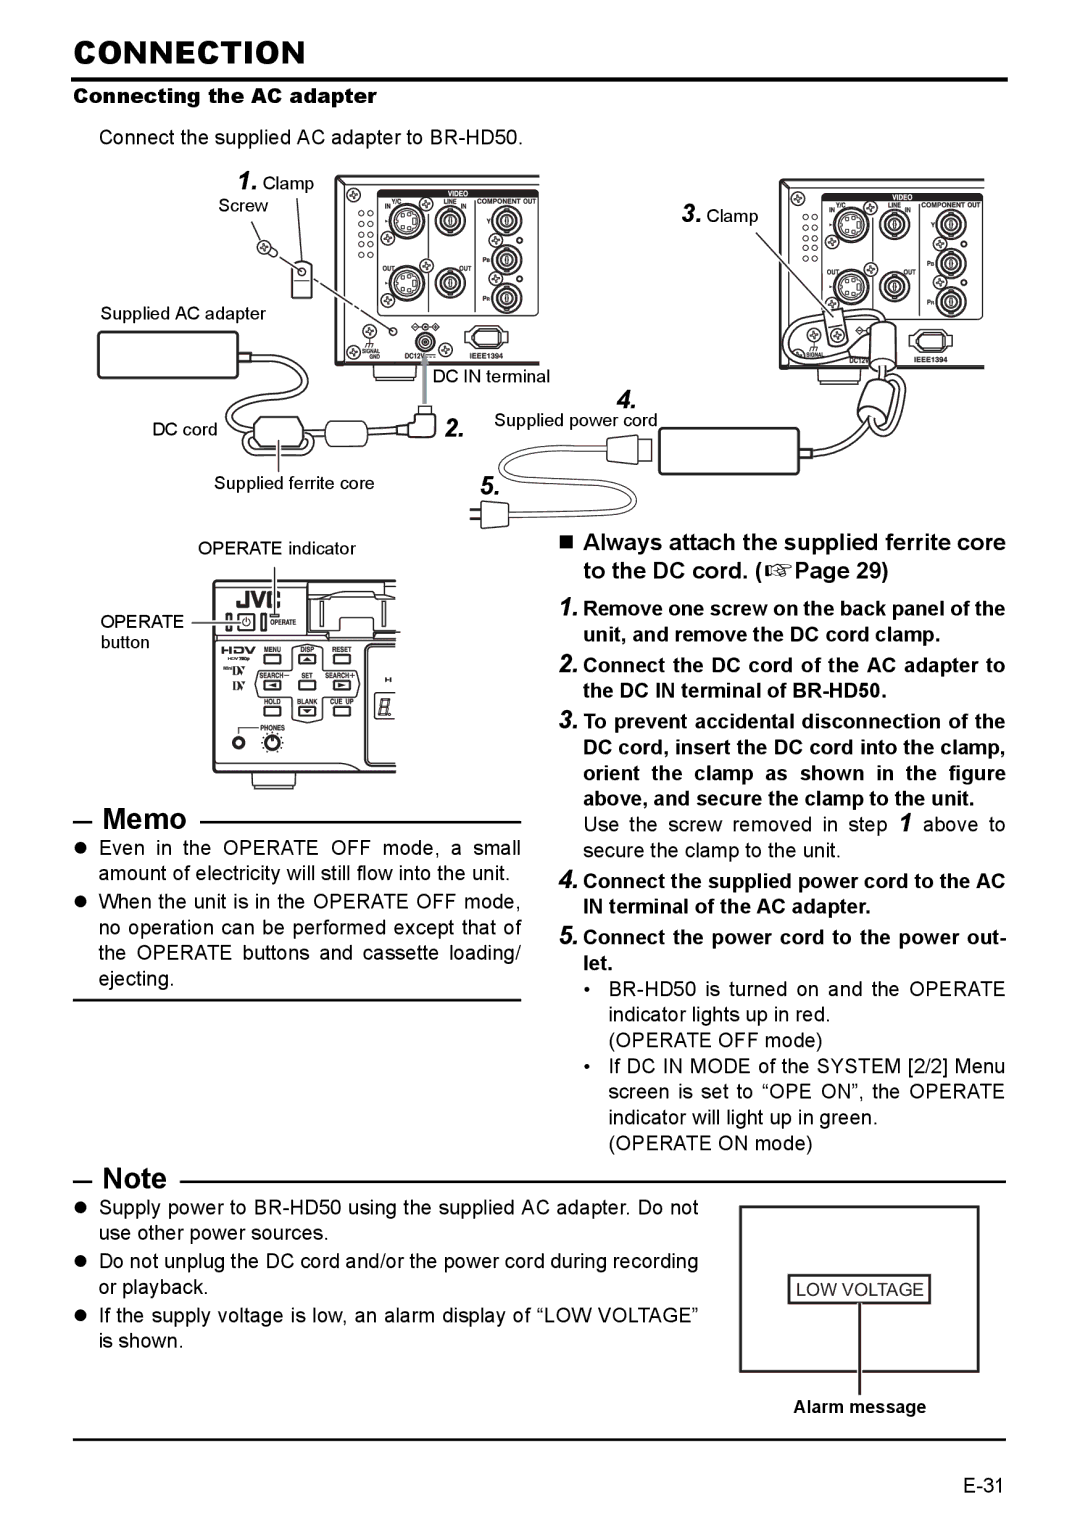
Connect the supplied AC adapter to BR-HD50.
1. Clamp |
|
Screw | 3. Clamp |
| |
Supplied AC adapter |
|
| DC IN terminal |
| 4. |
DC cord | 2. | Supplied power cord | |
|
| ||
Supplied ferrite core |
| 5. |
|
OPERATE indicator |
|
| Always attach the supplied ferrite core |
|
|
| to the DC cord. (XPage 29) |
OPERATE |
|
| 1. Remove one screw on the back panel of the |
|
| unit, and remove the DC cord clamp. | |
button |
|
| |
|
|
| 2. Connect the DC cord of the AC adapter to |
|
|
| the DC IN terminal of |
|
|
| 3. To prevent accidental disconnection of the |
|
|
| DC cord, insert the DC cord into the clamp, |
|
|
| orient the clamp as shown in the figure |
Memo |
|
| above, and secure the clamp to the unit. |
|
| Use the screw removed in step 1 above to | |
z Even in the OPERATE OFF mode, a small | secure the clamp to the unit. | ||
amount of electricity will still flow into the unit. | 4. Connect the supplied power cord to the AC | ||
z When the unit is in the OPERATE OFF mode, | IN terminal of the AC adapter. | ||
no operation can be performed except that of | 5. Connect the power cord to the power out- | ||
the OPERATE buttons and cassette loading/ | let. | ||
ejecting. | • |
| |
| indicator lights up in red. |
| (OPERATE OFF mode) |
| • If DC IN MODE of the SYSTEM [2/2] Menu |
| screen is set to “OPE ON”, the OPERATE |
| indicator will light up in green. |
| (OPERATE ON mode) |
Note
zSupply power to
zDo not unplug the DC cord and/or the power cord during recording or playback.
zIf the supply voltage is low, an alarm display of “LOW VOLTAGE” is shown.
LOW VOLTAGE
Alarm message