RECORDING
Backup recording function
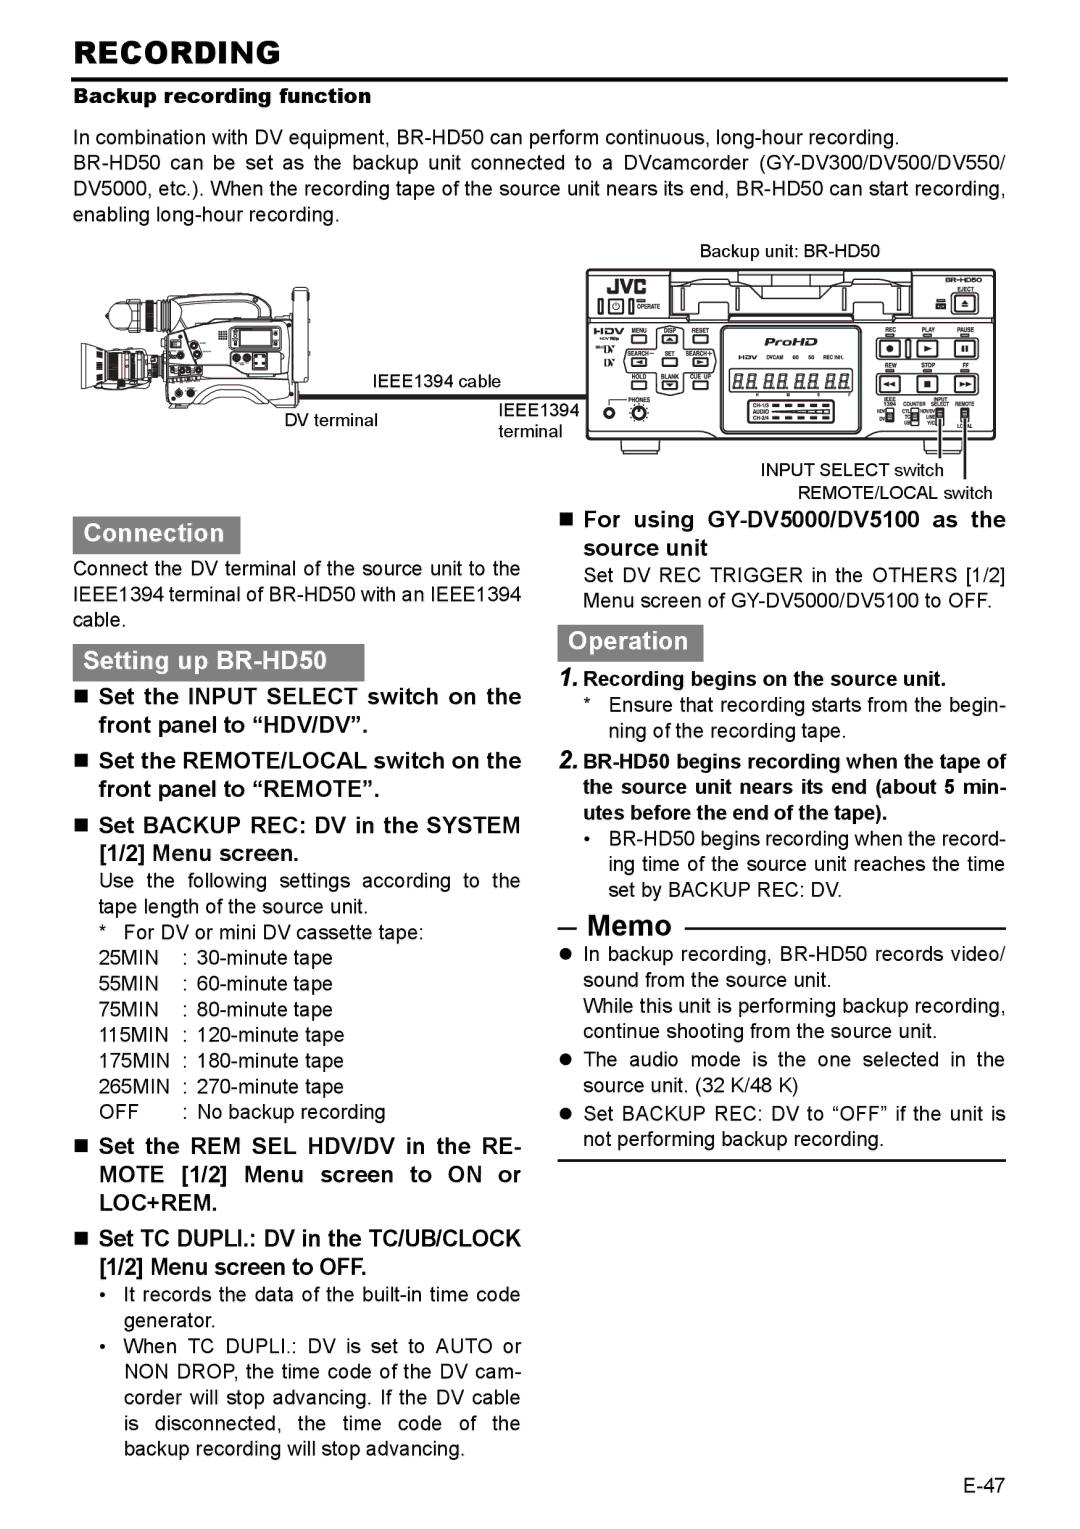
In combination with DV equipment,
Backup unit:
IEEE1394 cable
DV terminal | IEEE1394 | |
terminal | ||
|
INPUT SELECT switch
REMOTE/LOCAL switch
Connection
Connect the DV terminal of the source unit to the IEEE1394 terminal of
Setting up BR-HD50
Set the INPUT SELECT switch on the front panel to “HDV/DV”.
Set the REMOTE/LOCAL switch on the front panel to “REMOTE”.
Set BACKUP REC: DV in the SYSTEM [1/2] Menu screen.
Use the following settings according to the
tape length of the source unit.
*For DV or mini DV cassette tape: 25MIN :
55MIN :
75MIN :
115MIN :
175MIN :
265MIN :
OFF | : No backup recording |
Set the REM SEL HDV/DV in the RE- MOTE [1/2] Menu screen to ON or LOC+REM.
Set TC DUPLI.: DV in the TC/UB/CLOCK [1/2] Menu screen to OFF.
•It records the data of the
•When TC DUPLI.: DV is set to AUTO or NON DROP, the time code of the DV cam- corder will stop advancing. If the DV cable is disconnected, the time code of the backup recording will stop advancing.
For using GY-DV5000/DV5100 as the source unit
Set DV REC TRIGGER in the OTHERS [1/2] Menu screen of
Operation
1.Recording begins on the source unit.
*Ensure that recording starts from the begin- ning of the recording tape.
2.
•
Memo
zIn backup recording,
While this unit is performing backup recording, continue shooting from the source unit.
zThe audio mode is the one selected in the source unit. (32 K/48 K)
zSet BACKUP REC: DV to “OFF” if the unit is not performing backup recording.
