REMOVING AN OVEN LIGHT SOCKET ASSEMBLY
![]() WARNING
WARNING
Electrical Shock Hazard
Disconnect power before servicing.
Replace all parts and panels before operating.
Failure to do so can result in death or electrical shock.
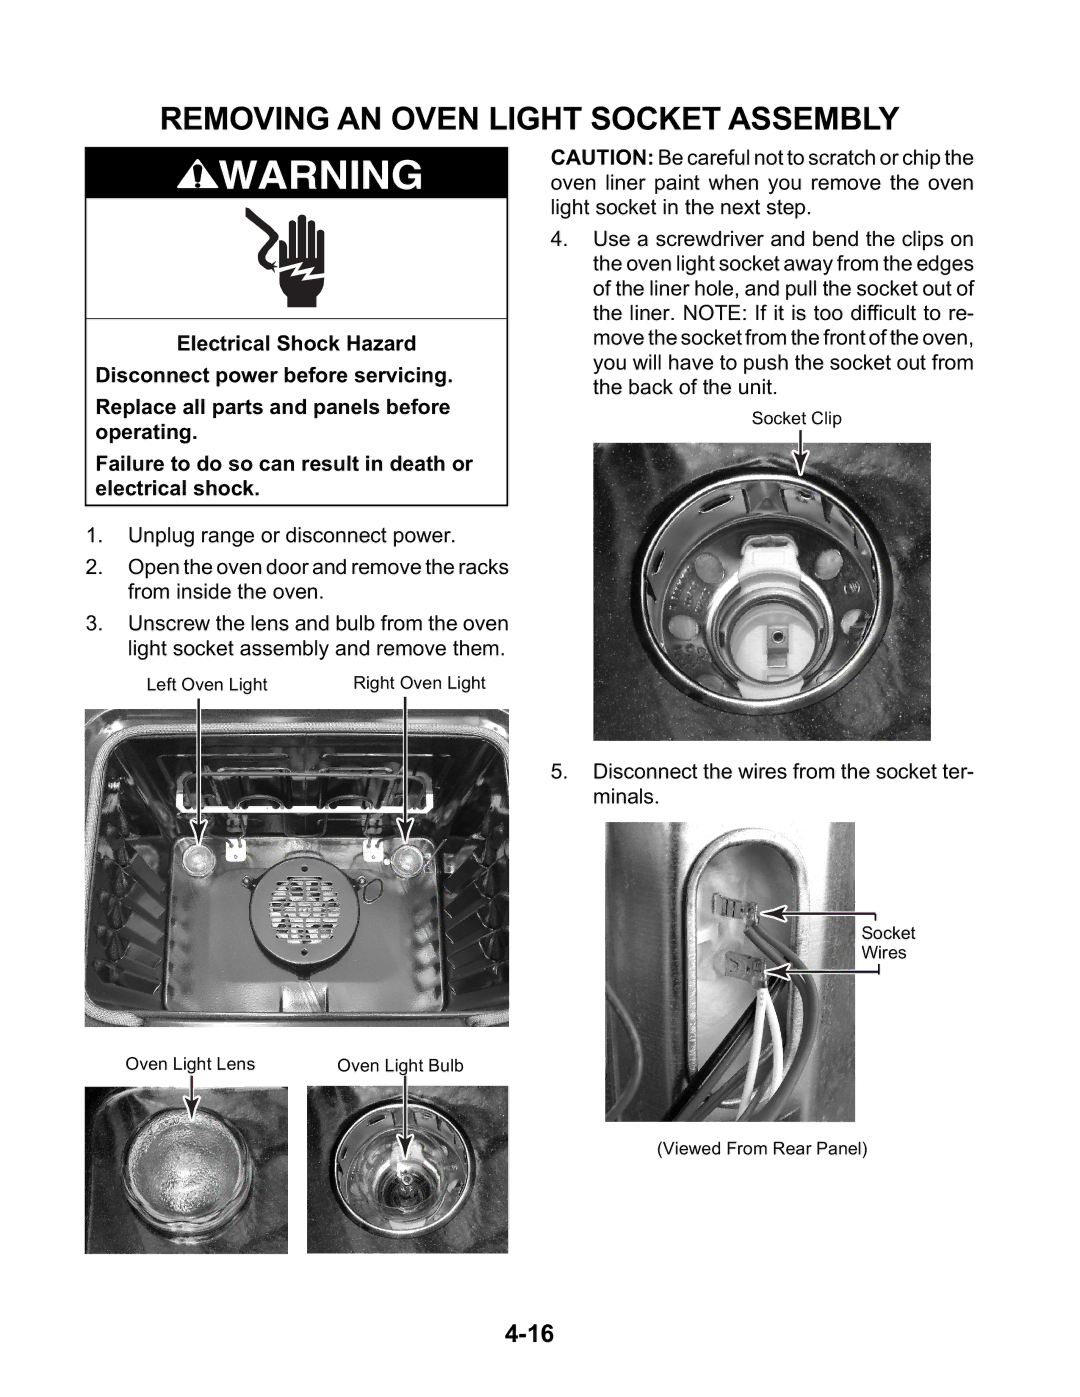
1.Unplug range or disconnect power.
2.Open the oven door and remove the racks from inside the oven.
3.Unscrew the lens and bulb from the oven light socket assembly and remove them.
Left Oven Light | Right Oven Light |
CAUTION: Be careful not to scratch or chip the oven liner paint when you remove the oven light socket in the next step.
4.Use a screwdriver and bend the clips on the oven light socket away from the edges of the liner hole, and pull the socket out of the liner. NOTE: If it is too difficult to re- move the socket from the front of the oven, you will have to push the socket out from the back of the unit.
Socket Clip
5.Disconnect the wires from the socket ter- minals.
Socket
Wires
Oven Light Lens | Oven Light Bulb |
(Viewed From Rear Panel)