REMOVING THE ELECTRONIC OVEN CONTROL
AND AN INDICATOR LIGHT
![]() WARNING
WARNING
Electrical Shock Hazard
Disconnect power before servicing.
Replace all parts and panels before operating.
Failure to do so can result in death or electrical shock.
b)Press down on the ribbon cable release arm, and disconnect the ribbon cable from the connector at P9.
Ribbon Cable Connector
Ribbon Cable Release
1.Unplug range or disconnect power.
2.Remove the control panel from its subchassis, (see page
(2) Indicator Lights | (3) Indicator Lights |
Electronic Oven Control
c)Remove the screws from the board.
d)Straighten the bracket tabs at the top and bottom of the board, and remove the board from the bracket.
Tabs ![]()
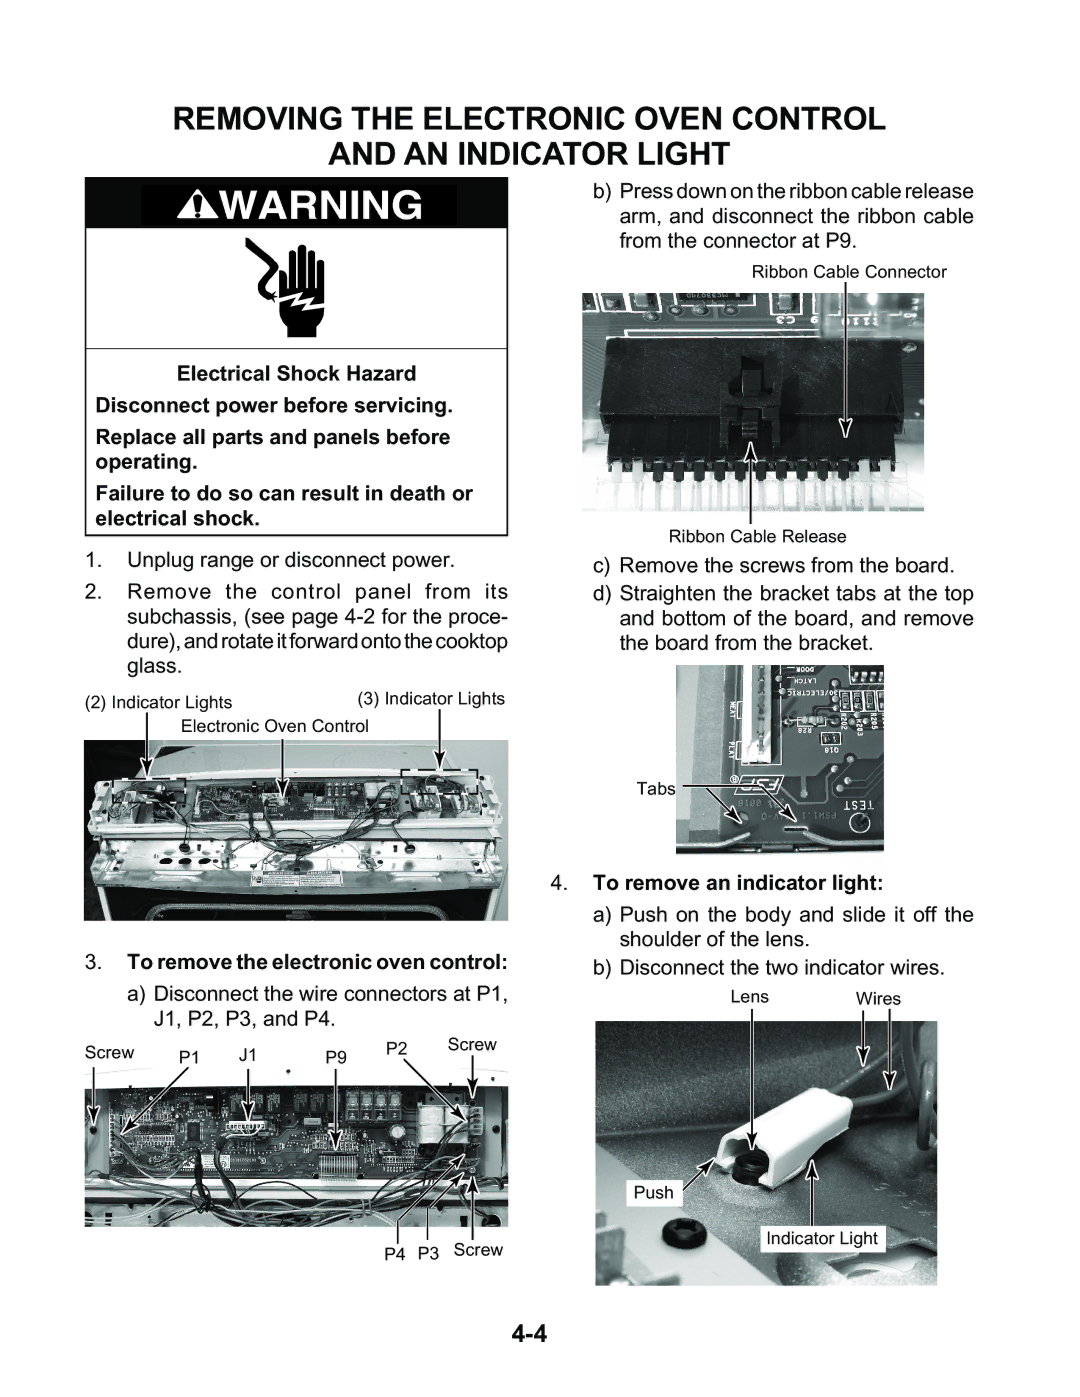
3.To remove the electronic oven control:
a)Disconnect the wire connectors at P1, J1, P2, P3, and P4.
Screw | P1 | J1 | P9 | P2 | Screw |
| |||||
|
|
P4 P3 Screw
4.To remove an indicator light:
a)Push on the body and slide it off the shoulder of the lens.
b)Disconnect the two indicator wires.
Lens Wires
Push ![]()
Indicator Light