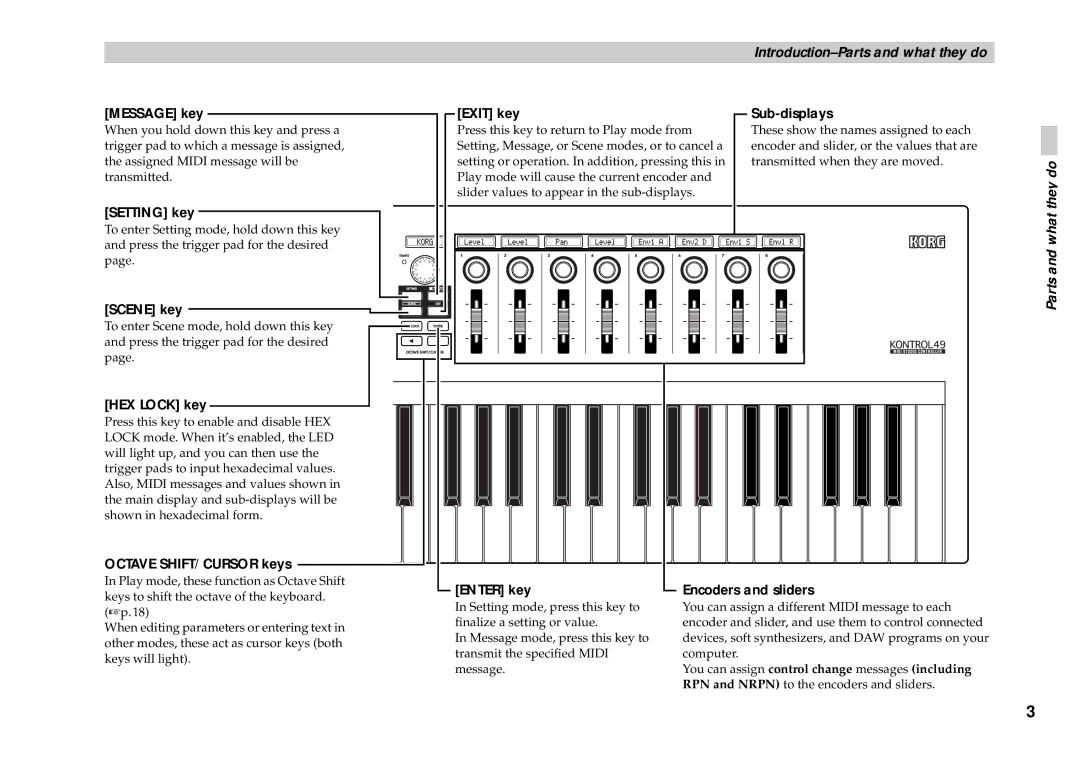
[MESSAGE] key
When you hold down this key and press a trigger pad to which a message is assigned, the assigned MIDI message will be transmitted.
[SETTING] key ![]() To enter Setting mode, hold down this
To enter Setting mode, hold down this ![]() key
key![]()
![]()
![]()
![]()
![]()
![]()
![]()
![]()
![]() and press the trigger pad for the desired
and press the trigger pad for the desired ![]() page.
page.![]()
![]()
![]()
![]()
![]()
![]()
![]()
![]()
![]()
![]()
![]()
![]()
![]()
![]()
![]()
![]()
![]()
![]()
![]()
![]()
![]()
[SCENE] key
 [EXIT] key
Press this key to return to Play mode from Setting, Message, or Scene modes, or to cancel a setting or operation. In addition, pressing this in Play mode will cause the current encoder and slider values to appear in the

Sub-displays
These show the names assigned to each encoder and slider, or the values that are transmitted when they are moved.
To enter Scene mode, hold down this key and press the trigger pad for![]() the desired page.
the desired page.
[HEX LOCK] key
Press this key to enable and disable HEX LOCK mode. When it’s enabled, the LED will light up, and you can then use the trigger pads to input hexadecimal values. Also, MIDI messages and values shown in the main display and
OCTAVE SHIFT/CURSOR keys 
In Play mode, these function as Octave Shift keys to shift the octave of the keyboard. (☞p.18)
When editing parameters or entering text in other modes, these act as cursor keys (both keys will light).
 [ENTER] key
In Setting mode, press this key to finalize a setting or value.
In Message mode, press this key to transmit the specified MIDI message.
 Encoders and sliders
You can assign a different MIDI message to each encoder and slider, and use them to control connected devices, soft synthesizers, and DAW programs on your computer.
You can assign control change messages (including RPN and NRPN) to the encoders and sliders.
3
