Making connections and turning the power on
MIDI & AC adapter connection
![]() Before you make connections, you must turn off the power of all devices. Failure to do so may damage your speaker system or cause malfunctions.
Before you make connections, you must turn off the power of all devices. Failure to do so may damage your speaker system or cause malfunctions.
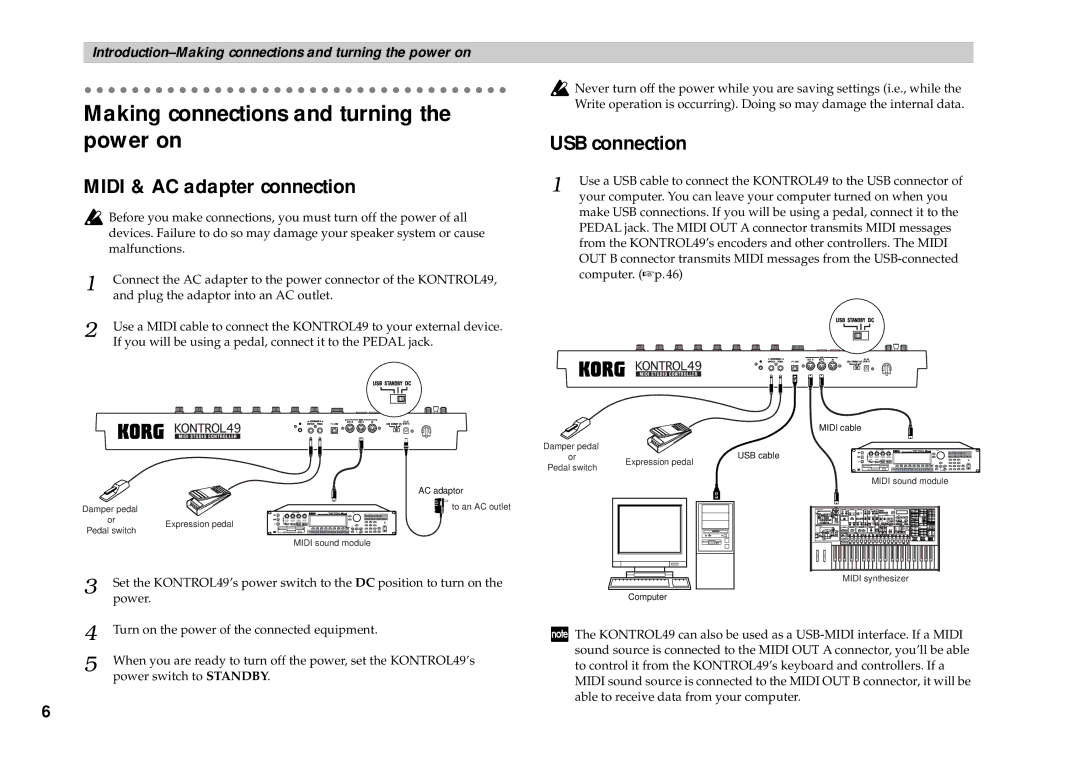
1 | Connect the AC adapter to the power connector of the KONTROL49, |
| and plug the adaptor into an AC outlet. |
2 | Use a MIDI cable to connect the KONTROL49 to your external device. |
| If you will be using a pedal, connect it to the PEDAL jack. |
![]() Never turn off the power while you are saving settings (i.e., while the Write operation is occurring). Doing so may damage the internal data.
Never turn off the power while you are saving settings (i.e., while the Write operation is occurring). Doing so may damage the internal data.
USB connection
1 | Use a USB cable to connect the KONTROL49 to the USB connector of |
| your computer. You can leave your computer turned on when you |
make USB connections. If you will be using a pedal, connect it to the PEDAL jack. The MIDI OUT A connector transmits MIDI messages from the KONTROL49’s encoders and other controllers. The MIDI OUT B connector transmits MIDI messages from the
| AC adaptor | |
Damper pedal | to an AC outlet | |
or | Expression pedal | |
Pedal switch | ||
| ||
| MIDI sound module |
3 | Set the KONTROL49’s power switch to the DC position to turn on the |
| power. |
4 | Turn on the power of the connected equipment. |
5 | When you are ready to turn off the power, set the KONTROL49’s |
| power switch to STANDBY. |
MIDI cable
Damper pedal | USB cable |
or | |
Pedal switch | Expression pedal |
|
MIDI sound module
MIDI synthesizer
Computer
![]() The KONTROL49 can also be used as a
The KONTROL49 can also be used as a
6