4.1. Toner Kit Replacement
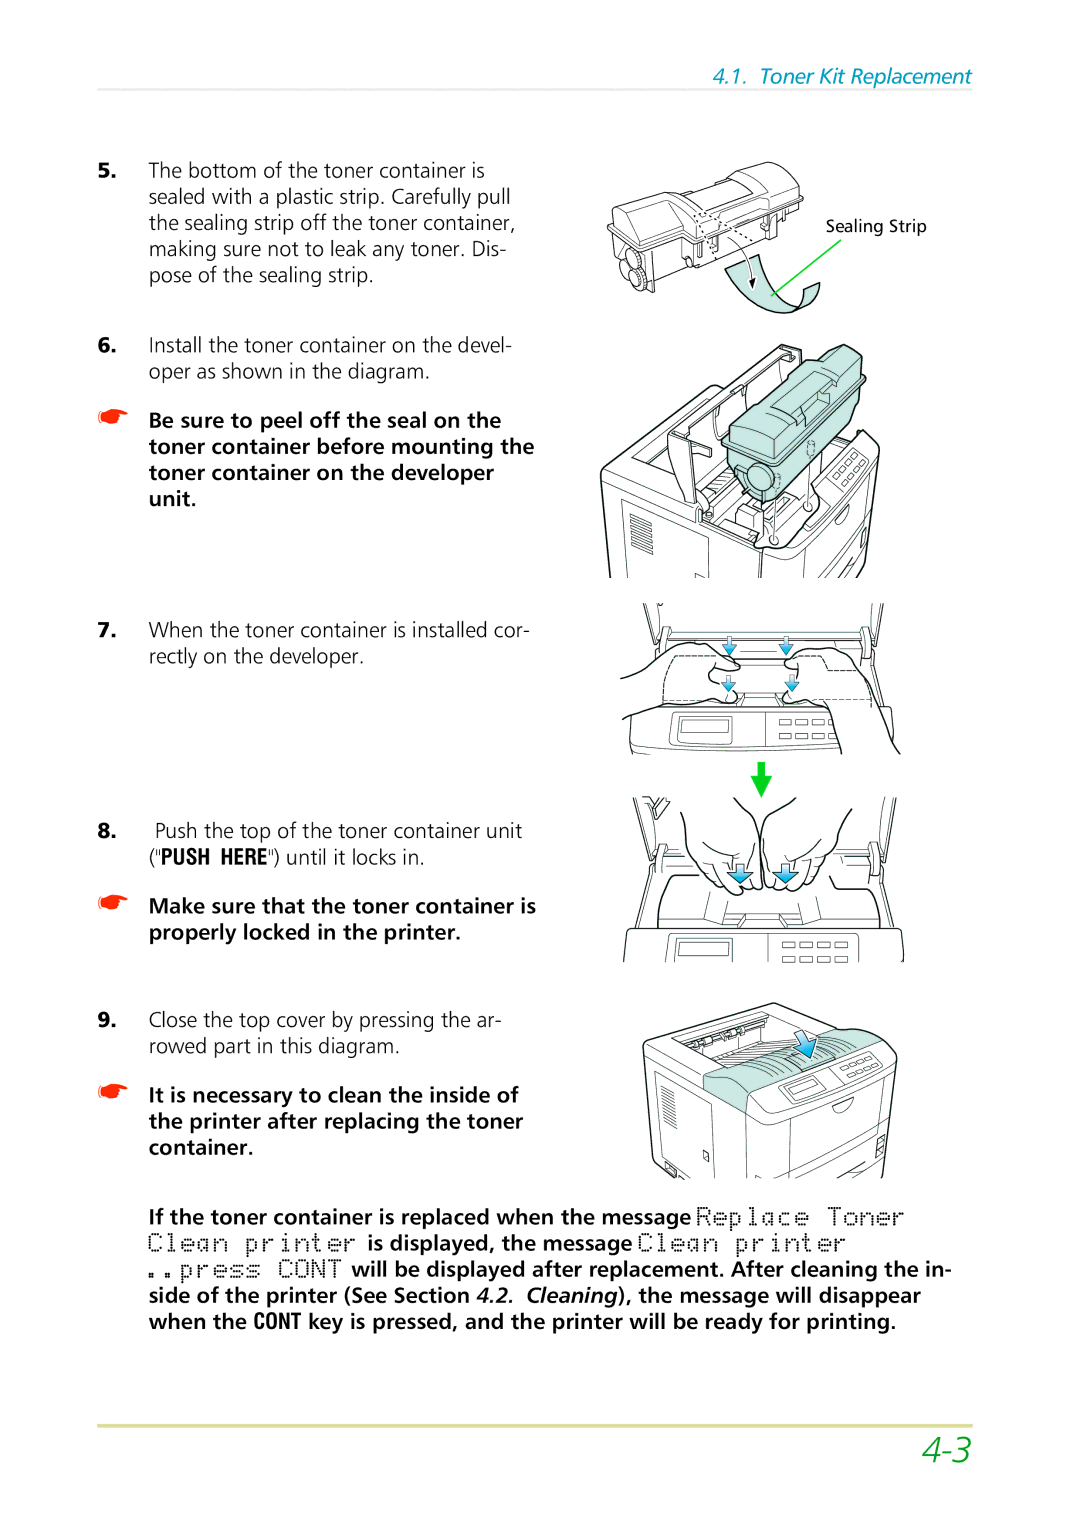
5.The bottom of the toner container is sealed with a plastic strip. Carefully pull the sealing strip off the toner container, making sure not to leak any toner. Dis- pose of the sealing strip.
6.Install the toner container on the devel- oper as shown in the diagram.
☛Be sure to peel off the seal on the toner container before mounting the toner container on the developer unit.
7.When the toner container is installed cor- rectly on the developer.
8.Push the top of the toner container unit ("PUSHHERE") until it locks in.
☛Make sure that the toner container is properly locked in the printer.
Sealing Strip
9. Close the top cover by pressing the ar- | ||||
.. |
|
| printerCONTis displayed, the message Cleanprinter | |
row d part this diagram. | ||||
☛ It is neces a y to clean the inside of | ||||
the | i | ter after | placing the toner | |
cont | i | er. |
| |
IfCleanthe toner co | ainer is replaced when the message ReplaceToner | |||
| press | will be displayed after replacement. After cleaning the in- | ||
side of the printer (See Section 4.2. Cleaning), the message will disappear when the CONTkey is pressed, and the printer will be ready for printing.
