TIMER REMOVAL
1 . Disconnect power to the unit.
2 . Carefully lift the timer knob and dial off the timer shaft by pulling the knob away from the face of the control console
(Figure
Figure
3 . Disengage the console assembly from the top cover and roll forward (See Console Removal) .
4 . Remove timer mounting screw on back of timer in the console.
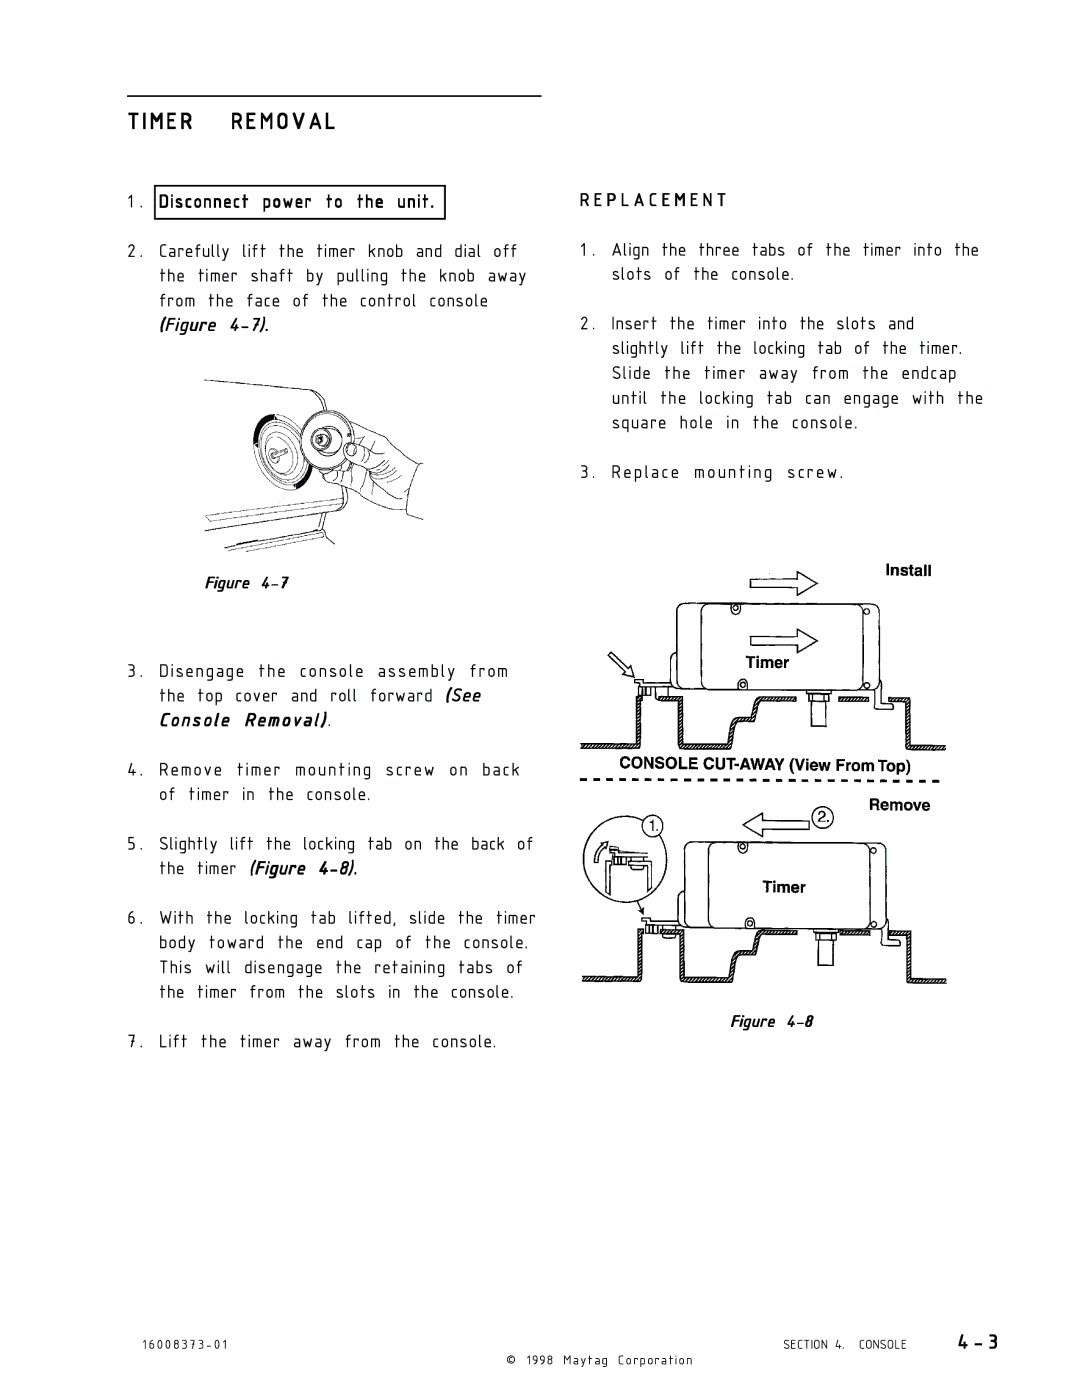
5 . Slightly lift the locking tab on the back of the timer (Figure
6 . With the locking tab lifted, slide the timer body toward the end cap of the console. This will disengage the retaining tabs of the timer from the slots in the console.
7 . Lift the timer away from the console.
R E P L A C E M E N T
1 . Align the three tabs of the timer into the slots of the console.
2 . Insert the timer into the slots and slightly lift the locking tab of the timer. Slide the timer away from the endcap until the locking tab can engage with the square hole in the console.
3 . Replace mounting screw.
Figure
1 6 0 0 8 3 7 3 - 0 1 | SECTION 4. CONSOLE | 4 - 3 |
© | 1998 Maytag Corporation |
|