ReadyNAS Pro Business Edition User Guide
If you want to delete a share, select the check box on the far right of the share listing and click Delete.
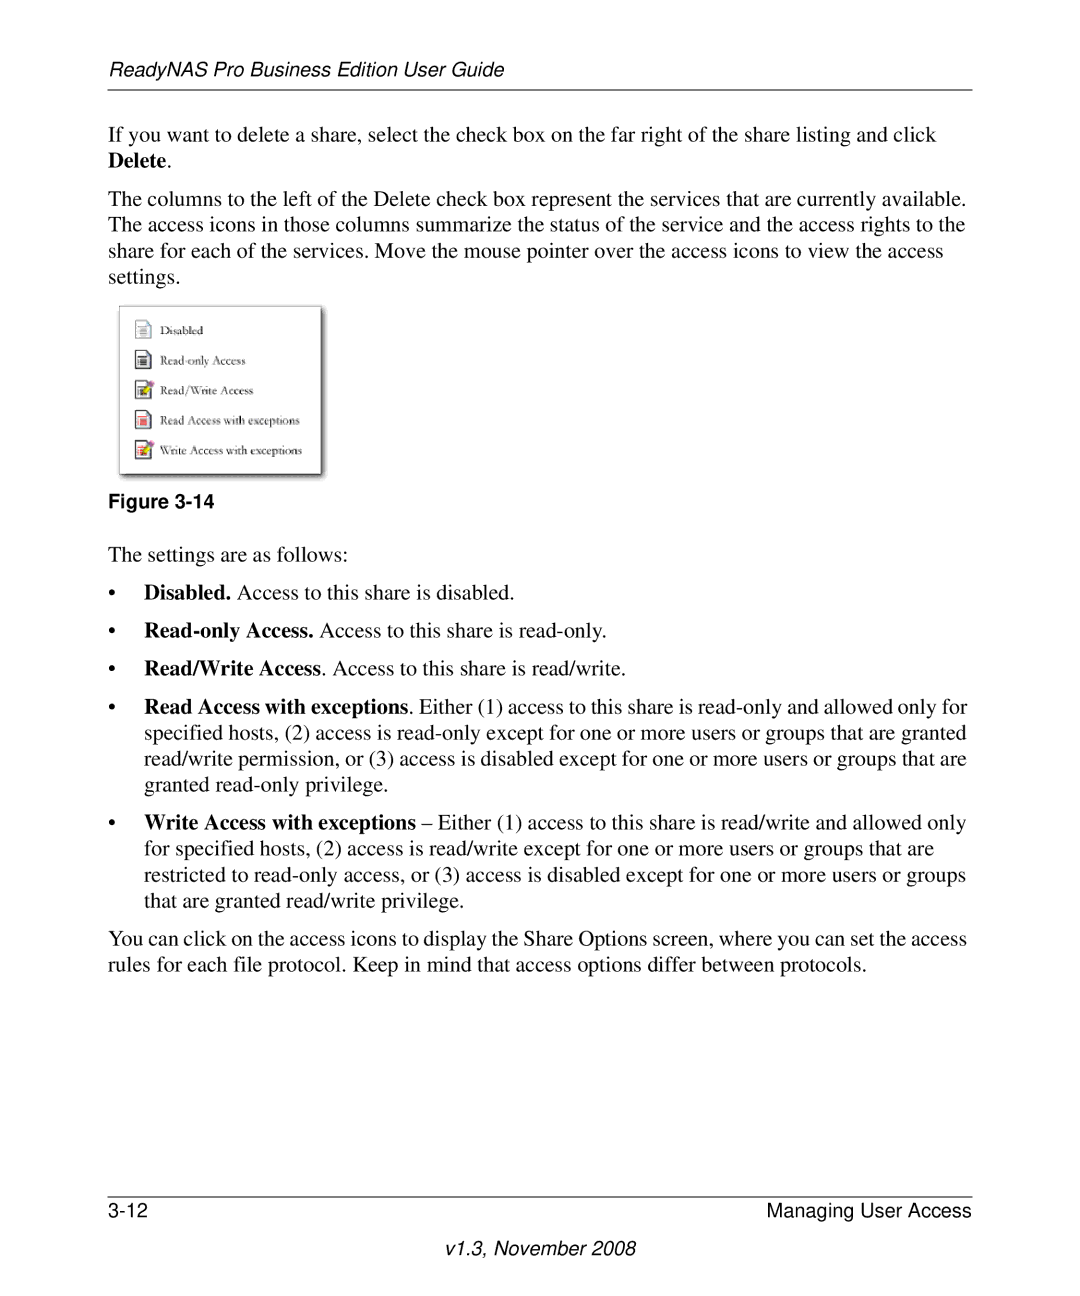
The columns to the left of the Delete check box represent the services that are currently available. The access icons in those columns summarize the status of the service and the access rights to the share for each of the services. Move the mouse pointer over the access icons to view the access settings.
Figure
The settings are as follows:
•Disabled. Access to this share is disabled.
•
•Read/Write Access. Access to this share is read/write.
•Read Access with exceptions. Either (1) access to this share is
•Write Access with exceptions – Either (1) access to this share is read/write and allowed only for specified hosts, (2) access is read/write except for one or more users or groups that are restricted to
You can click on the access icons to display the Share Options screen, where you can set the access rules for each file protocol. Keep in mind that access options differ between protocols.
Managing User Access |