Chapter 5 Contivity 1600 Option Installation 75
Installing Contivity 1600 DIMMs
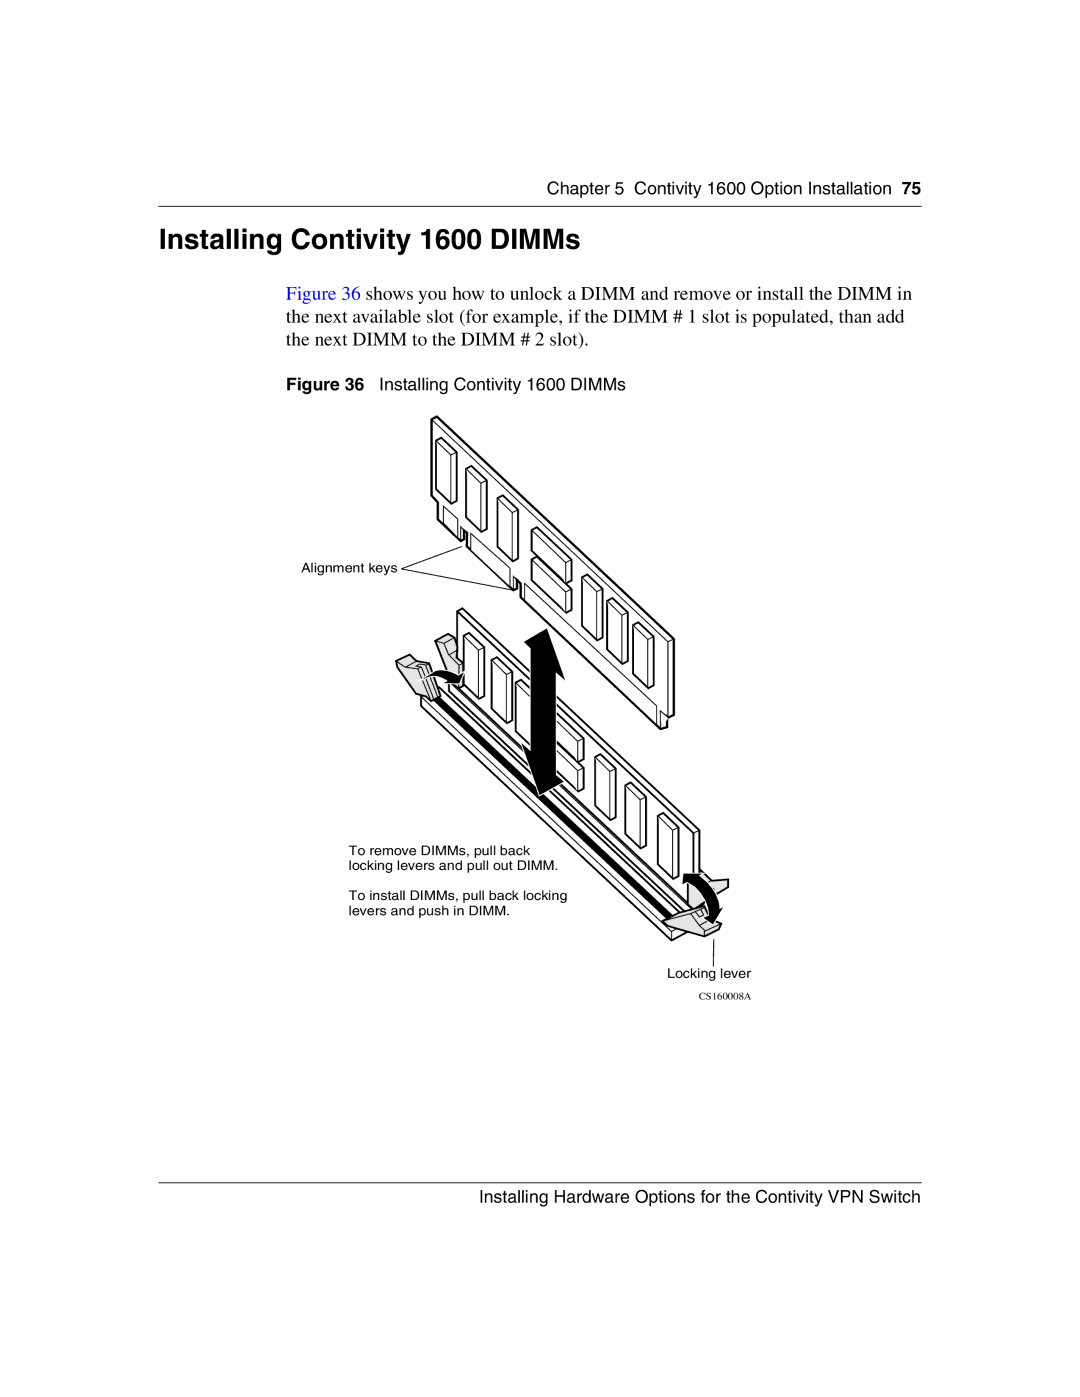
Figure 36 shows you how to unlock a DIMM and remove or install the DIMM in the next available slot (for example, if the DIMM # 1 slot is populated, than add the next DIMM to the DIMM # 2 slot).
Figure 36 Installing Contivity 1600 DIMMs
Alignment keys
To remove DIMMs, pull back locking levers and pull out DIMM.
To install DIMMs, pull back locking levers and push in DIMM.
Locking lever
CS160008A
Installing Hardware Options for the Contivity VPN Switch
