Monitor images on a PC
The following are descriptions of how to monitor images from the camera on a PC.
Monitor images from a single camera
Step 1
Start up the web browser.
Step 2
Enter the IP address designated using the Panasonic Easy IP Setup software in the address box of the browser.
Example when entering an IPv4 address: http://URL registered using IPv4 address http://192.168.0.10/
Example when entering an IPv6 address: http://URL registered using IPv6 address http://[2001:db8::10]/
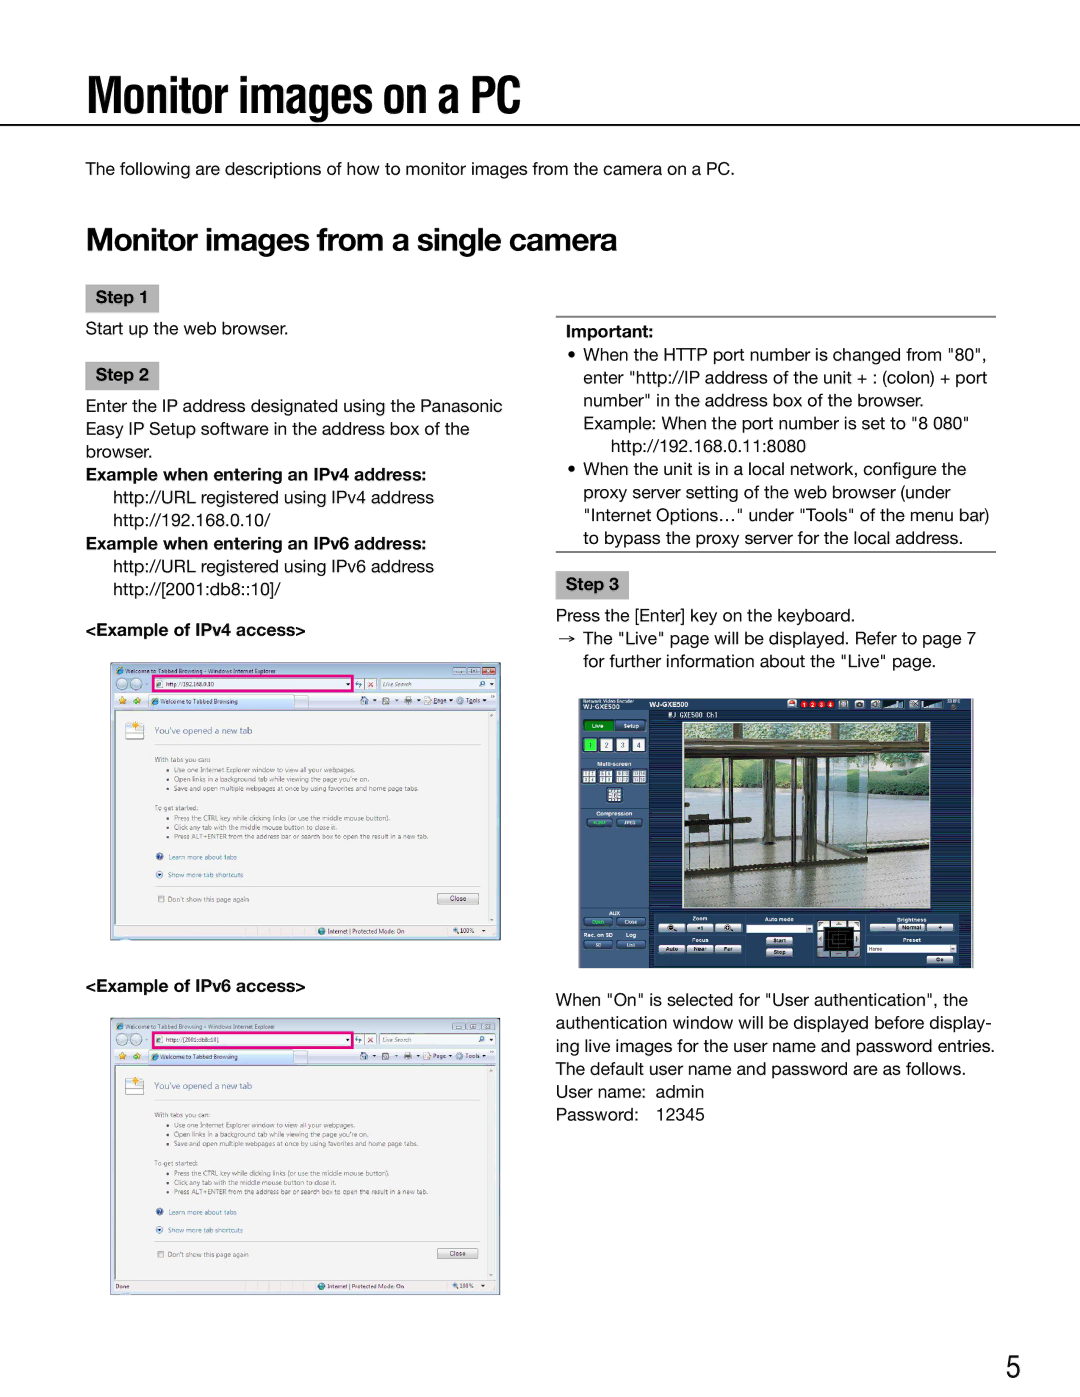
<Example of IPv4 access>
Important:
•When the HTTP port number is changed from "80", enter "http://IP address of the unit + : (colon) + port number" in the address box of the browser.
Example: When the port number is set to "8 080" http://192.168.0.11:8080
•When the unit is in a local network, configure the proxy server setting of the web browser (under "Internet Options…" under "Tools" of the menu bar) to bypass the proxy server for the local address.
Step 3
Press the [Enter] key on the keyboard.
→The "Live" page will be displayed. Refer to page 7 for further information about the "Live" page.
<Example of IPv6 access>
When "On" is selected for "User authentication", the authentication window will be displayed before display- ing live images for the user name and password entries. The default user name and password are as follows. User name: admin
Password: 12345
5