4.Time zone
Enter the time difference between your site and GMT.
Settings from 0:00 to 13:00 are valid.
Select +/– by pressing the [o] button, and click the [SET] button.
3.Time Setup
For Manual setting use only:
Enter the month, date, year, hour, minute and sec- ond, and click the [SET] button.
4.Time Display
Select Time Display ON/OFF by pressing the [o] button.
ON: Enables the time display on the HTML window.
ON
ON
ON
ON
OFF: No time display
5.Time Format
Select the Time format by pressing the [o] button, and click the [SET] button.
3 time format are available:
MM/DD/YYYY, DD/MM/YYYY or YYYY/MM/DD MM: month, DD: date, YYYY: year
6.Daylight Saving Time
Click ON or OFF and the [SET] button if necessary. ON: The time indication is advanced one hour. OFF: No daylight saving time, or to go back to reg-
ular time.
7.Camera Title
Enter any Camera Title (up to 32 characters), and click the [SET] button.
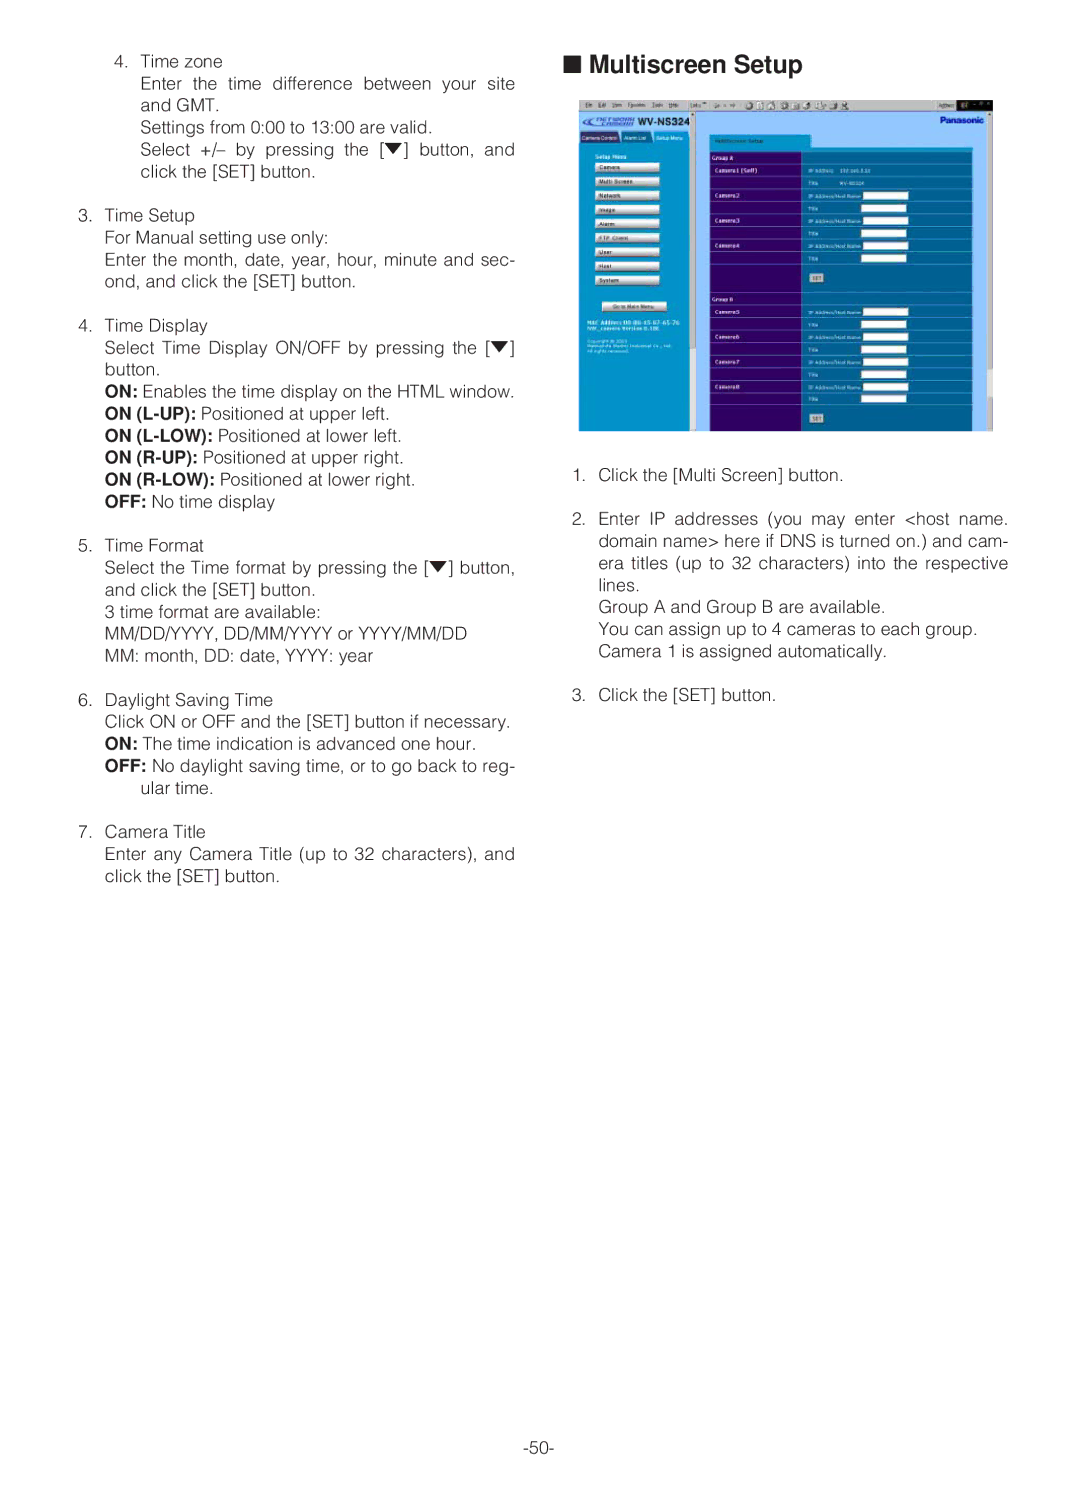
■Multiscreen Setup
1.Click the [Multi Screen] button.
2.Enter IP addresses (you may enter <host name. domain name> here if DNS is turned on.) and cam- era titles (up to 32 characters) into the respective lines.
Group A and Group B are available.
You can assign up to 4 cameras to each group. Camera 1 is assigned automatically.
3.Click the [SET] button.