INITIALIZING
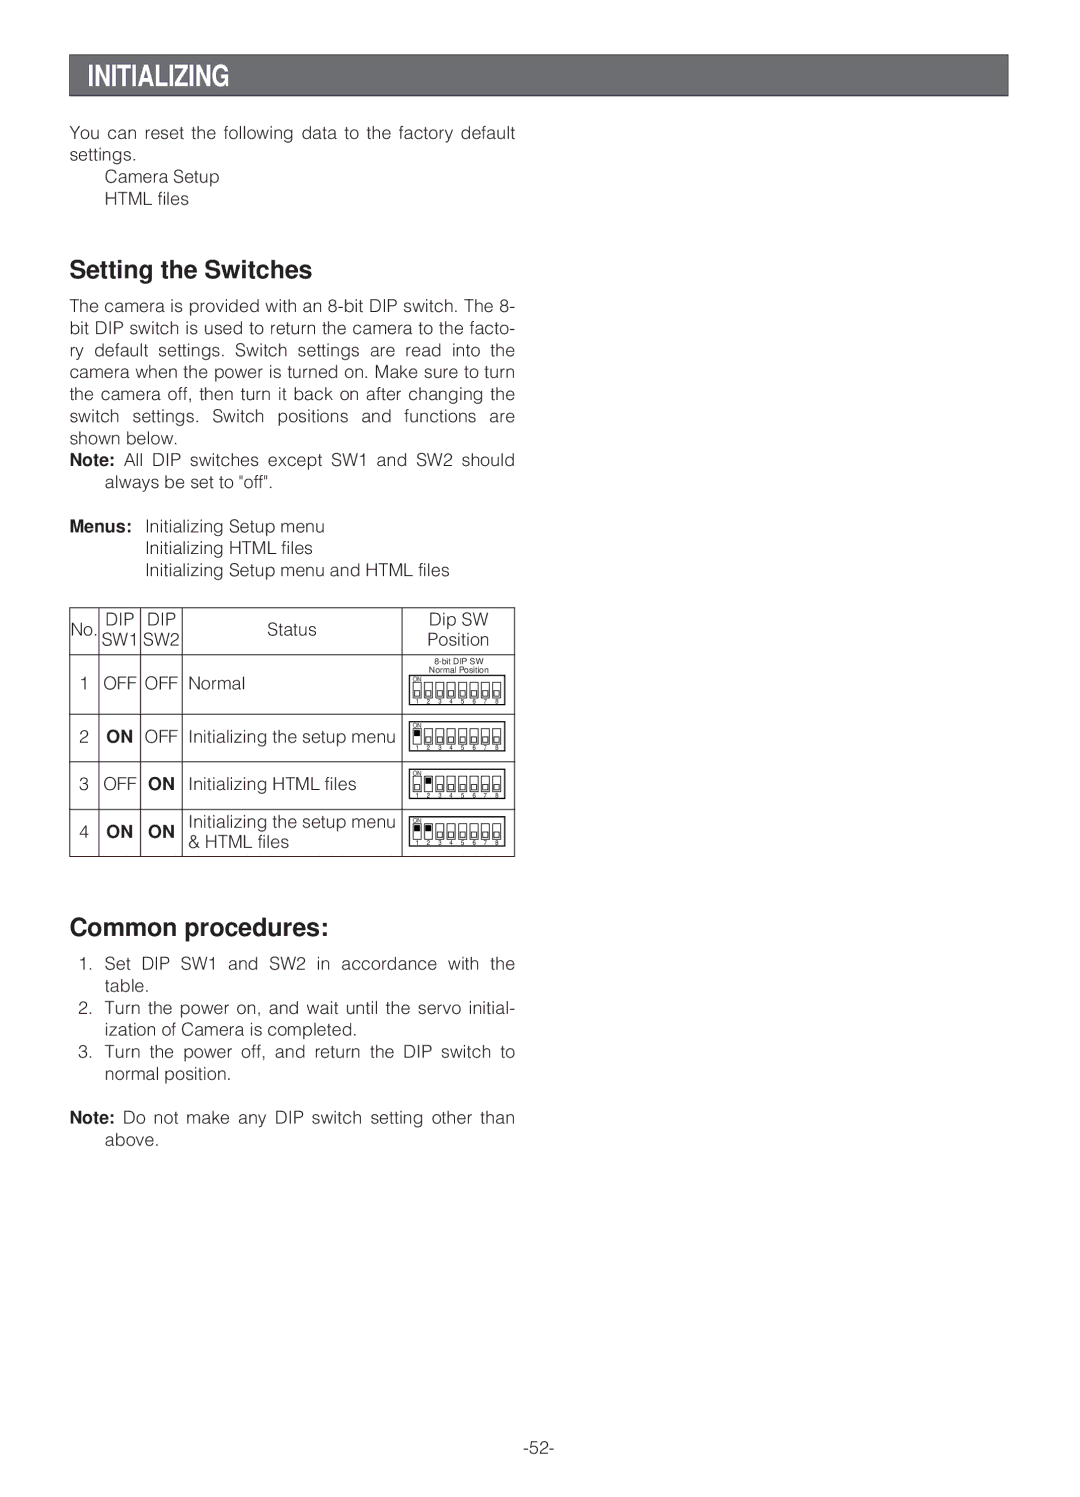
You can reset the following data to the factory default settings.
Camera Setup HTML files
Setting the Switches
The camera is provided with an
Note: All DIP switches except SW1 and SW2 should always be set to "off".
Menus: Initializing Setup menu Initializing HTML files
Initializing Setup menu and HTML files
No. | DIP | DIP | Status |
|
| Dip SW |
|
| |||||
SW1 | SW2 |
|
| Position |
|
| |||||||
|
|
|
|
|
|
|
|
|
|
| |||
|
|
|
|
|
|
|
|
|
| ||||
1 | OFF | OFF | Normal |
|
| Normal Position |
|
| |||||
| ON |
|
|
|
|
|
|
|
| ||||
|
|
|
|
| 1 | 2 | 3 | 4 | 5 | 6 | 7 | 8 |
|
|
|
|
|
|
|
|
|
|
|
|
|
|
|
|
|
|
|
|
|
|
|
|
|
|
|
|
|
2 | ON | OFF | Initializing the setup menu |
| ON |
|
|
|
|
|
|
|
|
| 1 | 2 | 3 | 4 | 5 | 6 | 7 | 8 |
| ||||
|
|
|
|
|
| ||||||||
|
|
|
|
|
|
|
|
|
|
|
|
|
|
|
|
|
|
|
|
|
|
|
|
|
|
|
|
3 | OFF | ON | Initializing HTML files |
| ON |
|
|
|
|
|
|
|
|
| 1 | 2 | 3 | 4 | 5 | 6 | 7 | 8 |
| ||||
|
|
|
|
|
| ||||||||
|
|
|
|
|
|
|
|
|
|
|
|
|
|
|
|
| Initializing the setup menu |
|
|
|
|
|
|
|
|
|
|
4 | ON | ON | ON |
|
|
|
|
|
|
|
| ||
|
|
| & HTML files |
| 1 | 2 | 3 | 4 | 5 | 6 | 7 | 8 |
|
|
|
|
|
|
|
|
|
|
|
|
|
|
|
Common procedures:
1.Set DIP SW1 and SW2 in accordance with the table.
2.Turn the power on, and wait until the servo initial- ization of Camera is completed.
3.Turn the power off, and return the DIP switch to normal position.
Note: Do not make any DIP switch setting other than above.