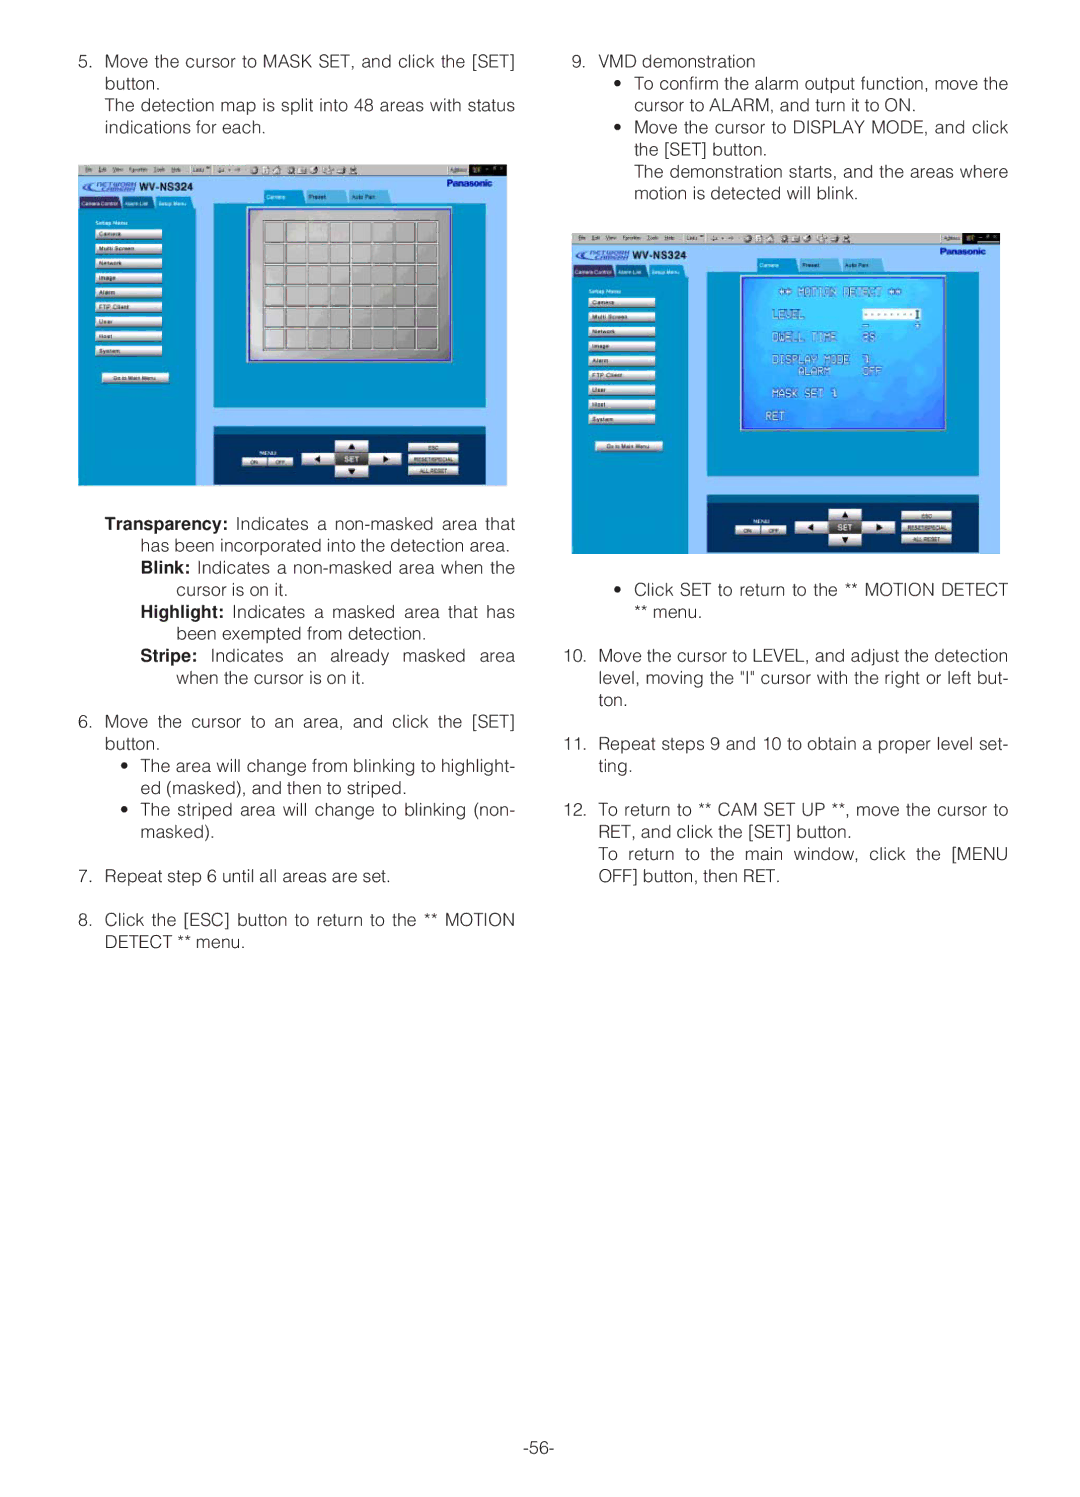
5.Move the cursor to MASK SET, and click the [SET] button.
The detection map is split into 48 areas with status indications for each.
Transparency: Indicates a
cursor is on it.
Highlight: Indicates a masked area that has been exempted from detection.
Stripe: Indicates an already masked area when the cursor is on it.
6.Move the cursor to an area, and click the [SET] button.
•The area will change from blinking to highlight- ed (masked), and then to striped.
•The striped area will change to blinking (non- masked).
7.Repeat step 6 until all areas are set.
8.Click the [ESC] button to return to the ** MOTION DETECT ** menu.
9.VMD demonstration
•To confirm the alarm output function, move the cursor to ALARM, and turn it to ON.
•Move the cursor to DISPLAY MODE, and click the [SET] button.
The demonstration starts, and the areas where motion is detected will blink.
•Click SET to return to the ** MOTION DETECT
**menu.
10.Move the cursor to LEVEL, and adjust the detection level, moving the "I" cursor with the right or left but- ton.
11.Repeat steps 9 and 10 to obtain a proper level set- ting.
12.To return to ** CAM SET UP **, move the cursor to RET, and click the [SET] button.
To return to the main window, click the [MENU OFF] button, then RET.