Step 3— Connecting the 6K to the PC through Ethernet
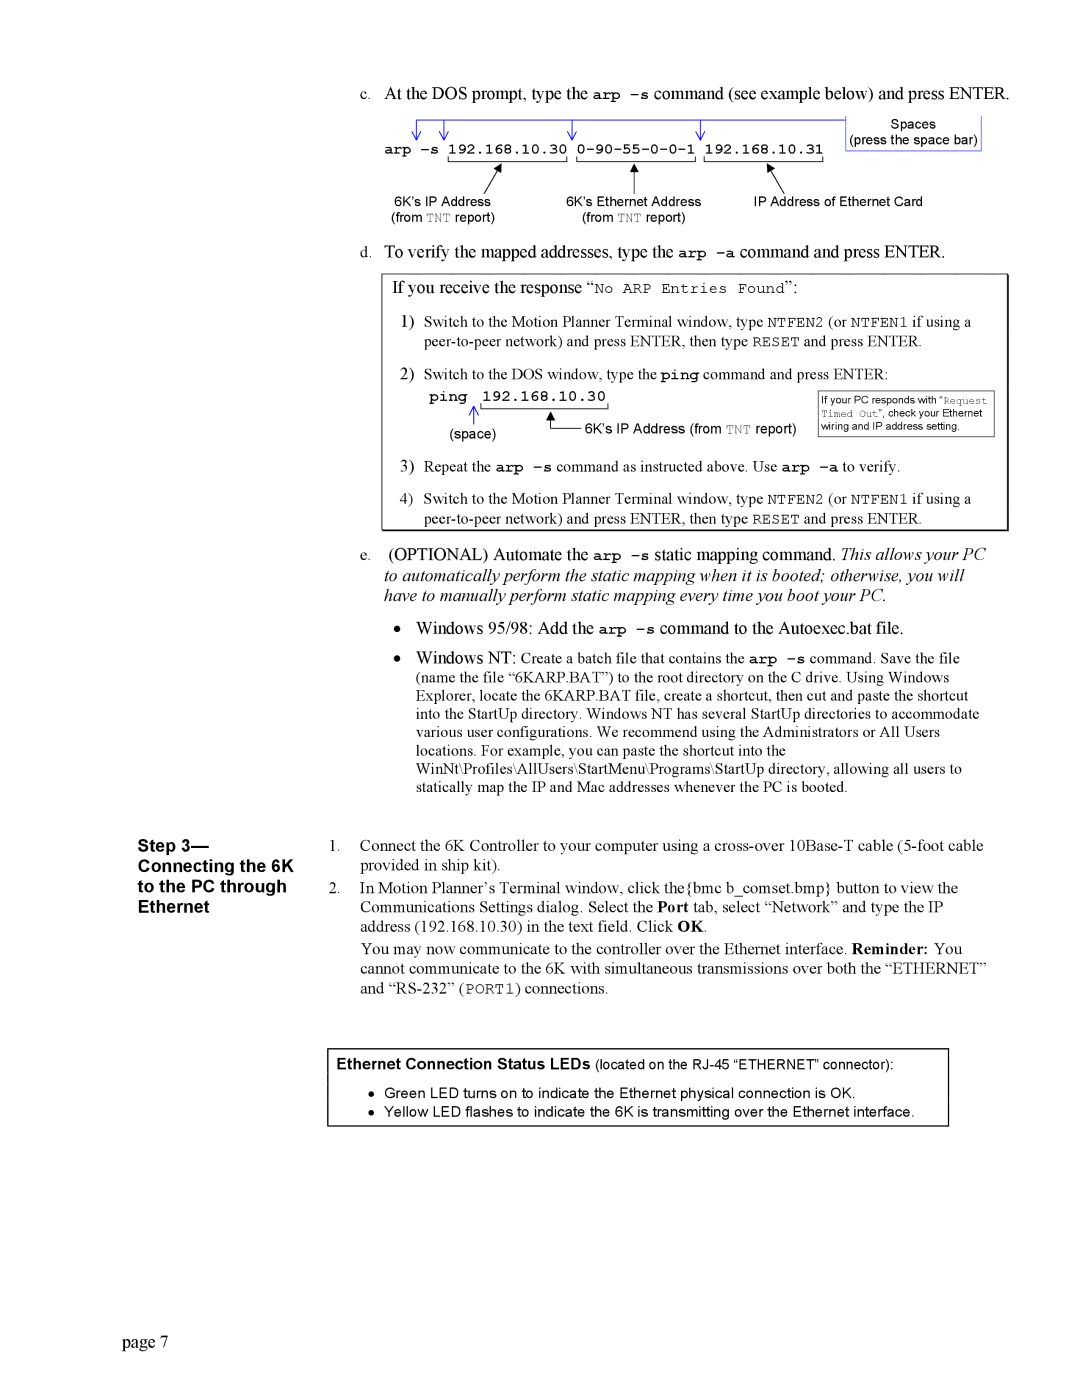
c.At the DOS prompt, type the arp
|
|
|
|
|
|
| Spaces |
arp | (press the space bar) | ||||||
| |||||||
| |||||||
|
|
|
|
|
|
|
|
6K’s IP Address |
|
|
|
| IP Address of Ethernet Card | ||
|
|
|
| ||||
6K’s Ethernet Address | |||||||
(from TNT report) |
| (from TNT report) |
|
|
| ||
d.To verify the mapped addresses, type the arp
1)Switch to the Motion Planner Terminal window, type NTFEN2 (or NTFEN1 if using a
2)Switch to the DOS window, type the ping command and press ENTER:
ping |
| 192.168.10.30 |
|
|
| ||
|
|
| If your PC responds with “Request | ||||
|
|
|
| 6K’s IP Address (from TNT report) | Timed Out”, check your Ethernet | ||
(space) |
| wiring and IP address setting. | |||||
| |||||||
|
| ||||||
|
| ||||||
3)Repeat the arp
4)Switch to the Motion Planner Terminal window, type NTFEN2 (or NTFEN1 if using a
e.(OPTIONAL) Automate the arp
•Windows 95/98: Add the arp
•Windows NT: Create a batch file that contains the arp
1.Connect the 6K Controller to your computer using a
2.In Motion Planner’s Terminal window, click the{bmc b_comset.bmp} button to view the Communications Settings dialog. Select the Port tab, select “Network” and type the IP address (192.168.10.30) in the text field. Click OK.
You may now communicate to the controller over the Ethernet interface. Reminder: You cannot communicate to the 6K with simultaneous transmissions over both the “ETHERNET” and
Ethernet Connection Status LEDs (located on the
•Green LED turns on to indicate the Ethernet physical connection is OK.
•Yellow LED flashes to indicate the 6K is transmitting over the Ethernet interface.
page 7