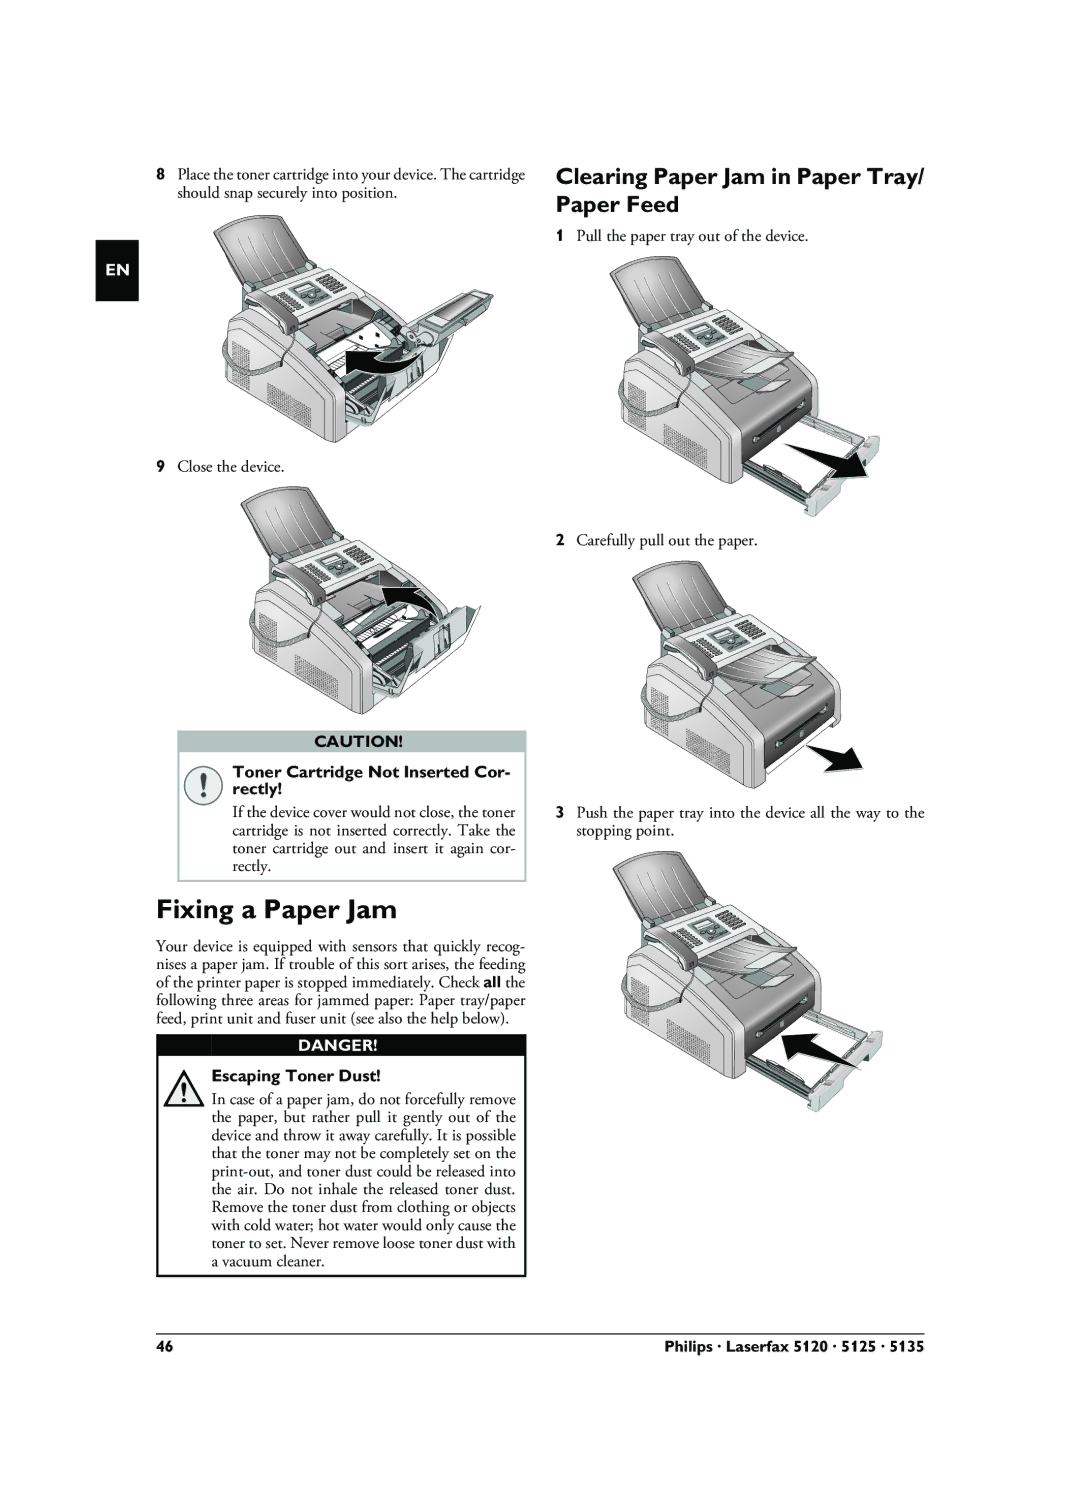
8Place the toner cartridge into your device. The cartridge should snap securely into position.
EN
9Close the device.
CAUTION!
Toner Cartridge Not Inserted Cor- rectly!
If the device cover would not close, the toner cartridge is not inserted correctly. Take the toner cartridge out and insert it again cor- rectly.
Fixing a Paper Jam
Your device is equipped with sensors that quickly recog- nises a paper jam. If trouble of this sort arises, the feeding of the printer paper is stopped immediately. Check all the following three areas for jammed paper: Paper tray/paper feed, print unit and fuser unit (see also the help below).
DANGER!
Escaping Toner Dust!
In case of a paper jam, do not forcefully remove the paper, but rather pull it gently out of the device and throw it away carefully. It is possible that the toner may not be completely set on the
Clearing Paper Jam in Paper Tray/ Paper Feed
1Pull the paper tray out of the device.
2Carefully pull out the paper.
3Push the paper tray into the device all the way to the stopping point.
46 | Philips · Laserfax 5120 · 5125 · 5135 |
