6Place the toner cartridge into your device. The cartridge should snap securely into position.
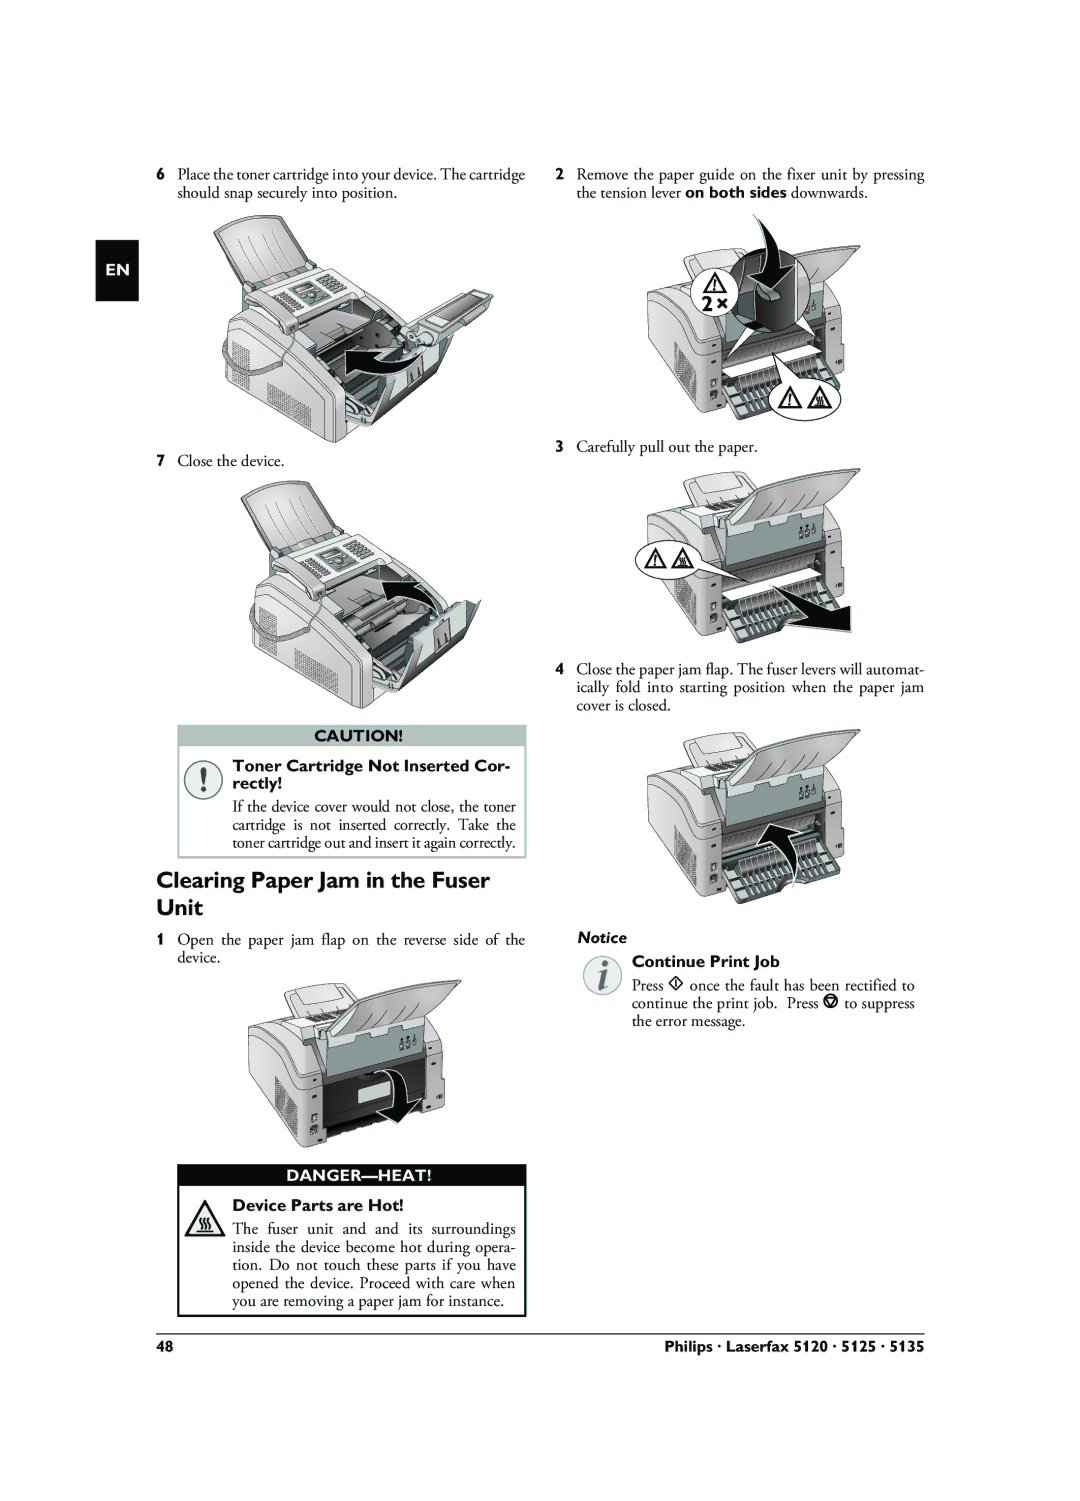
2Remove the paper guide on the fixer unit by pressing the tension lever on both sides downwards.
EN
7Close the device.
CAUTION!
Toner Cartridge Not Inserted Cor- rectly!
If the device cover would not close, the toner cartridge is not inserted correctly. Take the toner cartridge out and insert it again correctly.
Clearing Paper Jam in the Fuser Unit
1Open the paper jam flap on the reverse side of the device.
Device Parts are Hot!
The fuser unit and and its surroundings inside the device become hot during opera- tion. Do not touch these parts if you have opened the device. Proceed with care when you are removing a paper jam for instance.
3Carefully pull out the paper.
4Close the paper jam flap. The fuser levers will automat- ically fold into starting position when the paper jam cover is closed.
Notice
Continue Print Job
Press o once the fault has been rectified to continue the print job. Press j to suppress the error message.
48 | Philips · Laserfax 5120 · 5125 · 5135 |