Advanced Setup
Re-Equalization
STANDBY/ON
ENTER
5˜∞˜2˜3˜ENTER buttons
1 | 4.THX Audio Setup | ||||||
| |||||||
| [ 1.Ultra2 SW Setup ] | ||||||
| [ 2.SurBack Sp Position ] | ||||||
| [ | ] | |||||
| [Return] |
|
|
|
| ||
2 | 4.3 . | ||||||
HOME THX | :ON | ||||||
| |||||||
| except THX MUSICMODE | ||||||
| STANDARD | [ |
|
| ] | ||
| OFF | ||||||
| STEREO |
| [OFF] |
| |||
| [OFF] | ||||||
|
| [Return] |
|
|
|
| |
3 | 4.3. | ||||||
| HOME THX | :ON | |||||
except THX MUSICMODE
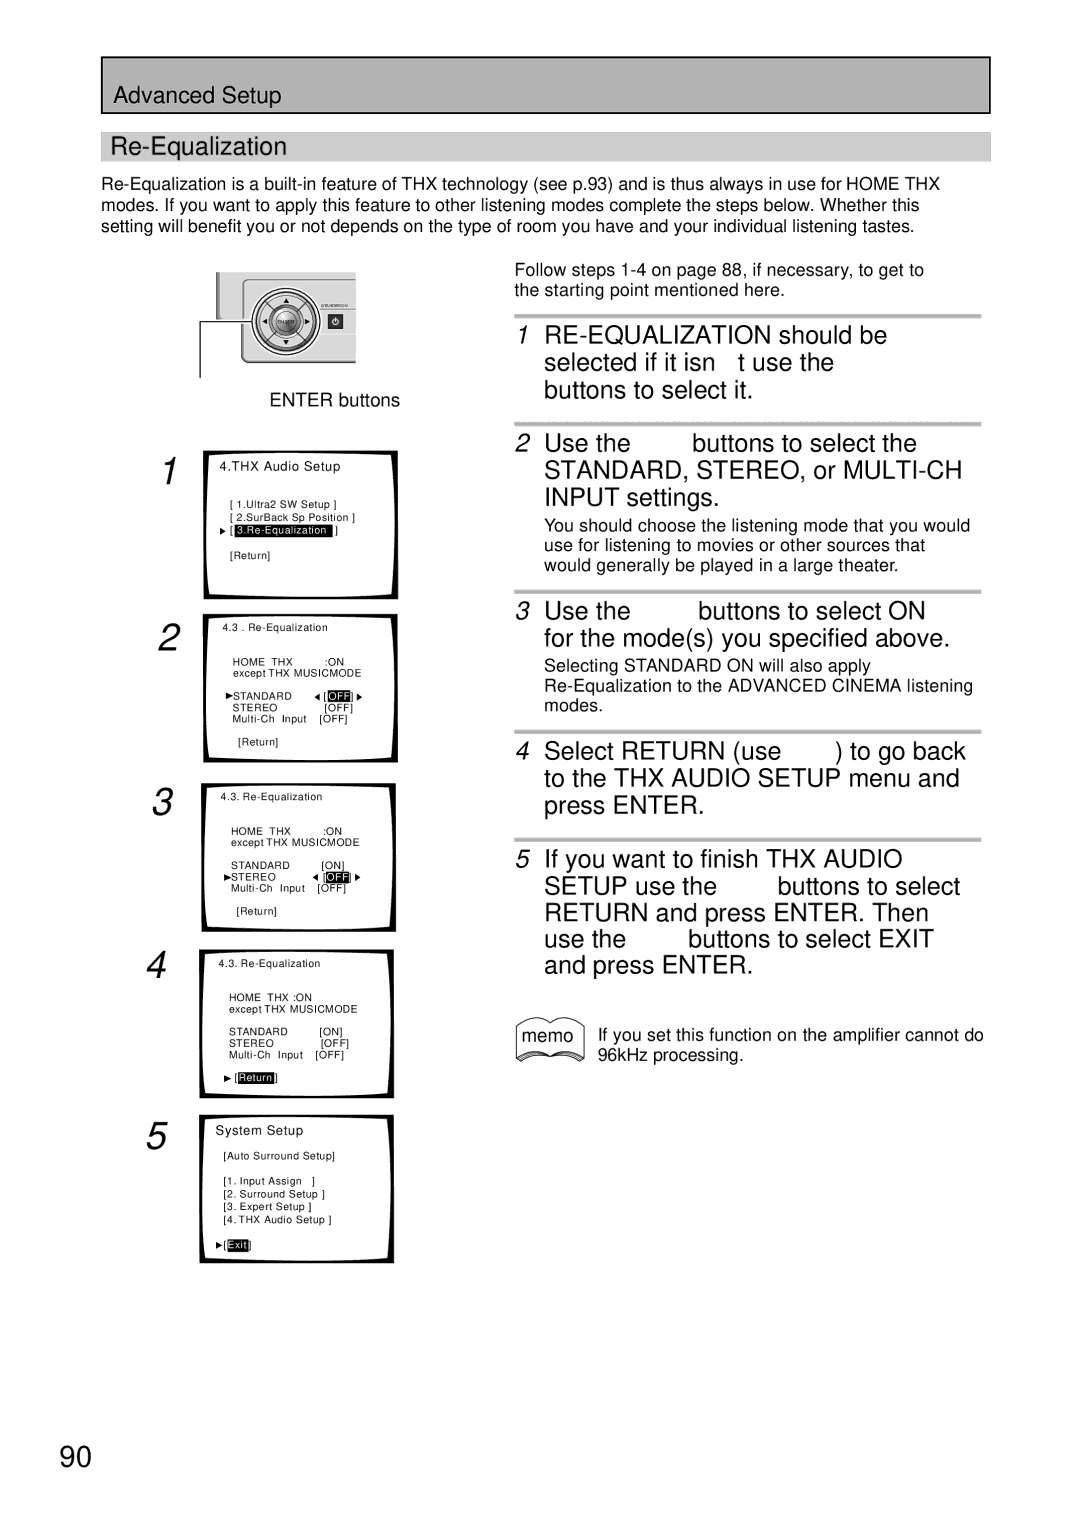
Follow steps
1
2Use the ∞5 buttons to select the
STANDARD, STEREO, or
INPUT settings.
You should choose the listening mode that you would use for listening to movies or other sources that would generally be played in a large theater.
3Use the 2 3 buttons to select ON
for the mode(s) you specified above.
Selecting STANDARD ON will also apply
4Select RETURN (use ∞5) to go back to the THX AUDIO SETUP menu and press ENTER.
4
5
STANDARD [ON] ![]() STEREO
STEREO ![]() [OFF]
[OFF]![]()
4.3.
HOME THX :ON
except THX MUSICMODE
STANDARD [ON]
STEREO[OFF]
![]() [Return]
[Return]
System Setup
[Auto Surround Setup]
[1. Input Assign ]
[2. Surround Setup ]
[3. Expert Setup ]
[4. THX Audio Setup ]
![]() [Exit]
[Exit]
5If you want to finish THX AUDIO SETUP use the 5∞ buttons to select
RETURN and press ENTER. Then use the 5∞ buttons to select EXIT and press ENTER.
memo If you set this function on the amplifier cannot do ![]() 96kHz processing.
96kHz processing.
90
En