Using Other Functions
Multi Operations
Multi operations allow you to tell the amplifier and your other components to do a number of things with the push of only two buttons on the LCD commander. For example, you can program the unit to turn on your TV, turn on your DVD player and start playing the loaded DVD. This allows you to freely decide which operations you want performed as well as the order in which you want them performed (see "Performing Multi Operations" on the next page). The steps below show you how to program a string of up to 5 different operations for each function button. You don't need to program the power of this amplifier (or any Pioneer component) to go on, it will do so automatically when multi operations are recalled.
memo • Be sure to recall or learn the remote commands for each component before attempting multi ![]() operations (see “Setting Up the Remote Control to Control Other Components“,
operations (see “Setting Up the Remote Control to Control Other Components“,
•Press the BACK button any time to go back a screen.
•Press the REMOTE SETUP button any time to cancel the process.
1
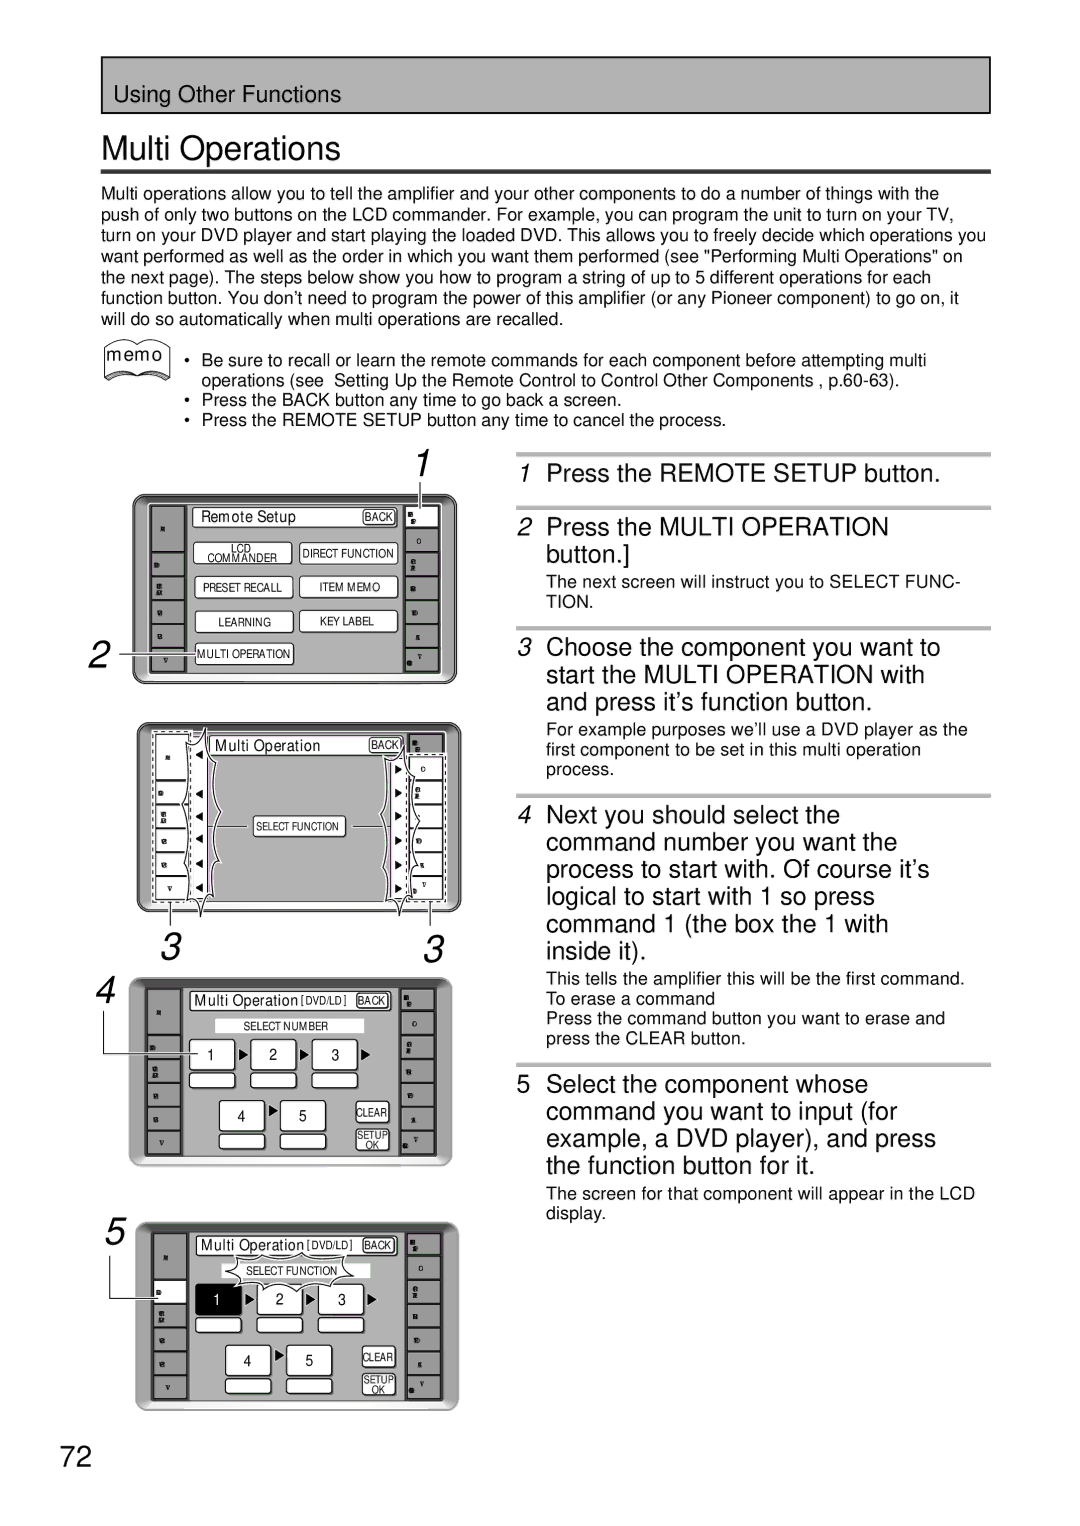
1 Press the REMOTE SETUP button. |
2
AMP
DVD/LD
VCR1
/DVR
VCR2
VCR3
TV
Remote Setup | BACK | |
LCD | DIRECT FUNCTION | |
COMMANDER | ||
| ||
PRESET RECALL | ITEM MEMO | |
LEARNING | KEY LABEL | |
MULTI OPERATION |
|
REMOTE
SETUP
CD
TUNER
VIDEO
SAT
TV
CONTROL
2 Press the MULTI OPERATION |
button.]
The next screen will instruct you to SELECT FUNC- TION.
3Choose the component you want to start the MULTI OPERATION with
and press it's function button.
AMP
DVD/LD
VCR1
/DVR
VCR2
VCR3
TV
Multi Operation | BACK |
SELECT FUNCTION
REMOTE |
SETUP |
CD |
TAPE1
TUNER
VIDEO
SAT
TV
CONTROL
For example purposes we'll use a DVD player as the first component to be set in this multi operation process.
4 Next you should select the |
command number you want the |
process to start with. Of course it's |
logical to start with 1 so press |
command 1 (the box the 1 with |
3
4 ![]()
![]()
![]()
AMP
DVD/LD
VCR1
/DVR
VCR2
VCR3
TV
|
|
|
| 3 |
Multi Operation [ DVD/LD ] | BACK | SETUP | ||
|
|
|
| REMOTE |
SELECT NUMBER |
|
| CD | |
|
|
| ||
1 | 2 | 3 |
| |
| TAPE1 | |||
|
| |||
|
|
|
| TUNER |
|
|
|
| VIDEO |
4 | 5 |
| CLEAR | SAT |
|
|
| SETUP | TV |
|
|
| OK | CONTROL |
inside it).
This tells the amplifier this will be the first command.
To erase a command
Press the command button you want to erase and press the CLEAR button.
5Select the component whose command you want to input (for example, a DVD player), and press
the function button for it.
5 ![]()
AMP
DVD/LD
VCR1
/DVR
VCR2
VCR3
TV
Multi Operation [ DVD/LD ] BACK
SELECT FUNCTION
1 2 3
4 5 CLEAR
SETUP
OK
REMOTE
SETUP
CD
TUNER
VIDEO
SAT
TV
CONTROL
The screen for that component will appear in the LCD display.
72
En