Manuals
/
Premio Computer
/
Kitchen Appliance
/
Kitchen Entertainment Center
Premio Computer
Aries/Centella
manual
Msi
Models:
Aries/Centella
1
23
131
131
Download
131 pages
19.28 Kb
20
21
22
23
24
25
26
27
Page 23
Image 23
MSI
MICRO-STAR
INTERNATIONAL
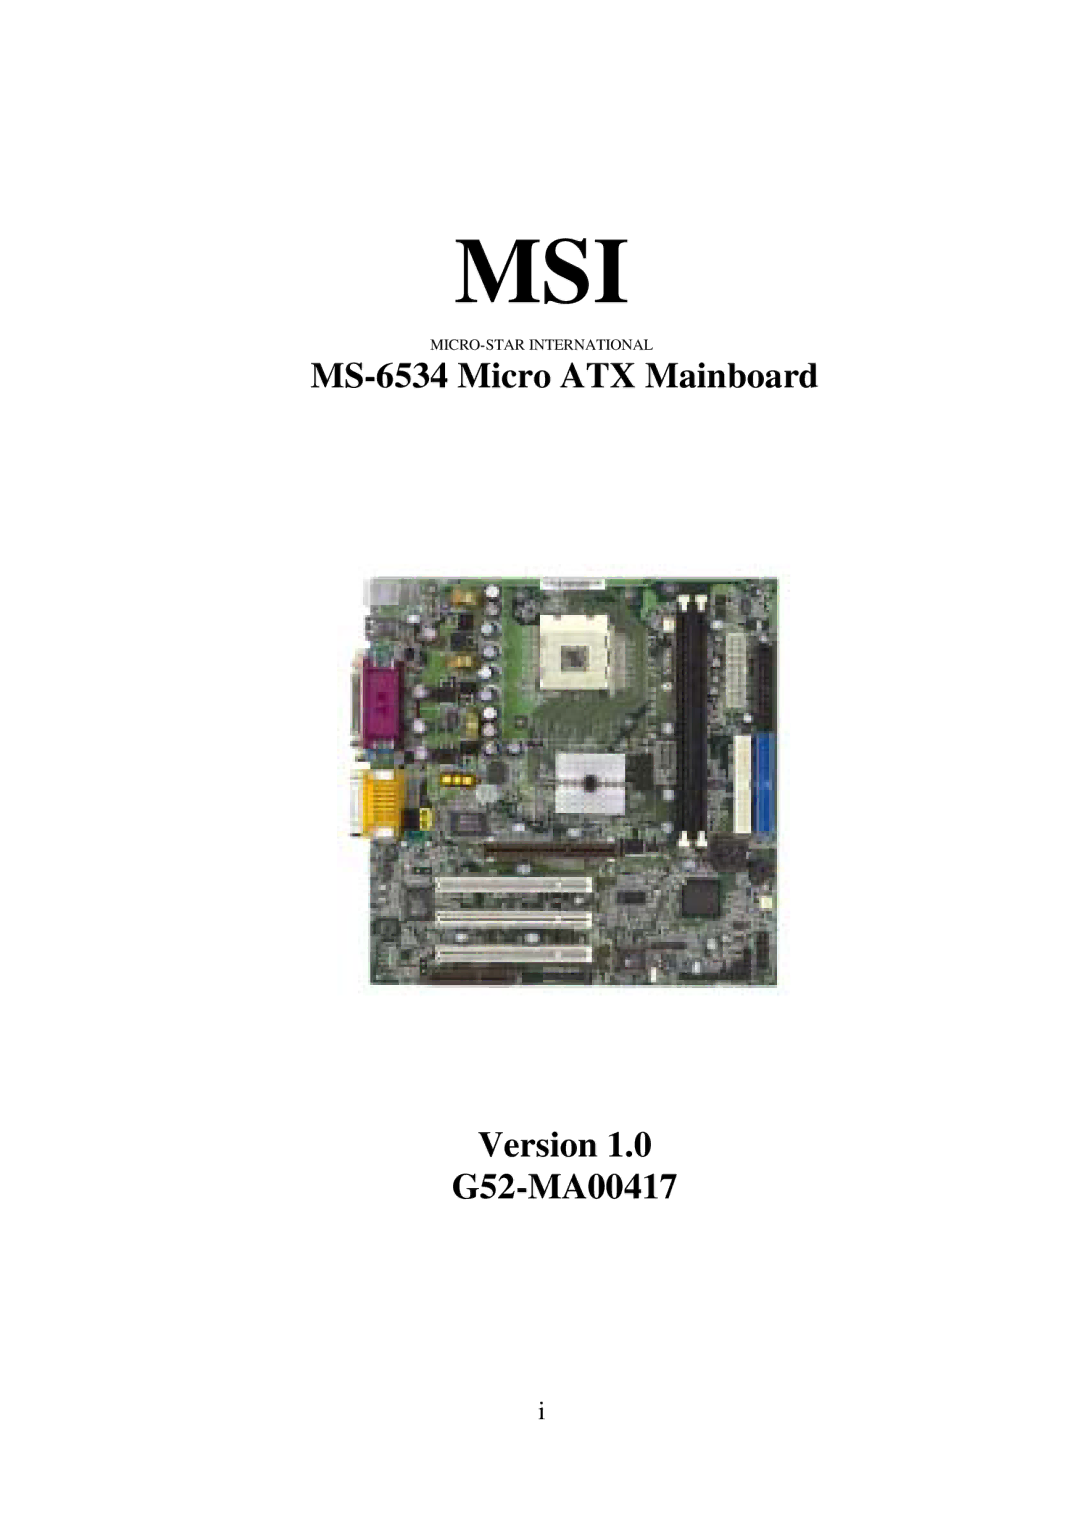
MS-6534
Micro ATX Mainboard
Version 1.0
G52-MA00417
i
Page 22
Page 24
Page 23
Image 23
Page 22
Page 24
Contents
Aries/Centella
System Manual
Ii Premio System Manual
Copyright
Disclaimers
Contents
Iv Premio System Manual
Appendix
Getting Started
Premio System Manual
Setting Up
CD-ROM drive reads information on CDs
Switches and Indicators
Reset Button CD ROM Drive
Upgrading
Opening the System Unit
Installing an Expansion Card
Installing a Hard Drive
Monitor Does Not Work
Troubleshooting
Mouse Does Not Work
Keyboard Does Not Work
Hard Drive Problems
System Unit Problems
Premio on the Internet
Technical Support
Appendix
Warranty Policy
Exclusions from Limited Warranty Programs
Service Under Warranty
FCC Standards
Important Safety Instructions
Appendix
MSI
FCC-B Radio Frequency Interference Statement
Voir LA Notice Dinstallation Avant DE Raccorder AU Reseau
Revision Revision History Date First Release August
Copyright Notice
Safety Instructions
Contents
MDMIN1
Vii
Introduction1
CPU
Mainboard Specification
Bios
Chipset
Mainboard Layout
Component Function Reference
Quick Components Guide
Key Features
Hardware Setup
Central Processing Unit CPU
Installing the CPU
Installing the CPU Fan
Then
CPU Core Speed Derivation Procedure
Introduction to Sdram
Memory
Dimm Modules Combination
Installing Dimm Modules
ATX 20-Pin Power Connector
Power Supply
ATX 12V Power Connector JPW1
Back Panel
Mouse Connector
USB Connectors
Keyboard Connector
Pin Definition
Parallel Port Connector
Audio Port Connectors
Serial Port Connectors COM a & COM B
Joystick/Midi Connector
Floppy Disk Drive Connector FDD1
Connectors
Primary IDE Connector
Hard Disk Connectors IDE1 & IDE2
FP2
Case Connectors FP1 & FP2
LEDStatus Description
Pin/3-pin dual color power LED 2-pin LED is connected to pin
Power LED FP2
HDD LED
Wake On LAN Connector JWOL1
Power Saving Switch Connector JGS1
Wake On Ring Connector JMDM1 Optional
Connectivity Design Guide
IrDA Infrared Module Connectors IR1 & IR2
Fan Power Connectors CFAN1/SFAN1
CD-In/Aux Line-In/Modem-In Connector CDIN1/AUXIN1/ MDMIN1
USB2 USB1
USB Front Panel Connectors USB1 & USB2
Panel I/O Connectivity Design Guide
Front Panel Audio Connector JAUDIO1
Clear Cmos Jumper JBAT1
Jumpers
CNR Communication Network Riser Slot
Slots
AGP Accelerated Graphics Port Slot
PCI Slots
PCI Interrupt Request Routing
Award Bios Setup
Control Keys
Entering Setup
General Help F1
Getting Help
MainMenu
Sub-Menu
Main Menu
Set Supervisor Password
PnP/PCI Configurations
Load Fail-Safe Defaults
Load Optimized Defaults
Year
Standard Cmos Features
Day
Month
Video
Drive A/B
HaltOn
CPU L1 & L2 Cache
Advanced Bios Features
Anti-Virus Protection
BootUpNum-LockLED
Quick Boot
1st/2nd/3rd Boot Device
Boot Other Device
Typematic Rate Chars/Sec
Typematic Rate Setting
Typematic Delay Msec
Gate A20 Option
Page
CAS# Latency
Advanced Chipset Features
Configure Sdram Timing
Precharge Delay
DRAMDataIntegrityMode
RAS# to CAS# Delay
Delayed Transaction
RAS# Precharge
AGP
Integrated Peripherals
USB Controller
On-ChipPrimary/SecondaryPCIIDE
IDE Primary/Secondary Master/Slave PIO
IDEPrimary/SecondaryMaster/SlaveUDMA
IDEHDDBlockMode
Serial Port B Mode
IR Transmission Delay
Onboard/CNR LAN selection
Parallel Port
Parallel Port Mode
IRDuplexMode
IR Pin Select
ACPIStandbyState
Power Management Setup
IPCAFunction
Suspend Time Out
PowerManagement/APM
Power Button Function
MODEMUseIRQ
POWERONFunction
Resume By RTC Alarm
DateofMonthAlarm
TimehhmmssAlarm
Sleep State LED
Hot Key Power on
Power Again
Resources Controlled By
PnP/PCI Configurations
PNP OS Installed
Reset Configuration Data
PCI/VGA Palette Snoop
IRQ Resources
PC Health Status
CPU Critical Temperature
SpreadSpectrum
Frequency/Voltage Control
CPU Ratio Selection
Auto Detect PCI Clock
Award Bios Setup
Load Fail-Safe Defaults
Load Fail-Safe/Optimized Defaults
Load Optimized Defaults
Set Supervisor Password
Set Supervisor/User Password
About Supervisor Password & User Password
Save & Exit Setup
Exit Without Saving
AMI Bios Setup
Select First Boot Device
Selecting the First Boot Device
Load Bios Setup defaults
Default Settings
Chipset Features Setup
Standard Cmos Setup
Bios Features Setup
Load Fail Safe Defaults
PNP/PCI Configuration
Hardware Monitor Setup
Load Optimal Defaults
Amibios Setup Standard Cmos Setup
Standard Cmos Setup
FloppyDriveA/B
Boot Sector Virus Protection
Pri Master/Pri Slave/Sec Master/Sec Slave
Amibios Setup Bios Features Setup
Bios Features Setup
A.R.T. for Hard Disks
Try Other Boot Devices
BootUpNum-Lock
Full Screen Logo Show
Option Description
Password Check
Boot OS/2 for Dram 64MB
System Bios Cacheable
Configure Dram Timing by
Chipset Features Setup
AGP Aperture Size
DRAMIntegrityMode
S1/POS
Specific Key for Wakeup
USB Wakeup From S3
Mouse Wakeup From S3
Keyboard Wakeup From S3
Wake Up On Ring/LAN/PME
RTCAlarm Date/Hour/Minute/Second
Power Again
PCI VGA Palette Snoop
PNP/PCI Configuration
Clear Escd
IRQ 3/4/5/7/9/10/11
DMA Channel 0/1/3/5/6/7
OnboardAudioChipOptional
USB Legacy Support
On-ChipIDE
AC’97 Audio
OnBoard Midi Port
DMAChannel
OnBoardGamePort
CPU FSB Clock Mhz
Hardware Monitor Setup
Chassis Intrusion Optional
Load Optimal Defaults
Load Optimal/Fail Safe Defaults
Load Fail Safe DefaultsY/N? N
Enter new Supervisor password
Supervisor/User Password
About Supervisor Password & User Password
IDE HDD Auto Detection
Save to Cmos and EXITY/N? Y
Quit without SavingY/N? N
Using 4-/6-channel Audio Function a
Click on C-Media Sound Drivers
Installing C-Media Drivers
Hardware Configuration
To install C-Media drivers
To set the multi-channel configuration
Software Configuration
Top
Page
Image
Contents