NETWORK
Network
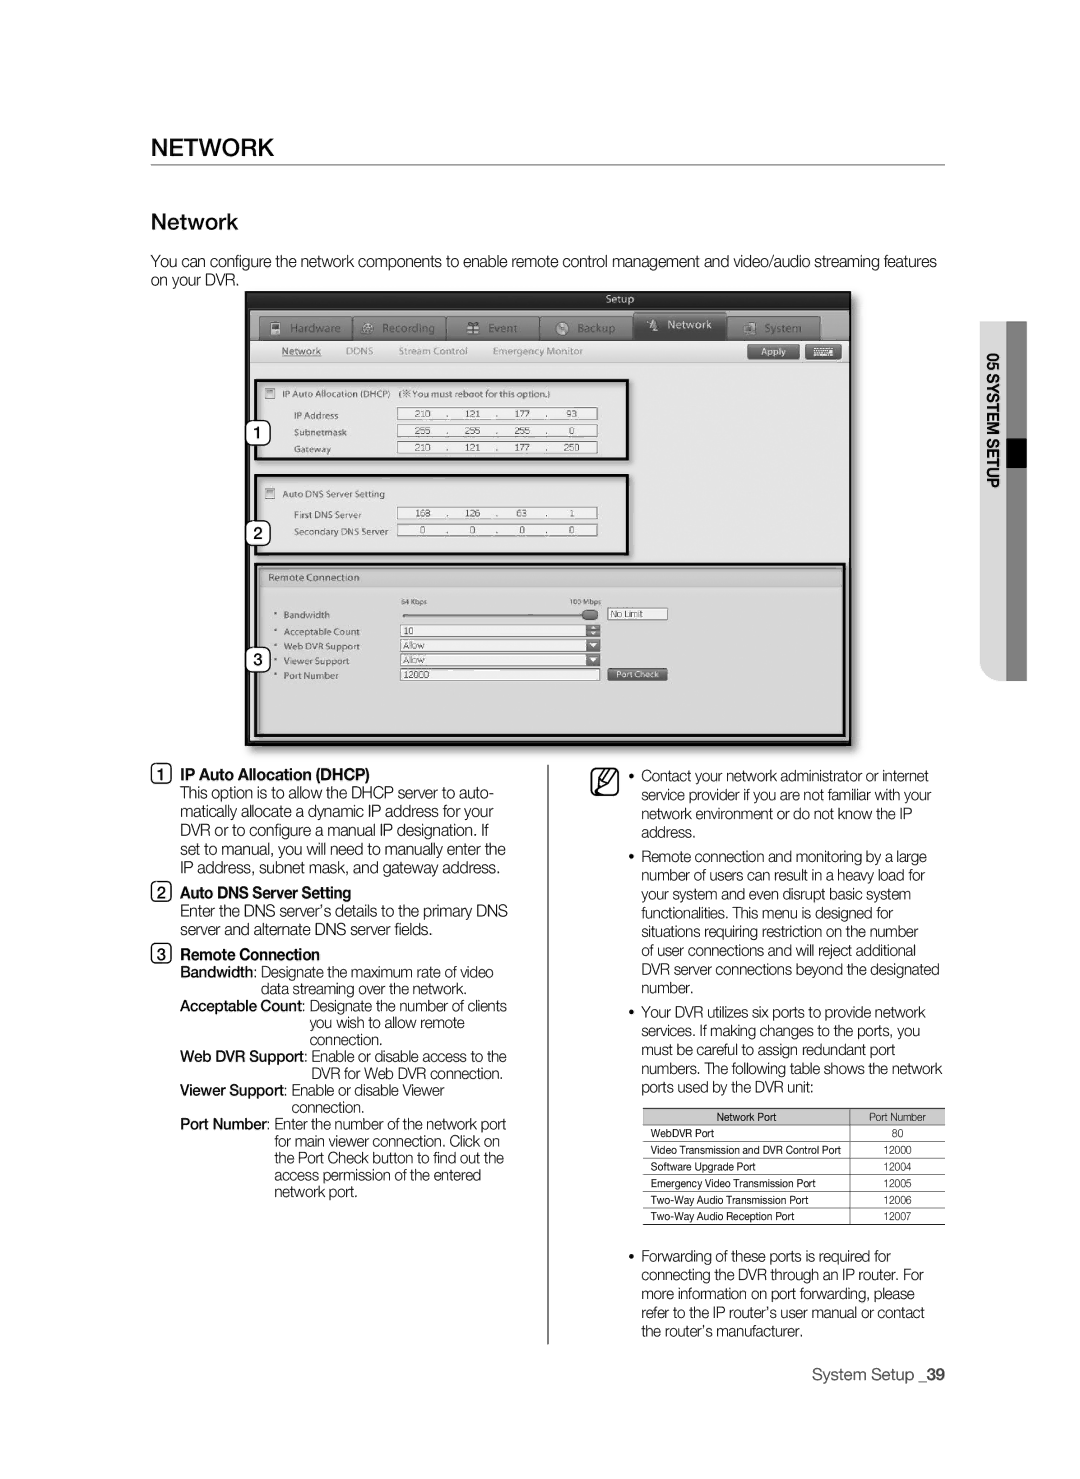
You can confi gure the network components to enable remote control management and video/audio streaming features on your DVR.
1
2
3
1 | Ip Auto Allocation (DhCp) | Contact your network administrator or internet | ||
| This option is to allow the DHCP server to auto- |
| service provider if you are not familiar with your | |
| matically allocate a dynamic IP address for your |
| network environment or do not know the IP | |
| DVR or to confi gure a manual IP designation. If |
| address. |
|
| set to manual, you will need to manually enter the | | Remote connection and monitoring by a large | |
| IP address, subnet mask, and gateway address. | |||
|
| number of users can result in a heavy load for | ||
2 Auto DNS Server Setting |
| |||
| your system and even disrupt basic system | |||
| Enter the DNS server’s details to the primary DNS |
| functionalities. This menu is designed for | |
| server and alternate DNS server fi elds. |
| situations requiring restriction on the number | |
3 | Remote Connection |
| of user connections and will reject additional | |
| Bandwidth: Designate the maximum rate of video |
| DVR server connections beyond the designated | |
| data streaming over the network. |
| number. |
|
| Acceptable Count: Designate the number of clients | | Your DVR utilizes six ports to provide network | |
| you wish to allow remote | |||
|
| services. If making changes to the ports, you | ||
| connection. |
| ||
|
| must be careful to assign redundant port | ||
| Web DVR Support: Enable or disable access to the |
| ||
|
| numbers. The following table shows the network | ||
| DVR for Web DVR connection. |
| ||
|
| ports used by the DVR unit: |
| |
| Viewer Support: Enable or disable Viewer |
|
| |
| connection. |
|
|
|
| Port Number: Enter the number of the network port |
| Network Port | Port Number |
|
| WebDVR Port | 80 | |
| for main viewer connection. Click on |
| ||
|
| Video Transmission and DVR Control Port | 12000 | |
| the Port Check button to fi nd out the |
| ||
|
| Software Upgrade Port | 12004 | |
| access permission of the entered |
| ||
|
| Emergency Video Transmission Port | 12005 | |
| network port. |
| ||
|
| 12006 | ||
|
|
| ||
|
|
| 12007 | |
|
| Forwarding of these ports is required for | ||
|
|
| connecting the DVR through an IP router. For | |
|
|
| more information on port forwarding, please | |
|
|
| refer to the IP router’s user manual or contact | |
|
|
| the router’s manufacturer. |
|
|
|
|
|
|
05 SYSTEM SETUp![]()
System Setup _39