Numbers in Z refer to the main pages in this operation manual where the topic is explained.
Introduction
1
2
3
4 |
| |
5 | 15 | |
6 | ||
|
7![]()
![]()
![]()
![]() 16
16
8 ![]()
![]()
![]()
![]() 17
17
9 ![]()
![]()
![]()
![]() 18
18
10 | 19 |
11 | 20 |
12 | 21 |
13 |
|
14 | 22 |
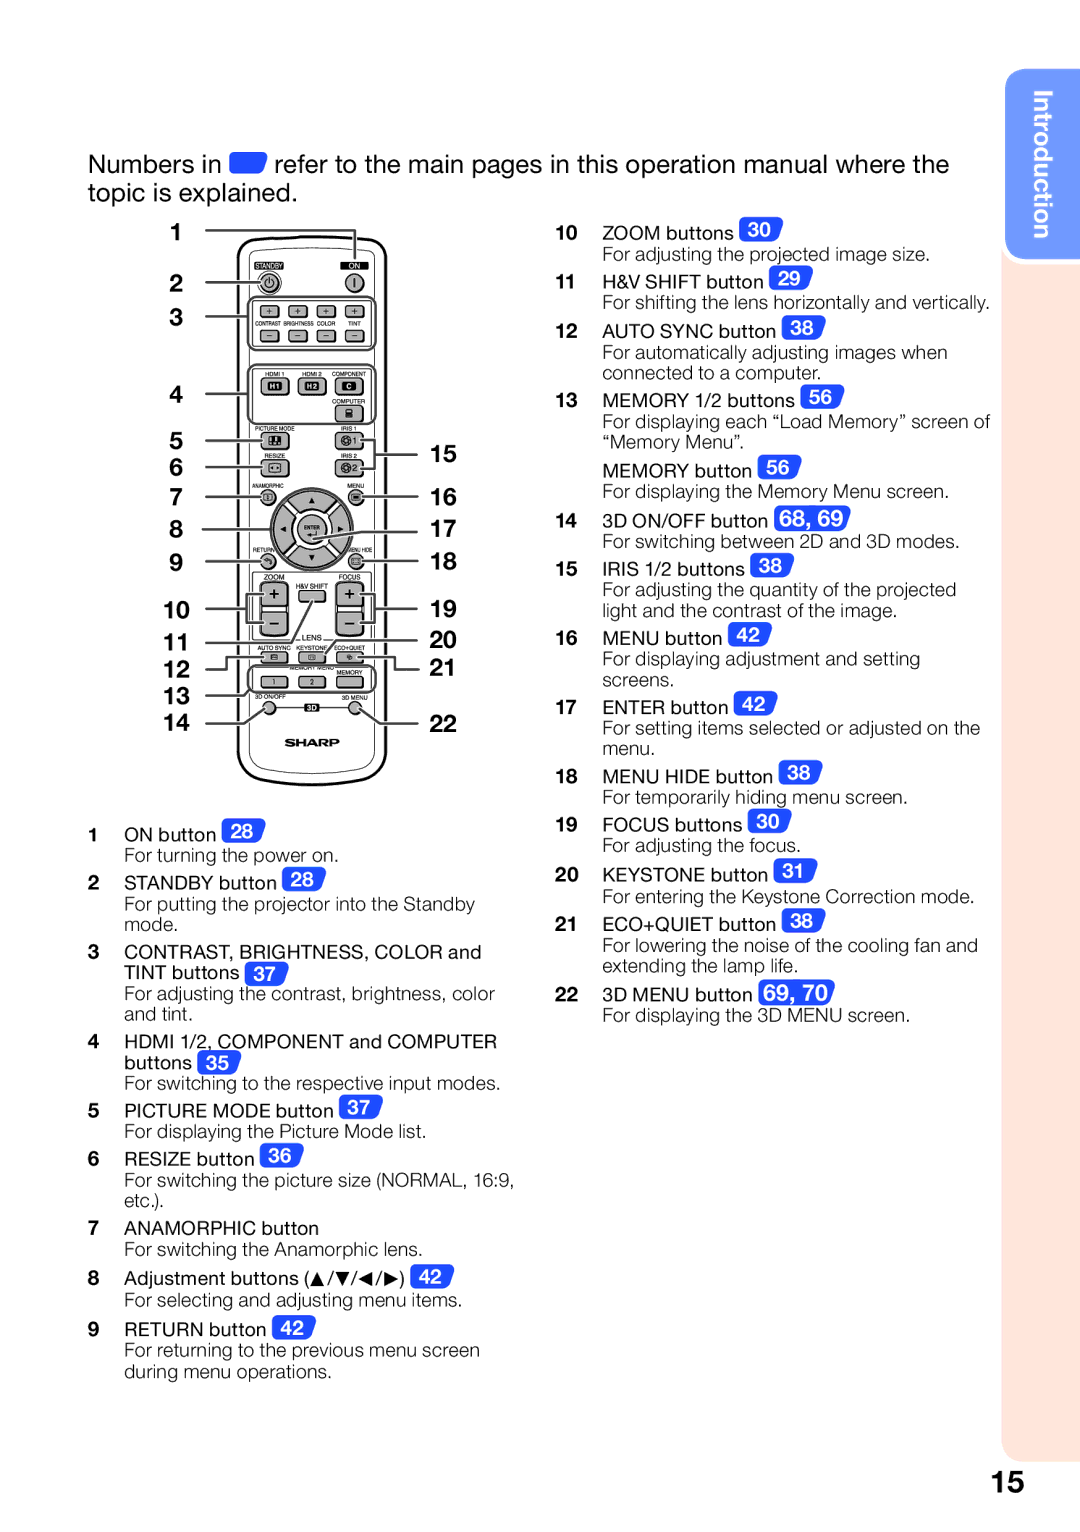
1ON button 28
For turning the power on.
2STANDBY button 28
For putting the projector into the Standby mode.
3CONTRAST, BRIGHTNESS, COLOR and TINT buttons 37
For adjusting the contrast, brightness, color and tint.
4HDMI 1/2, COMPONENT and COMPUTER buttons 35
For switching to the respective input modes.
5PICTURE MODE button 37
For displaying the Picture Mode list.
6RESIZE button 36
For switching the picture size (NORMAL, 16:9, etc.).
7ANAMORPHIC button
For switching the Anamorphic lens.
8Adjustment buttons (P/R/O/Q) 42 For selecting and adjusting menu items.
9RETURN button 42
For returning to the previous menu screen during menu operations.
10ZOOM buttons 30
For adjusting the projected image size.
11H&V SHIFT button 29
For shifting the lens horizontally and vertically.
12AUTO SYNC button 38
For automatically adjusting images when connected to a computer.
13MEMORY 1/2 buttons 56
For displaying each “Load Memory” screen of “Memory Menu”.
MEMORY button 56
For displaying the Memory Menu screen.
143D ON/OFF button 68, 69
For switching between 2D and 3D modes.
15IRIS 1/2 buttons 38
For adjusting the quantity of the projected light and the contrast of the image.
16MENU button 42
For displaying adjustment and setting screens.
17ENTER button 42
For setting items selected or adjusted on the menu.
18MENU HIDE button 38
For temporarily hiding menu screen.
19FOCUS buttons 30 For adjusting the focus.
20KEYSTONE button 31
For entering the Keystone Correction mode.
21ECO+QUIET button 38
For lowering the noise of the cooling fan and extending the lamp life.
223D MENU button 69, 70
For displaying the 3D MENU screen.
15