Enjoying 3D Image Viewing (Continued)
Supplied Accessories for the 3D Glasses
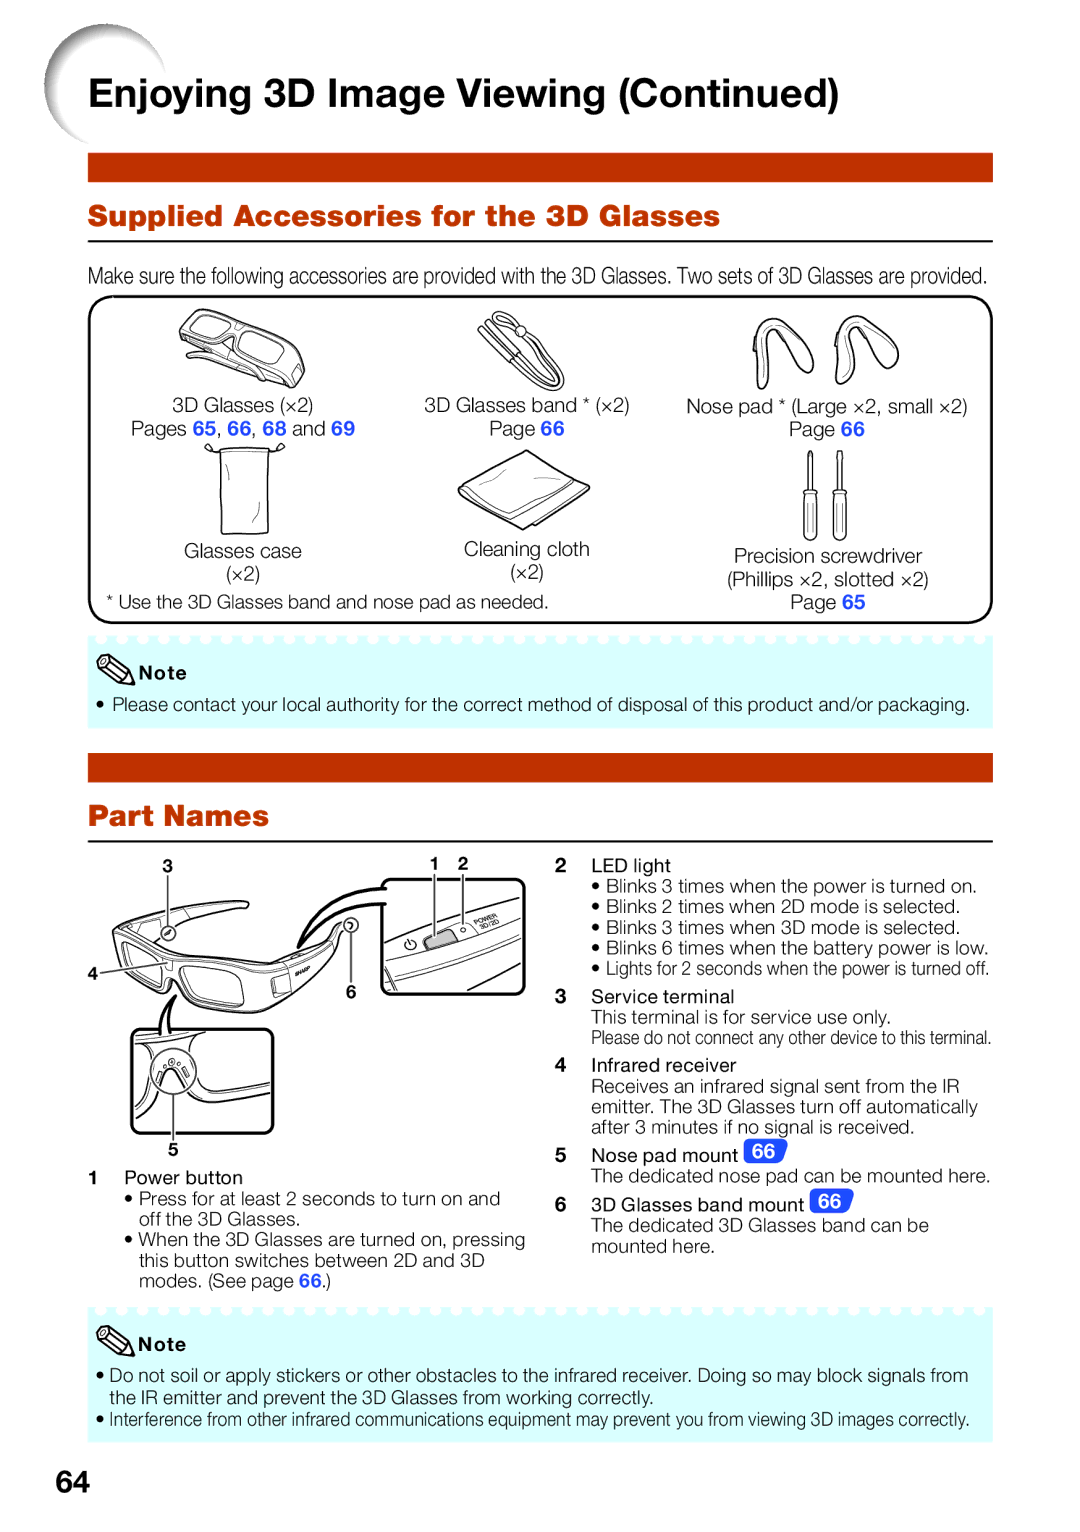
Make sure the following accessories are provided with the 3D Glasses. Two sets of 3D Glasses are provided.
3D Glasses (×2) | 3D Glasses band * (×2) | Nose pad * (Large ×2, small ×2) |
Pages 65, 66, 68 and 69 | Page 66 | Page 66 |
Glasses case | Cleaning cloth | Precision screwdriver |
(×2) | (×2) | (Phillips ×2, slotted ×2) |
* Use the 3D Glasses band and nose pad as needed. | Page 65 | |
![]() Note
Note
• Please contact your local authority for the correct method of disposal of this product and/or packaging.
Part Names
3 | 1 | 2 |
4 | 6 |
|
|
|
5
1Power button
•Press for at least 2 seconds to turn on and off the 3D Glasses.
•When the 3D Glasses are turned on, pressing this button switches between 2D and 3D modes. (See page 66.)
![]() Note
Note
2LED light
•Blinks 3 times when the power is turned on.
•Blinks 2 times when 2D mode is selected.
•Blinks 3 times when 3D mode is selected.
•Blinks 6 times when the battery power is low.
•Lights for 2 seconds when the power is turned off.
3Service terminal
This terminal is for service use only.
Please do not connect any other device to this terminal.
4Infrared receiver
Receives an infrared signal sent from the IR emitter. The 3D Glasses turn off automatically after 3 minutes if no signal is received.
5Nose pad mount 66
The dedicated nose pad can be mounted here.
63D Glasses band mount 66
The dedicated 3D Glasses band can be mounted here.
•Do not soil or apply stickers or other obstacles to the infrared receiver. Doing so may block signals from the IR emitter and prevent the 3D Glasses from working correctly.
•Interference from other infrared communications equipment may prevent you from viewing 3D images correctly.
64