4
nInstalling the ribbon cartridge
This printer uses a neat,
with automatic threading. To fit or change the ribbon car- tridge:
1.Turn off the power and remove the printer cover.
2.Slide the print head gently to the center of the printer. Wuvning: The print head gets hot during operation, so let it cool off before you touch it.
3.Set the release lever to either single sheet or sprock-
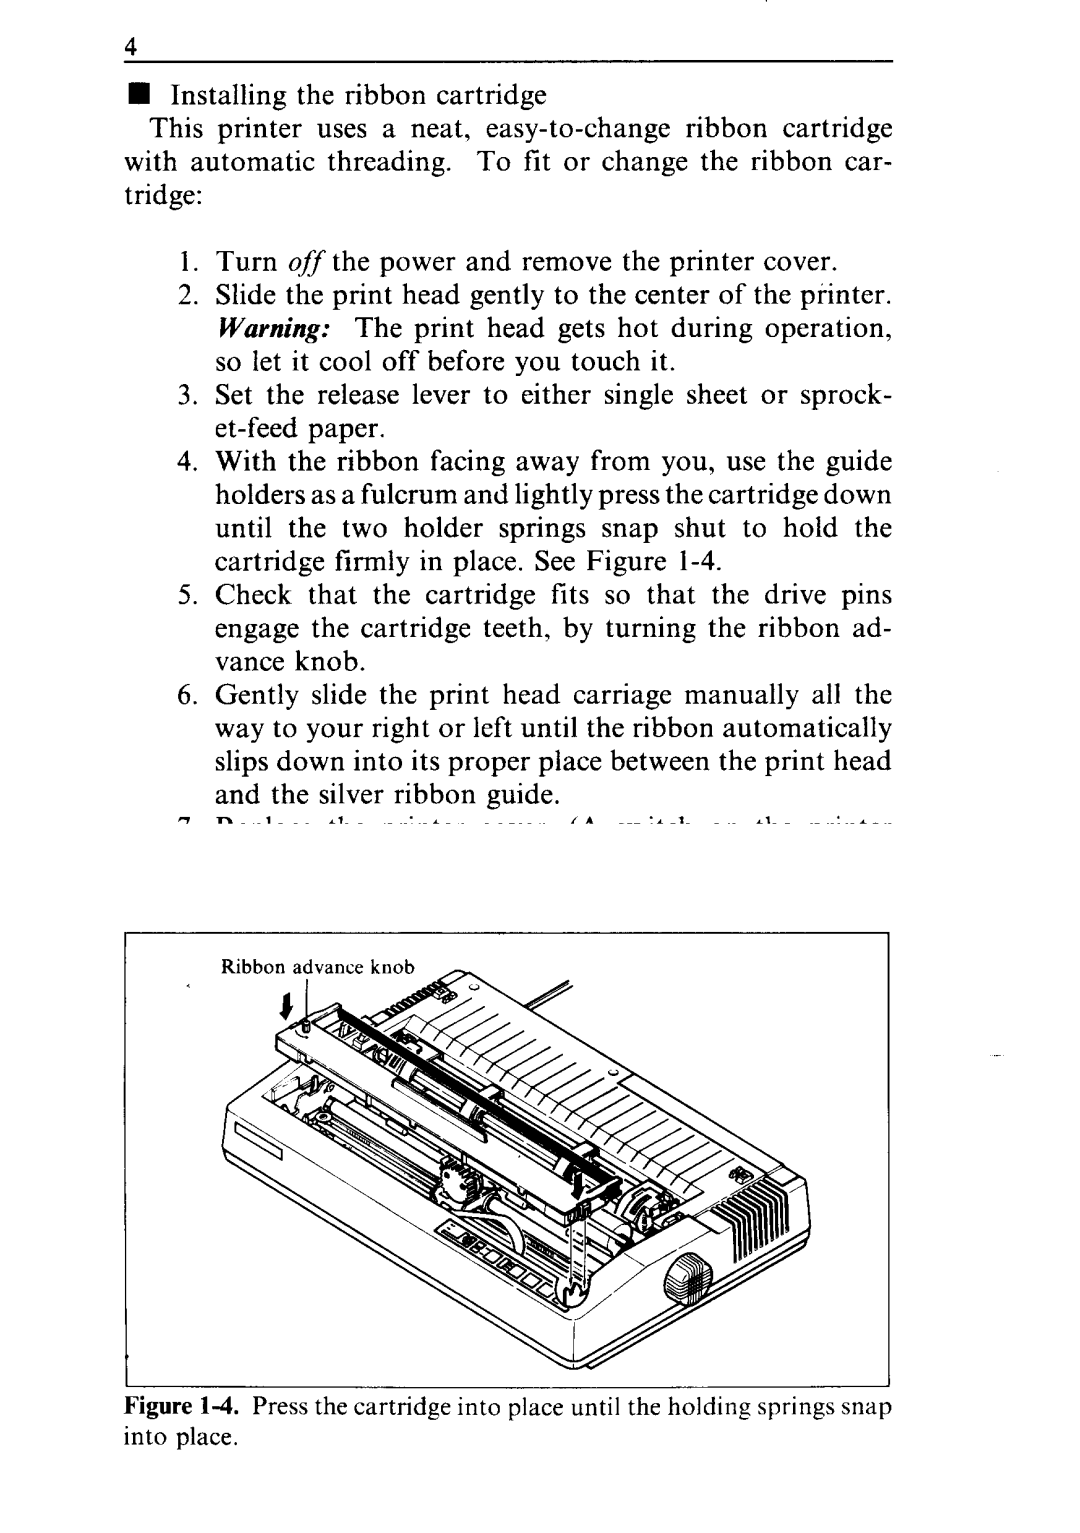
4.With the ribbon facing away from you, use the guide holders as a fulcrum and lightly press the cartridge down until the two holder springs snap shut to hold the cartridge firmly in place. See Figure
5.Check that the cartridge fits so that the drive pins engage the cartridge teeth, by turning the ribbon ad- vance knob.
6.Gently slide the print head carriage manually all the way to your right or left until the ribbon automatically slips down into its proper place between the print head and the silver ribbon guide.
7.Replace the printer cover. (A switch on the printer prevents the printer from operating when the cover is off.)