99
for the macro: one to define it, and one to use it. They are given in the Table
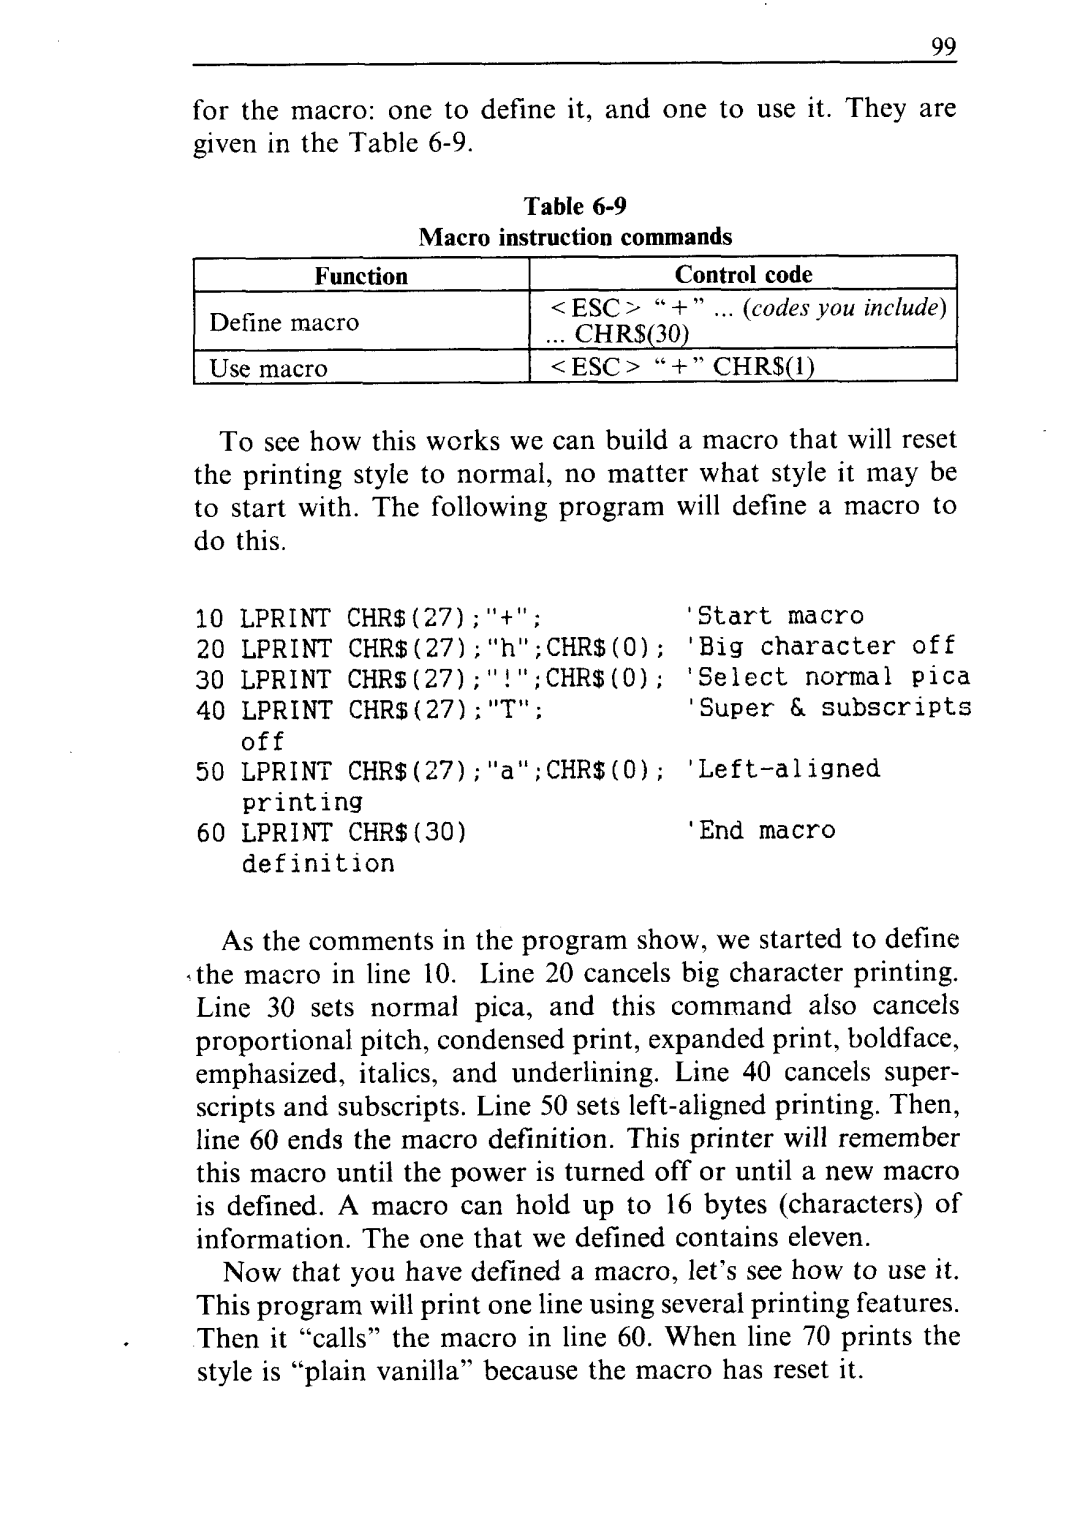
Function
Define macro
Use macro
Table
Macro instruction commands
Control code
<EfjCi “+” ...(codesyou include)
...CHR$(30)
< ESC > “+ ” CHR$(l)
To see how this works we can build a macro that will reset the printing style to normal, no matter what style it may be to start with. The following program will define a macro to do this.
10 LPRINT CHR$(27);‘It”; | ‘Start macro |
20LPRINT CHR$(27);“h”;CHR$(O); ‘Big character off
30LPRINT CHRs(27);“!“;CHR$(0) ; ‘Select normal pica
40 | LPRINT CHR$(27);“T” ; | ‘Super & subscripts |
| off | 0); |
50 | LPRINT CHR$(27);“a”;CHR$( | |
| printing |
|
60 LPRINT CHR$(30) | ‘End macro | |
| definition |
|
As the comments in the program show, we started to define the macro in line 10. Line 20 cancels big character printing. Line 30 sets normal pica, and this command also cancels proportional pitch, condensed print, expanded print, boldface, emphasized, italics, and underlining. Line 40 cancels super- scripts and subscripts. Line 50 sets
Now that you have defined a macro, let’s see how to use it. This program will print one line using several printing features. Then it “calls” the macro in line 60. When line 70 prints the style is “plain vanilla” because the macro has reset it.