7.3. Camera Selection
Select the camera to be displayed or operated.
1. Press the camera number to be selected using the |
numerical pad. |
2. Press the CAM key. |
[Example]
1 5
The selected camera number is displayed on the LCD |
screen (CAM section). |
CAM
LCD screen
7 | 1 | 1 5 |
|
CAM MENU | MON | CAM | POS |
DVR |
Camera No.
displayed on the full screen
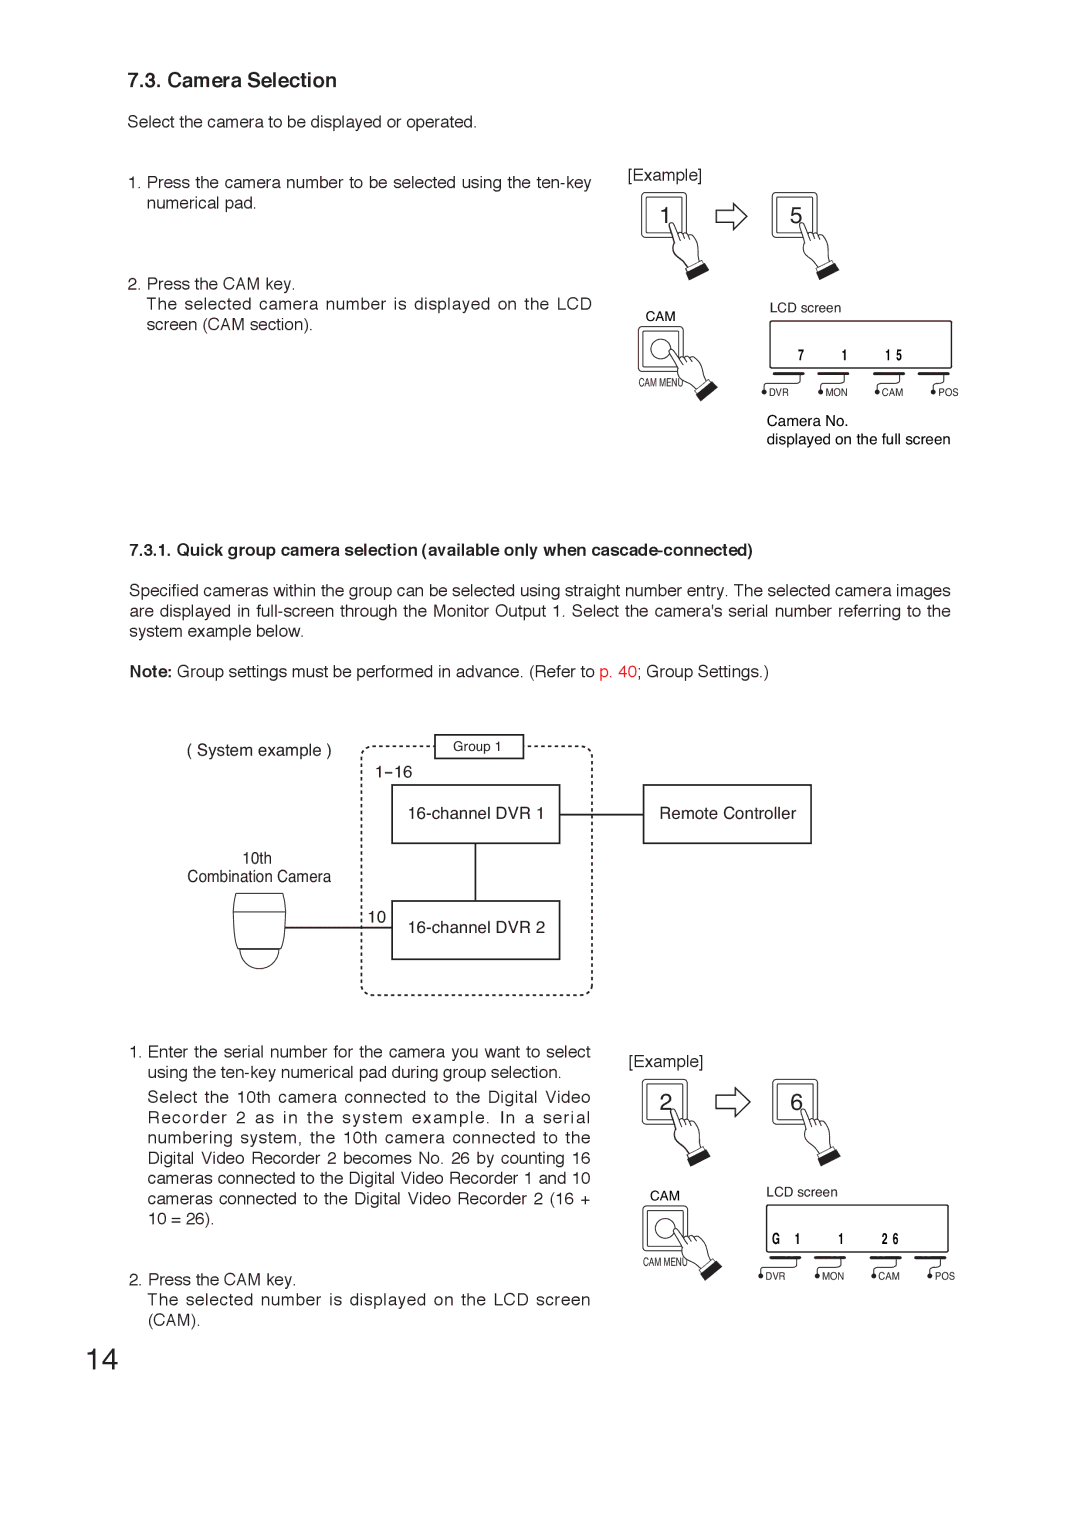
7.3.1. Quick group camera selection (available only when
Specified cameras within the group can be selected using straight number entry. The selected camera images are displayed in
Note: Group settings must be performed in advance. (Refer to p. 40; Group Settings.)
( System example ) | Group 1 |
10th Combination Camera
10
Remote Controller
1.Enter the serial number for the camera you want to select using the
Select the 10th camera connected to the Digital Video Recorder 2 as in the system example. In a serial numbering system, the 10th camera connected to the Digital Video Recorder 2 becomes No. 26 by counting 16 cameras connected to the Digital Video Recorder 1 and 10 cameras connected to the Digital Video Recorder 2 (16 + 10 = 26).
2.Press the CAM key.
The selected number is displayed on the LCD screen (CAM).
[Example]
2 6
CAM | LCD screen |
|
|
|
|
| |
| G 1 | 1 | 2 6 |
CAM MENU
DVR | MON | CAM | POS |
14