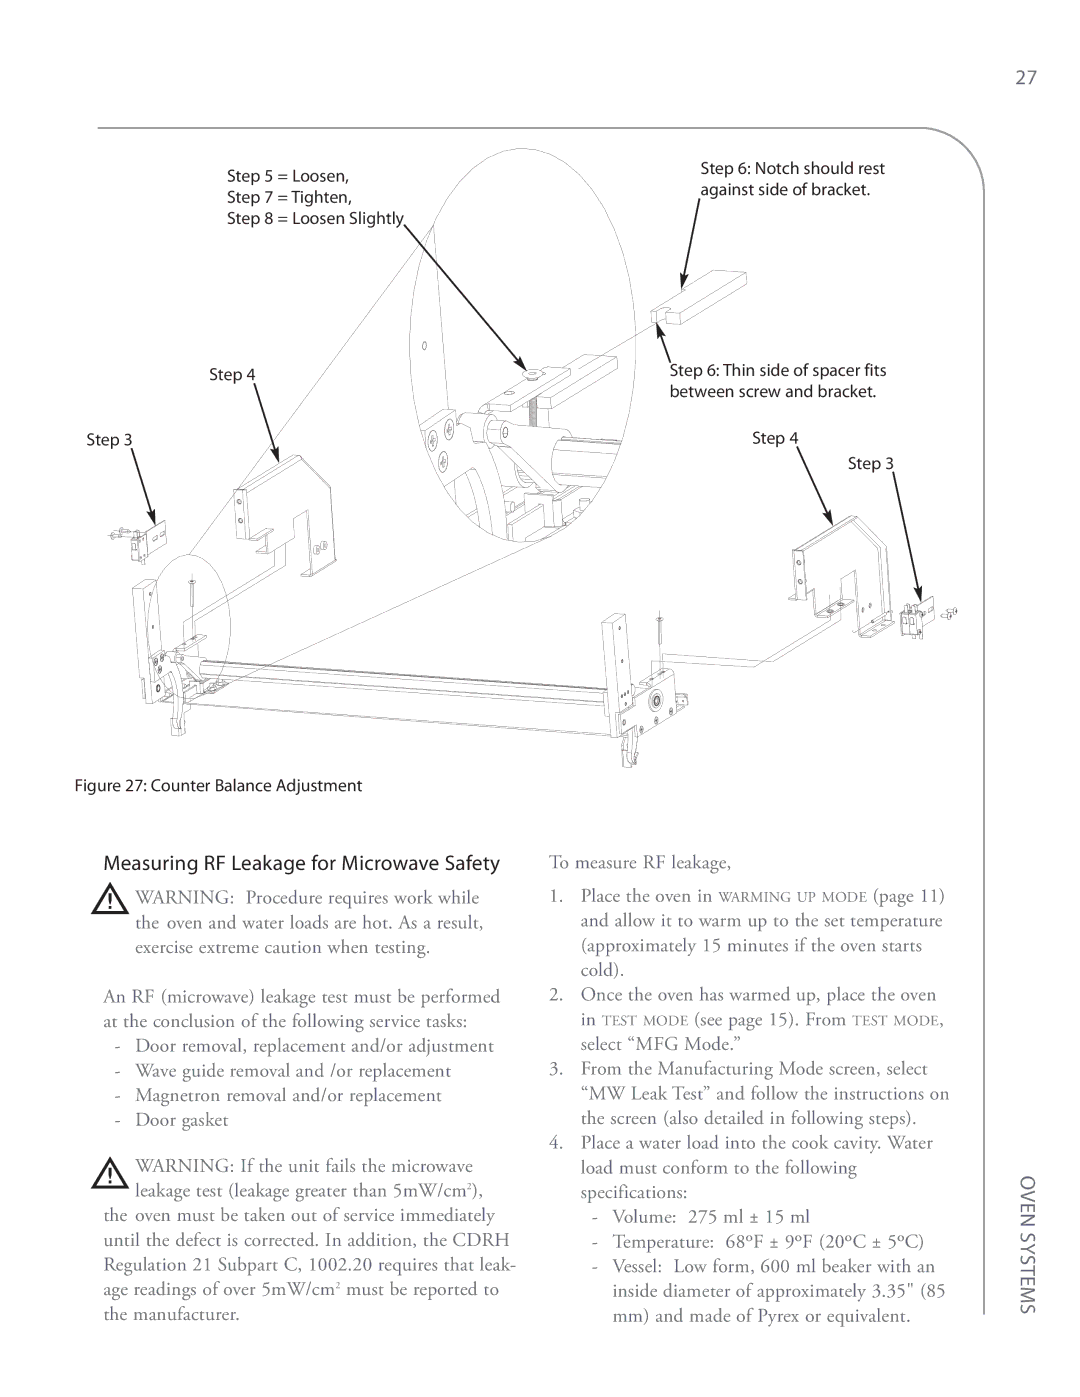
Step 5 = Loosen,
Step 7 = Tighten,
Step 8 = Loosen Slightly
Step 4
Step 3
27
Step 6: Notch should rest against side of bracket.
Step 6: Thin side of spacer fits between screw and bracket.
Step 4
Step 3
Figure 27: Counter Balance Adjustment
Measuring RF Leakage for Microwave Safety
![]() WARNING: Procedure requires work while the oven and water loads are hot. As a result, exercise extreme caution when testing.
WARNING: Procedure requires work while the oven and water loads are hot. As a result, exercise extreme caution when testing.
An RF (microwave) leakage test must be performed at the conclusion of the following service tasks:
-Door removal, replacement and/or adjustment
-Wave guide removal and /or replacement
-Magnetron removal and/or replacement
-Door gasket
WARNING: If the unit fails the microwave leakage test (leakage greater than 5mW/cm2),
the oven must be taken out of service immediately until the defect is corrected. In addition, the CDRH Regulation 21 Subpart C, 1002.20 requires that leak- age readings of over 5mW/cm2 must be reported to the manufacturer.
To measure RF leakage,
1.Place the oven in WARMING UP MODE (page 11) and allow it to warm up to the set temperature (approximately 15 minutes if the oven starts cold).
2.Once the oven has warmed up, place the oven in TEST MODE (see page 15). From TEST MODE, select “MFG Mode.”
3.From the Manufacturing Mode screen, select “MW Leak Test” and follow the instructions on the screen (also detailed in following steps).
4.Place a water load into the cook cavity. Water load must conform to the following specifications:
-Volume: 275 ml ± 15 ml
-Temperature: 68ºF ± 9ºF (20ºC ± 5ºC)
-Vessel: Low form, 600 ml beaker with an inside diameter of approximately 3.35" (85 mm) and made of Pyrex or equivalent.
OVEN SYSTEMS
