Three ways to scan
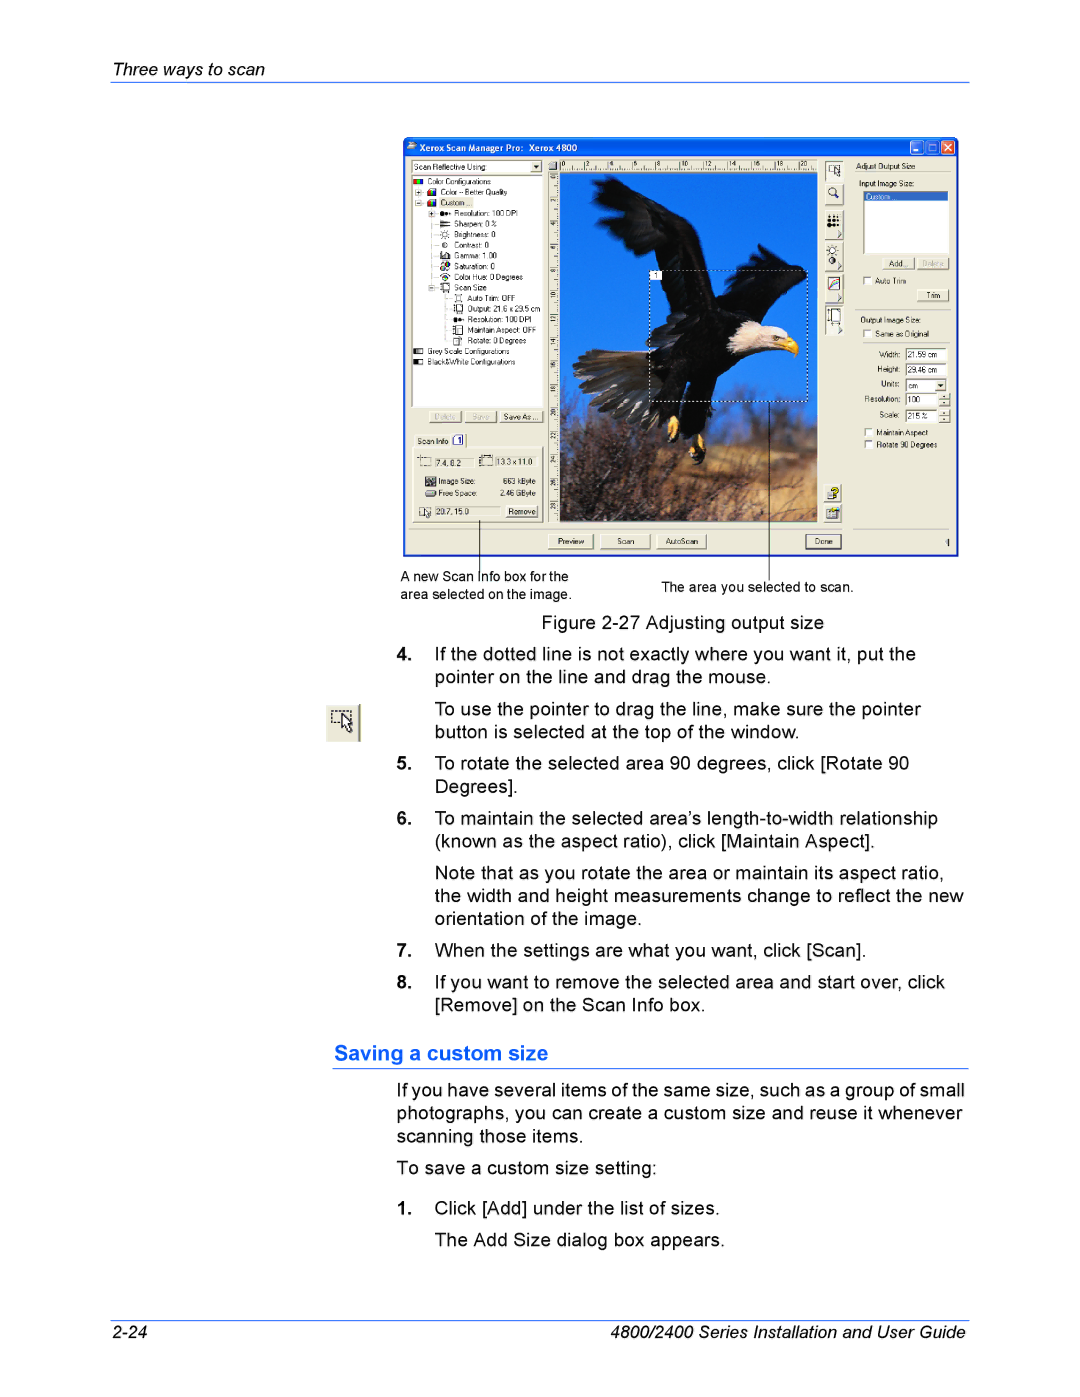
A new Scan Info box for the area selected on the image.
The area you selected to scan.
Figure 2-27 Adjusting output size
4.If the dotted line is not exactly where you want it, put the pointer on the line and drag the mouse.
To use the pointer to drag the line, make sure the pointer button is selected at the top of the window.
5.To rotate the selected area 90 degrees, click [Rotate 90 Degrees].
6.To maintain the selected area’s length-to-width relationship (known as the aspect ratio), click [Maintain Aspect].
Note that as you rotate the area or maintain its aspect ratio, the width and height measurements change to reflect the new orientation of the image.
7.When the settings are what you want, click [Scan].
8.If you want to remove the selected area and start over, click [Remove] on the Scan Info box.
Saving a custom size
If you have several items of the same size, such as a group of small photographs, you can create a custom size and reuse it whenever scanning those items.
To save a custom size setting:
1.Click [Add] under the list of sizes. The Add Size dialog box appears.
4800/2400 Series Installation and User Guide |