Three ways to scan
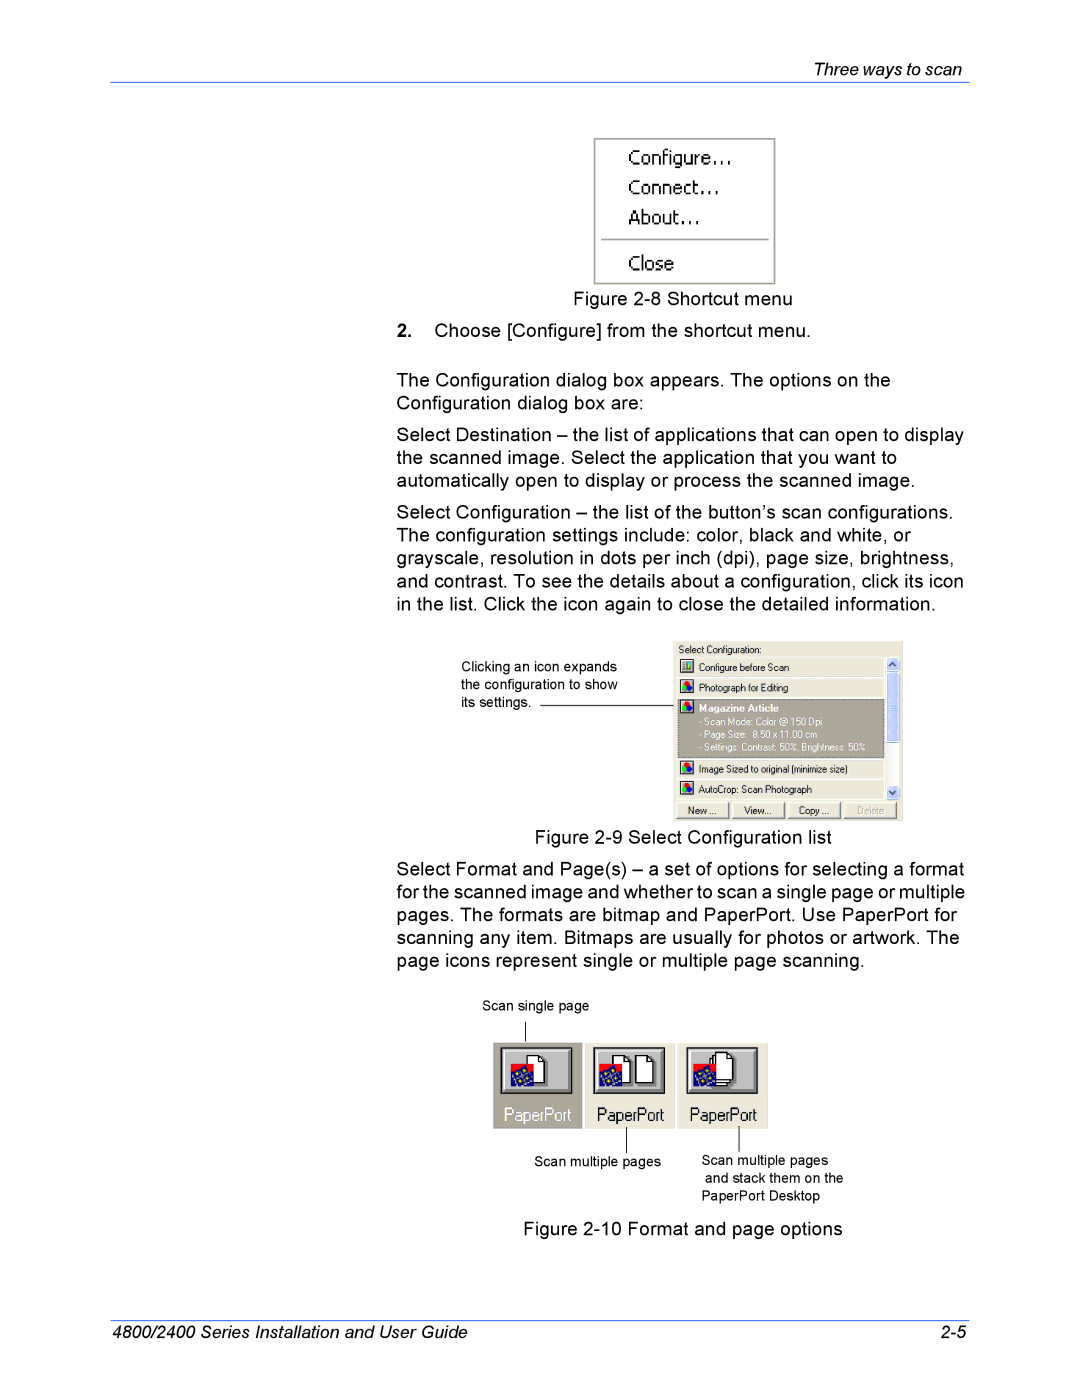
Figure 2-8 Shortcut menu
2.Choose [Configure] from the shortcut menu.
The Configuration dialog box appears. The options on the Configuration dialog box are:
Select Destination – the list of applications that can open to display the scanned image. Select the application that you want to automatically open to display or process the scanned image.
Select Configuration – the list of the button’s scan configurations. The configuration settings include: color, black and white, or grayscale, resolution in dots per inch (dpi), page size, brightness, and contrast. To see the details about a configuration, click its icon in the list. Click the icon again to close the detailed information.
Clicking an icon expands the configuration to show its settings.
Figure 2-9 Select Configuration list
Select Format and Page(s) – a set of options for selecting a format for the scanned image and whether to scan a single page or multiple pages. The formats are bitmap and PaperPort. Use PaperPort for scanning any item. Bitmaps are usually for photos or artwork. The page icons represent single or multiple page scanning.
Scan single page
|
|
|
|
Scan multiple | pages | Scan multiple pages | |
|
| and stack them on the | |
|
| PaperPort Desktop | |
Figure 2-10 Format and page options
4800/2400 Series Installation and User Guide |
