Connecting to Various Devices (Cont.)
Examples of System Configuration
Before connection, be sure to turn off both the projector and the equipment.
•Also, read the manuals which came with the equipment.
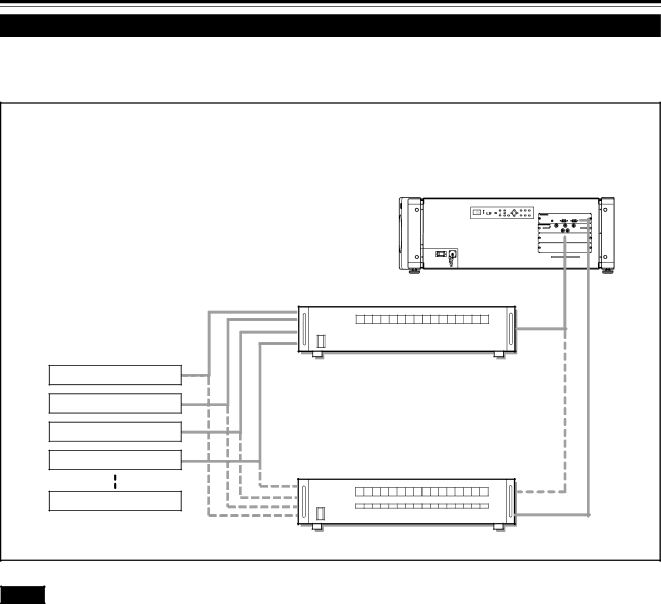
Example of a basic system
•By connecting an RGB switcher, a variety of input sources can be input to the projector using RGB signals. Using the remote control unit supplied, you can select the channel for an input source and project an image optimal to the source.
•By connecting the dedicated switcher, you can switch the chan-
nel of the projector automatically by selecting the channel on | Projector | ||
the dedicated switcher. |
|
|
|
|
|
|
|
RGB switcher (not supplied)
HDTV 1 |
|
HDTV 2 |
|
Computer 1 |
|
| Dedicated switcher |
Computer 2 | (not supplied) |
Notes |
•Video image played back on devices, such as a VCR, whose image signal is unstable may be disturbed. (This may occur when the projector is not yet adjusted at the time of installation, or when a new device is added.)
In such a case, consult your dealer to adjust the projector.
•For buying and installing the dedicated switcher, consult your dealer.
26