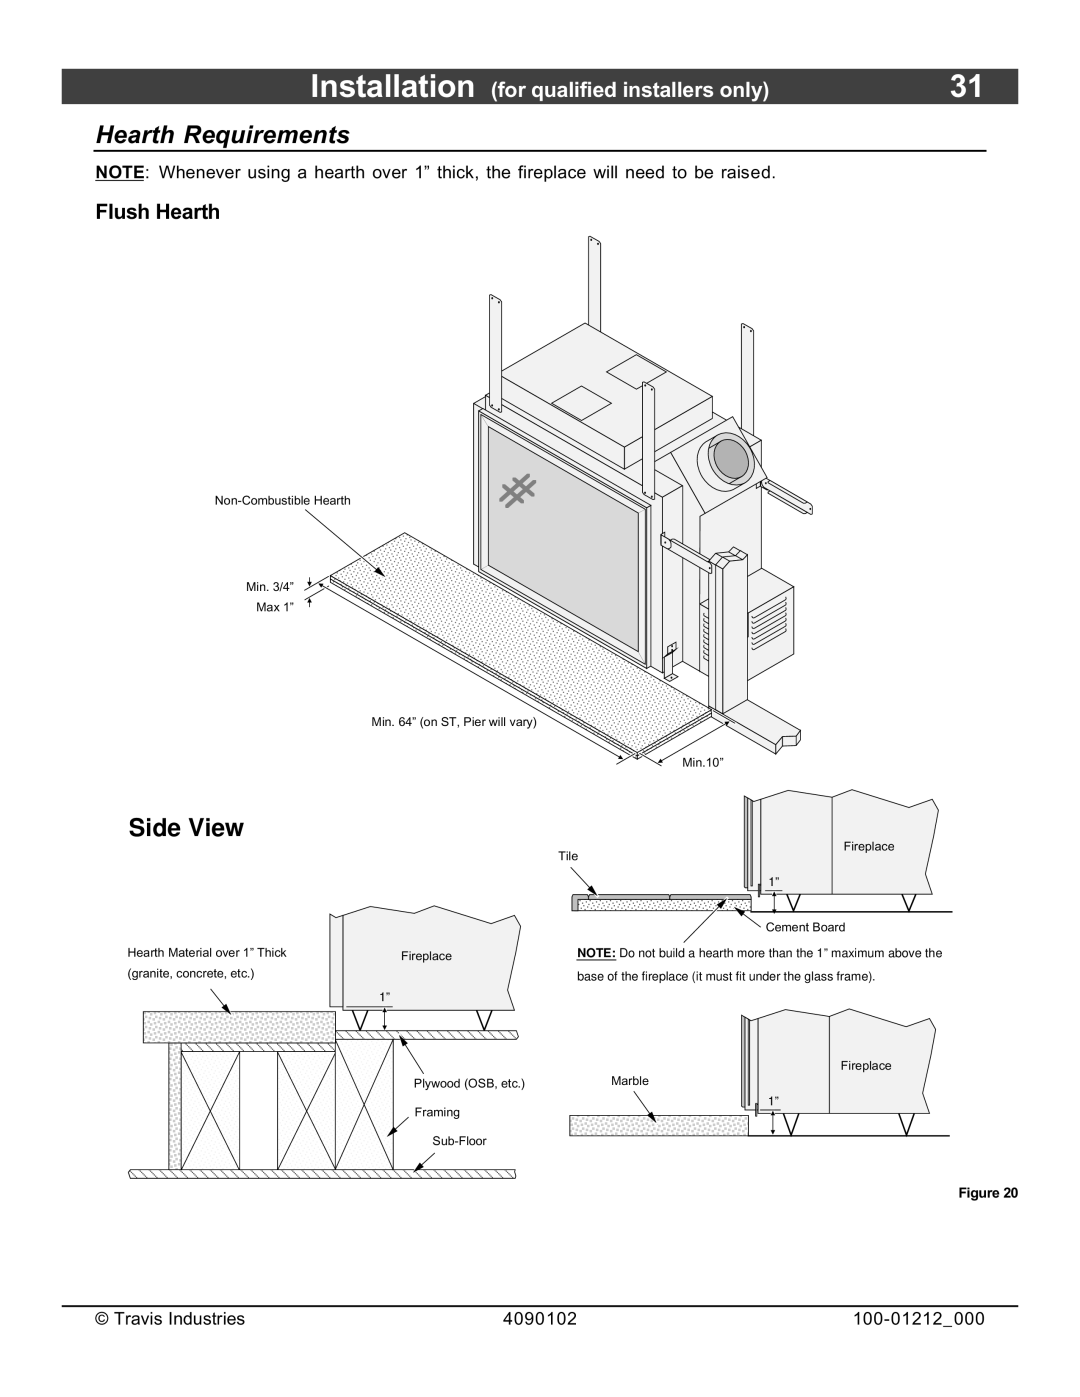
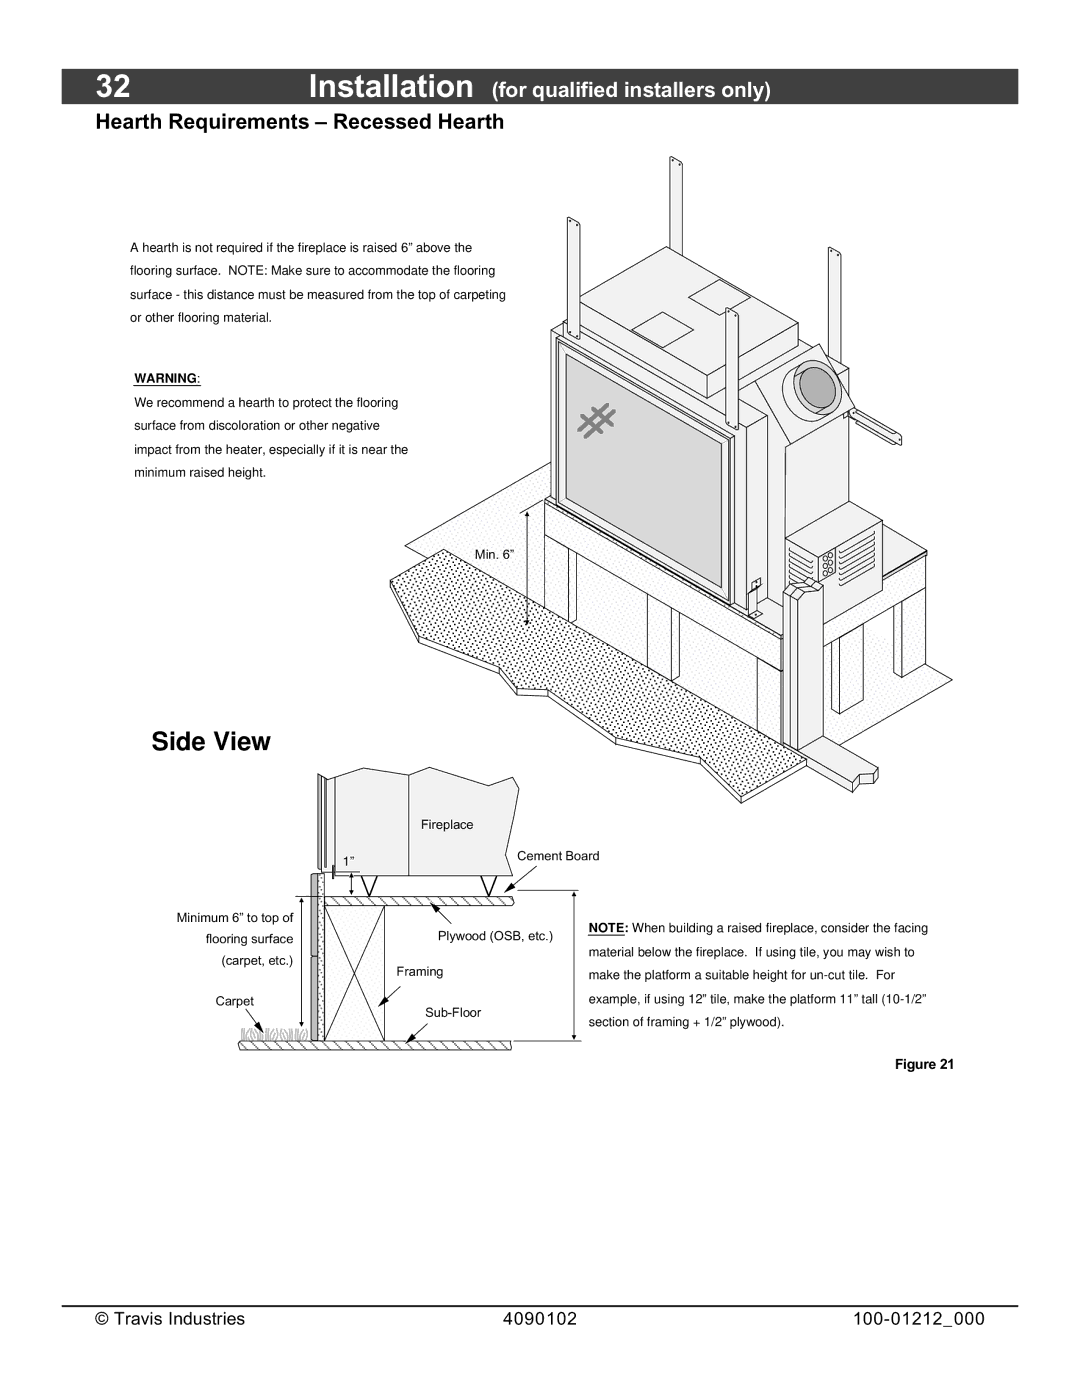
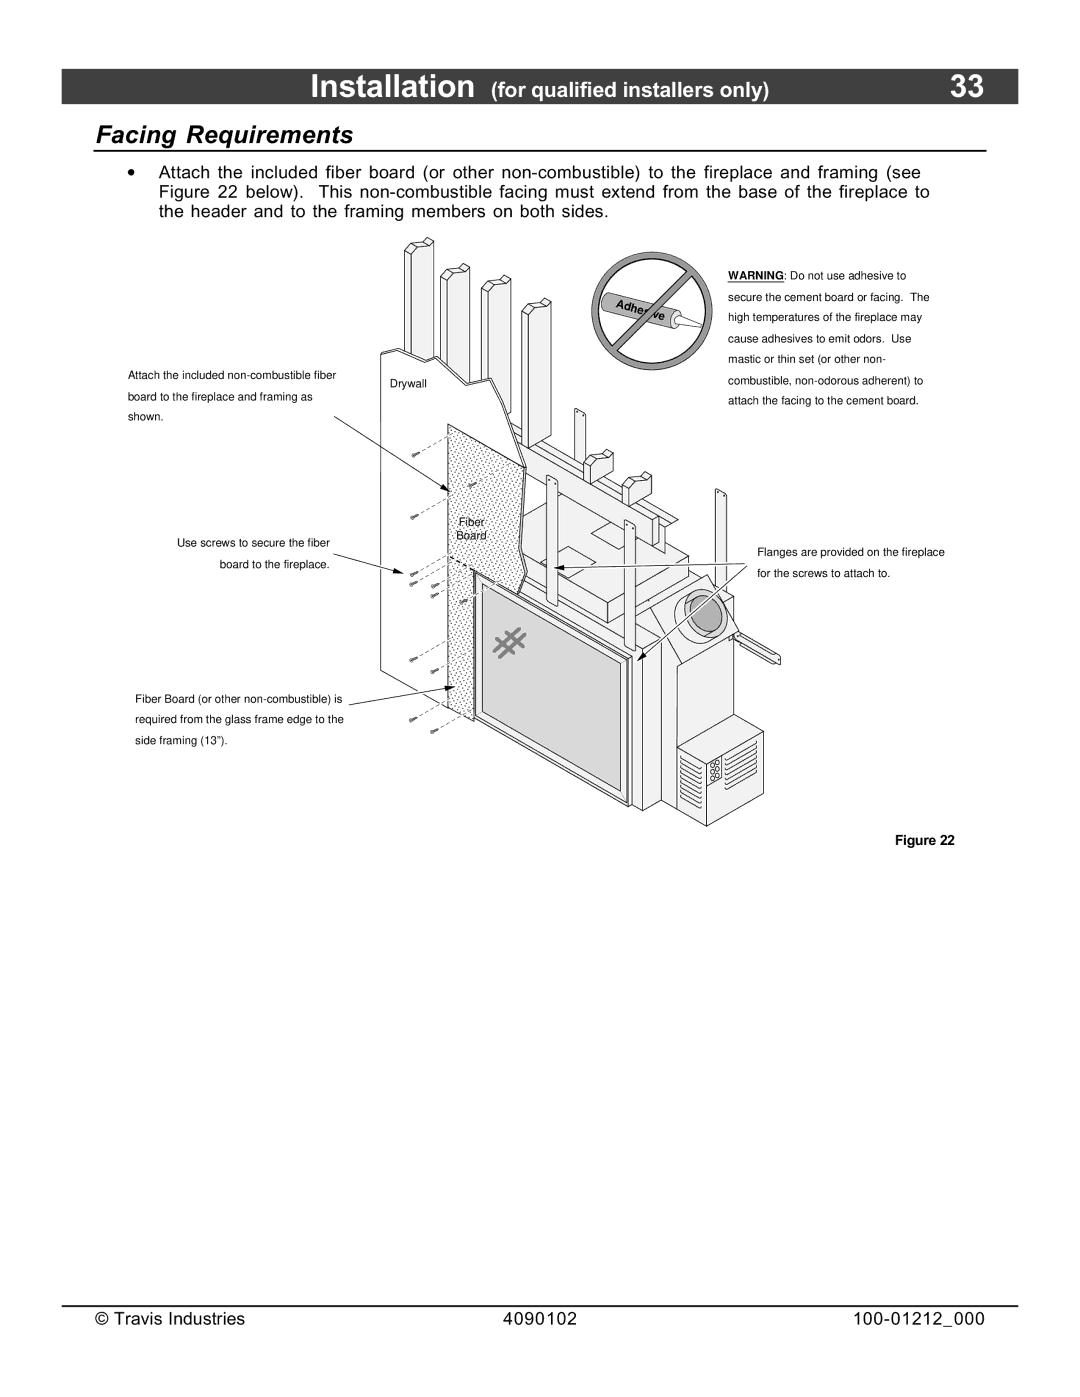
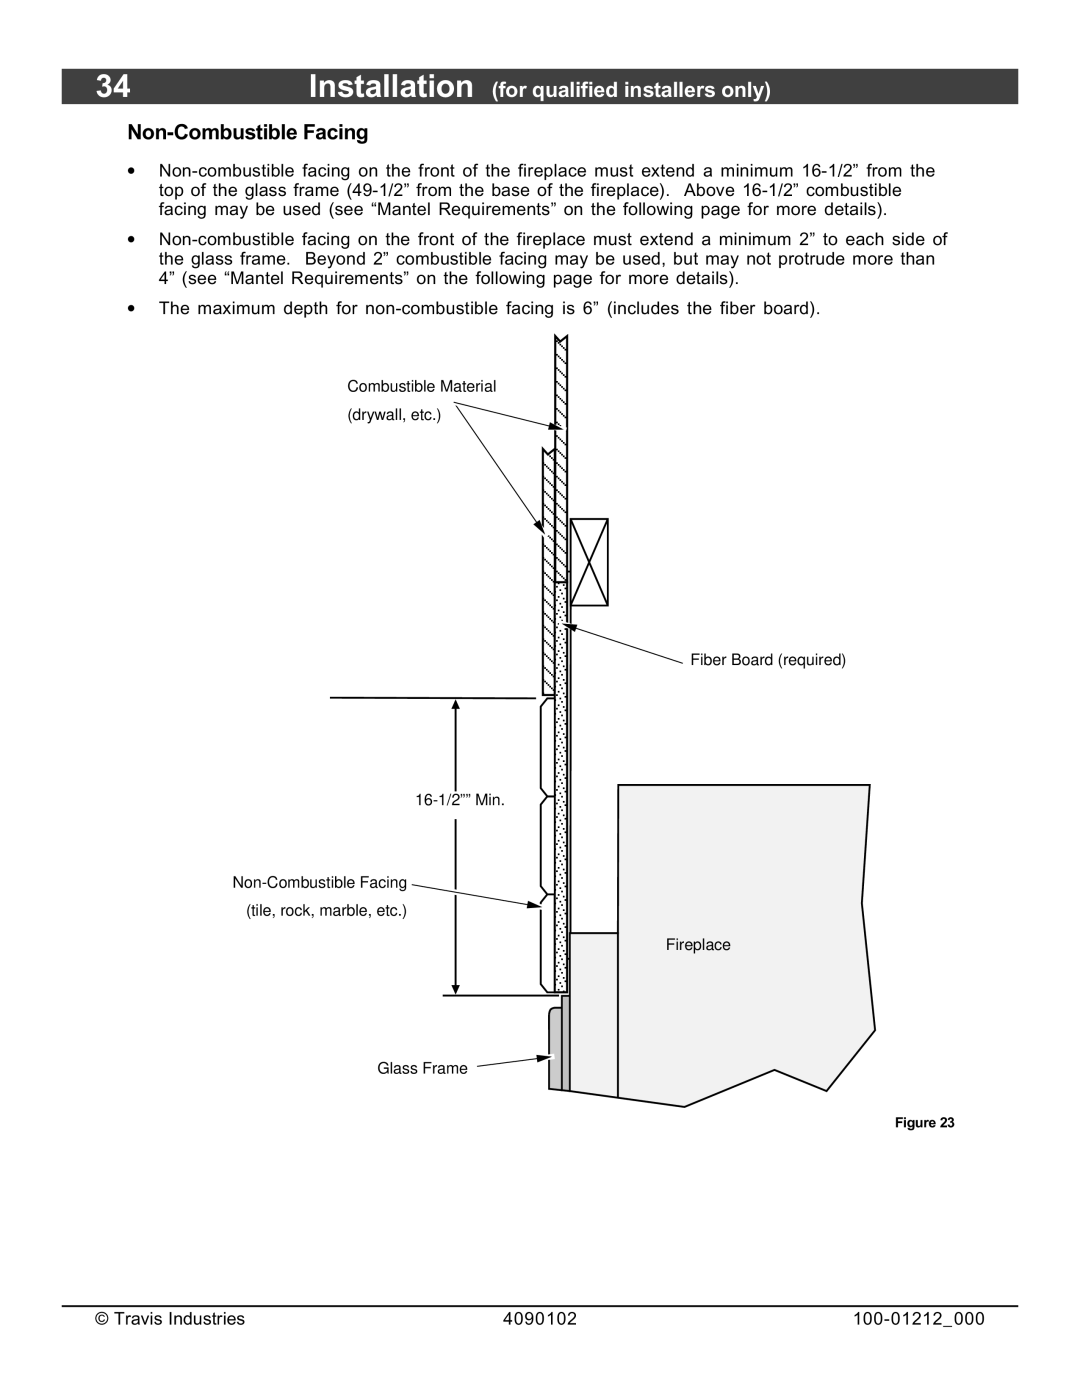
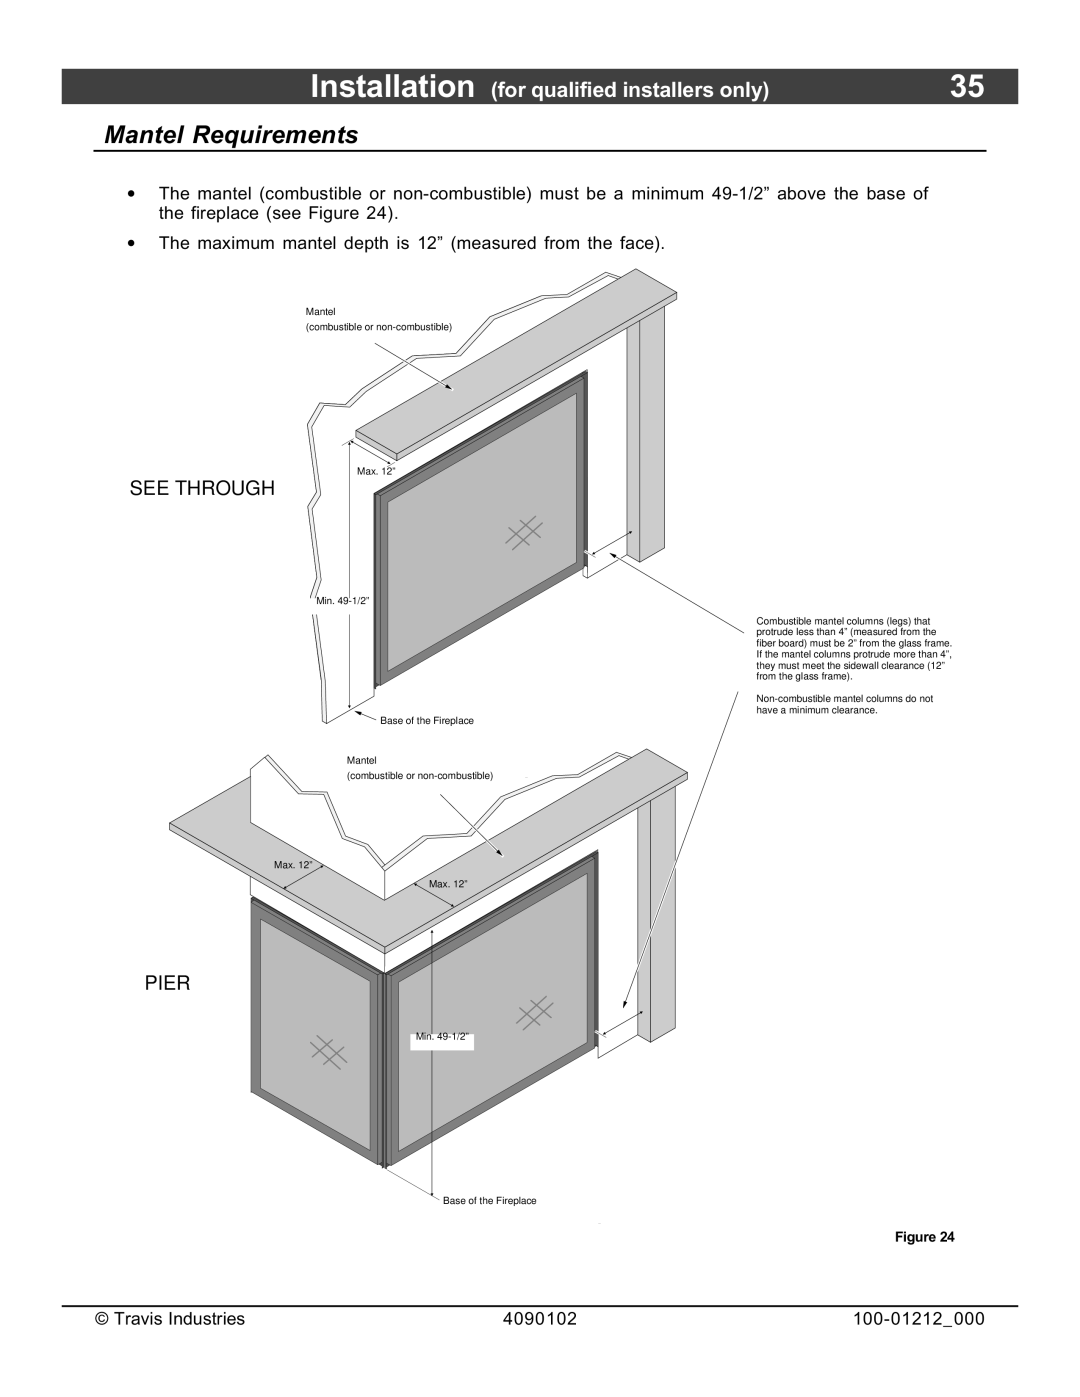
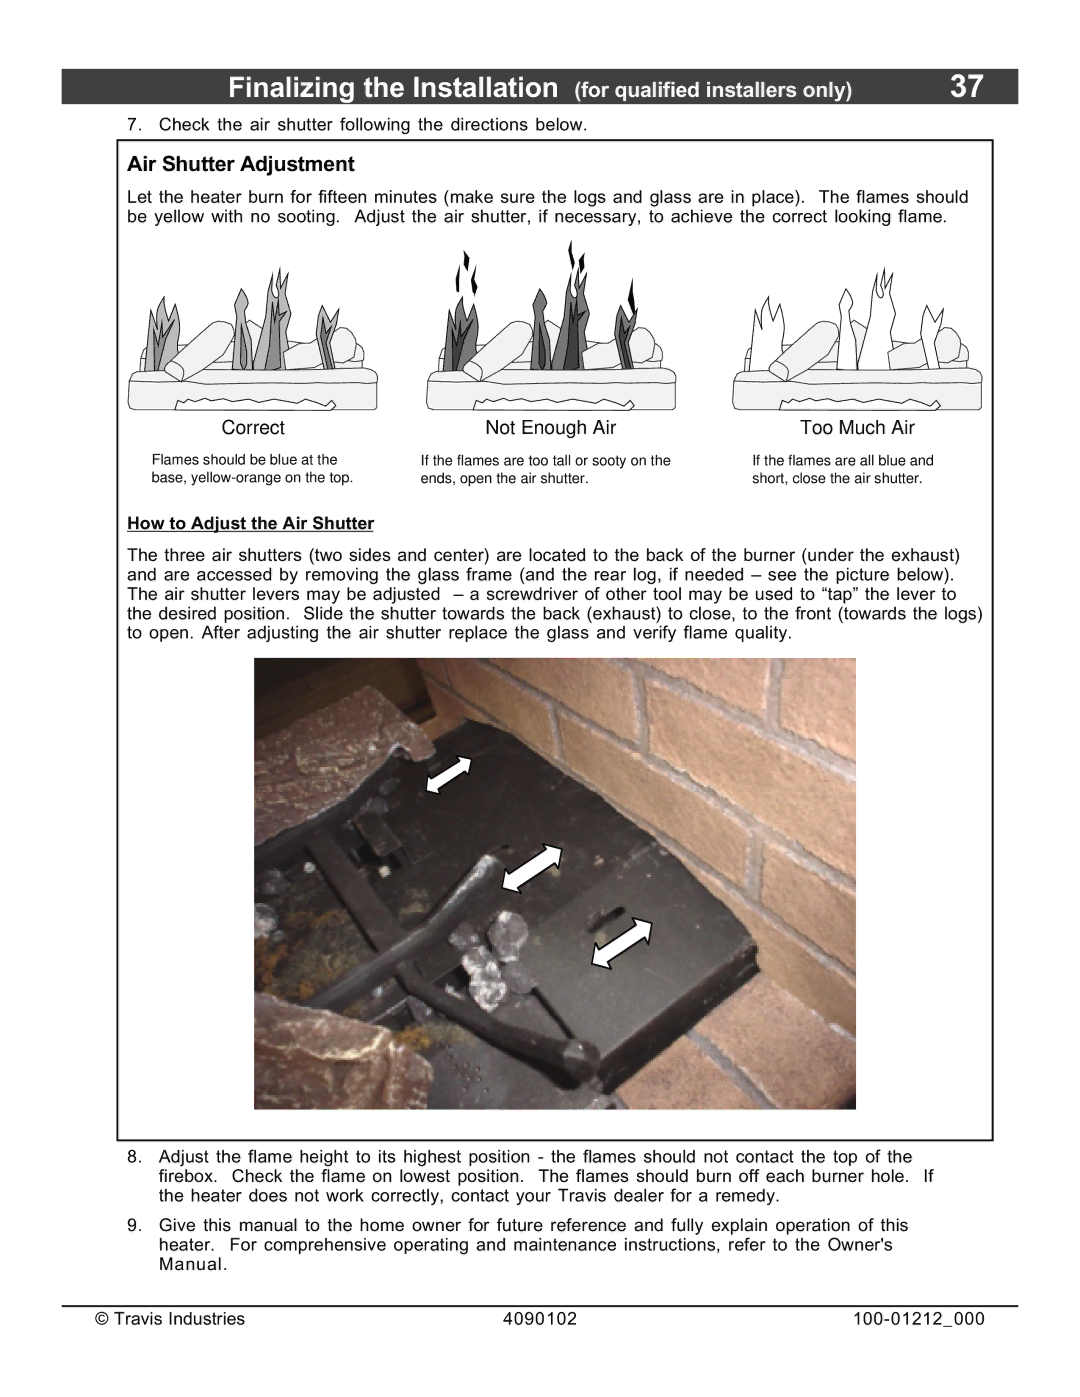
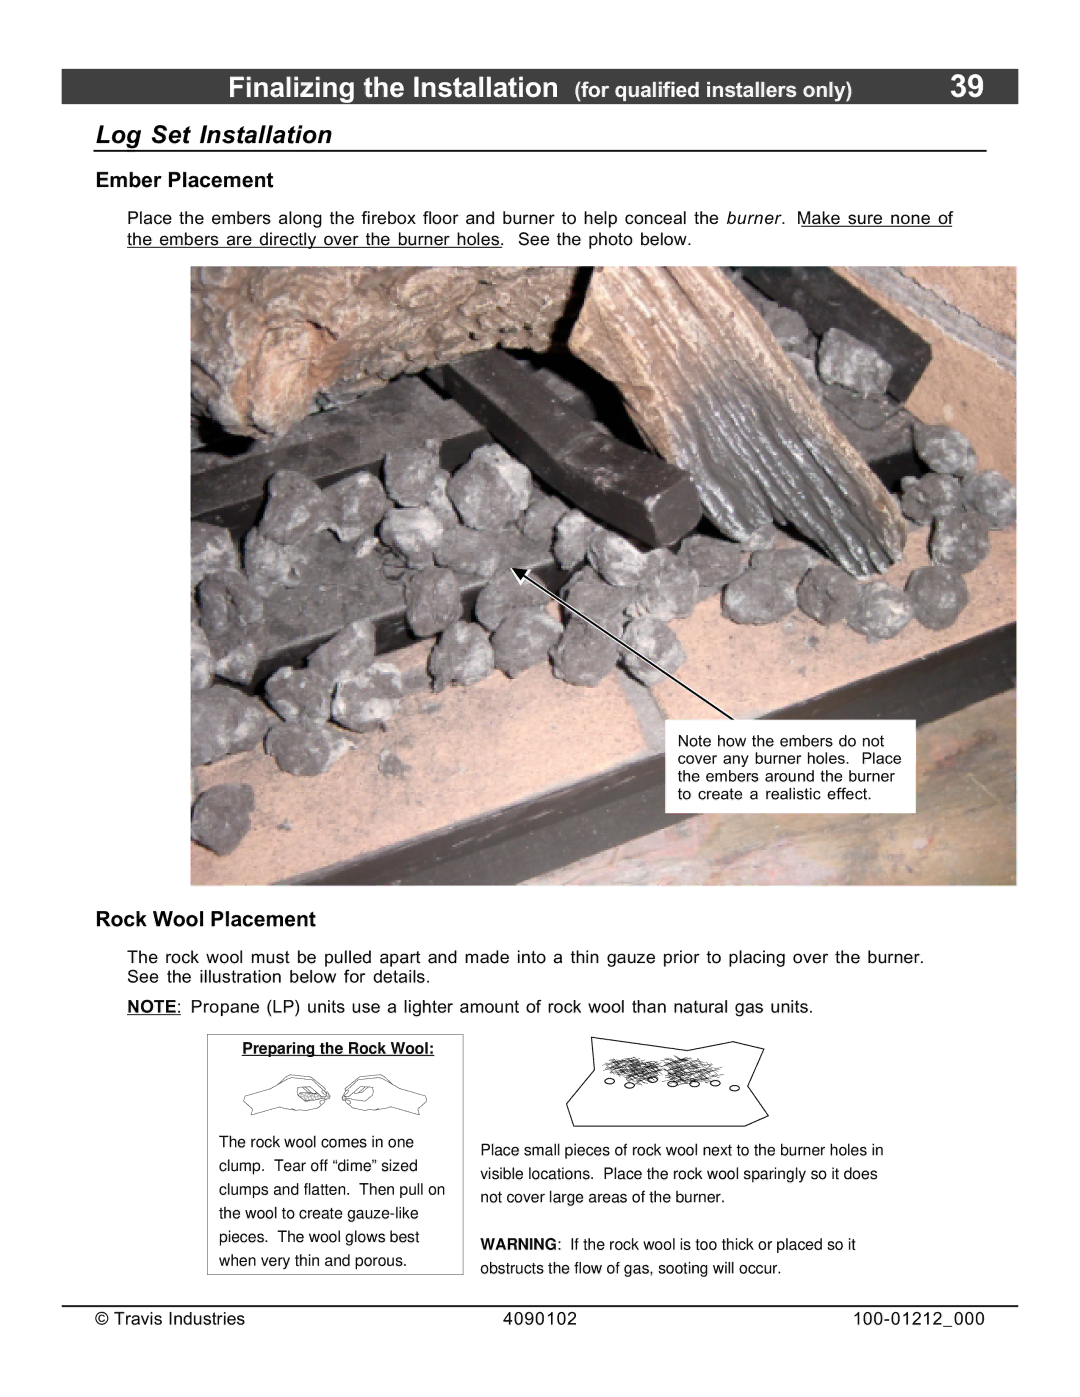
FireplaceXtrordinair 36CF Glass Frame Removal and Installation, Glass Frame Glass Trim

Page 38

38 Finalizing the Installation (for qualified installers only)

Glass Frame Removal and Installation

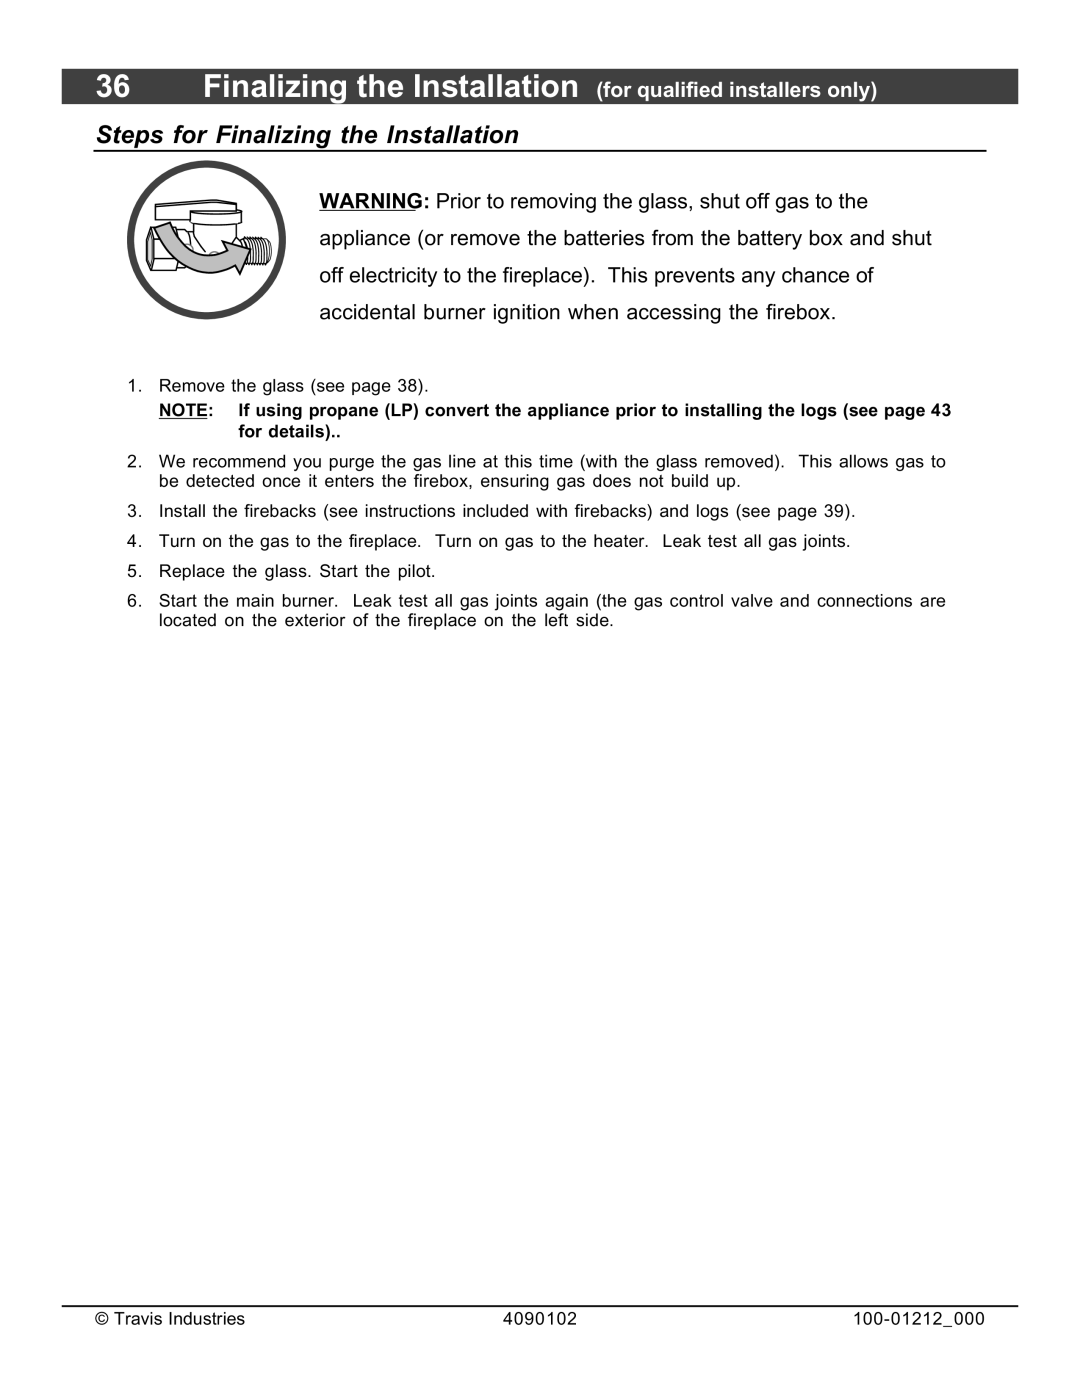
WARNING: Prior to removing the glass, shut off gas to the appliance (or remove the

batteries from the battery box and shut off electricity to the fireplace). This

prevents any chance of accidental burner ignition when accessing the firebox.

Warning: The appliance must be completely cool before removing the glass.

Warning: Do not strike or slam the glass.

Remove the glass trim (see directions to the right).

The glass frame is held in place with two latches along the top and two slots, with brackets, along the bottom. Insert the glass latch tool into the latch, pull it forward and up to detach the latches (see pictures below). Once the latches are free, pivot the frame out and lift it off the brackets at the bottom of the glass frame.

Glass Frame

Glass Trim

Attach the glass trim to the glass frame by inserting the hooks on the trim over the studs on the glass frame. When properly aligned, the frame will push straight in and drop into place.

Figure 25

© Travis Industries

4090102

100-01212_000

Image 38
Contents CF ST/Pier Gas Fireplace 2Introduction Overview Listing DetailsTable of Contents Safety Precautions Safety WarningsSafety Precautions Specifications Features and SpecificationsInstallation Options DimensionsAdditional Items Required Recommended Installation ProcedurePacking List Massachusetts Requirements Preparing the Fireplace Stand-offs Raised Fireplaces Fireplace Placement RequirementsClearances Minimum Framing 36 CF ST See Through BackFraming Dimensions 36 CF Pier FrontAttaching Stand-Offs to Framing Required Electrical Connection Battery Pack / Learn Switch Installation Do not route the wires over the top FireplaceBattery Installation Steps for Installing the Battery Box and Learn SwitchInstallation Warning Remote Synchronization Remote Synchronization Synchronizing the RemoteGas Inlet Pressure Gas Line RequirementsGas Line Connection Approved Vent Vent InstallationVent Requirements Altitude ConsiderationsVent Clearances Vent LocationApproved Vent Configurations Exhaust Restrictor AdjustmentApproved Vent Configuration Rear Vent, Horz. Term 45 Elbow 0feet Max 5feetFeet max 0feet 5feet 10feet 15feet 20max Max 0feet 5feet 10feet 15feet 20max Feet Max Feet max 0feet 5feet 10feet 15feet 20max Installation for qualified installers only 0feet 5feet Feet max 10feet 15feet 40feet max Feet 5feet 10feet 15feet 20max Max 40feet max Feet 5feet 10feet 15feet Termination Requirements Hearth Requirements Flush HearthHearth Requirements Recessed Hearth Facing Requirements Non-Combustible Facing Mantel Requirements See ThroughFinalizing the Installation for qualified installers only Steps for Finalizing the InstallationFinalizing the Installation for qualified installers only Air Shutter AdjustmentGlass Frame Removal and Installation Glass Frame Glass TrimRock Wool Placement Log Set InstallationEmber Placement Log Installation Top 2 logs last 2 logs Picture from opposite side Picture from end Pier only LP Conversion Instructions Finalizing the Installation for qualified installers only Orifice Table Rate Screws Power Heat Duct Installation Andiron Installation48Index