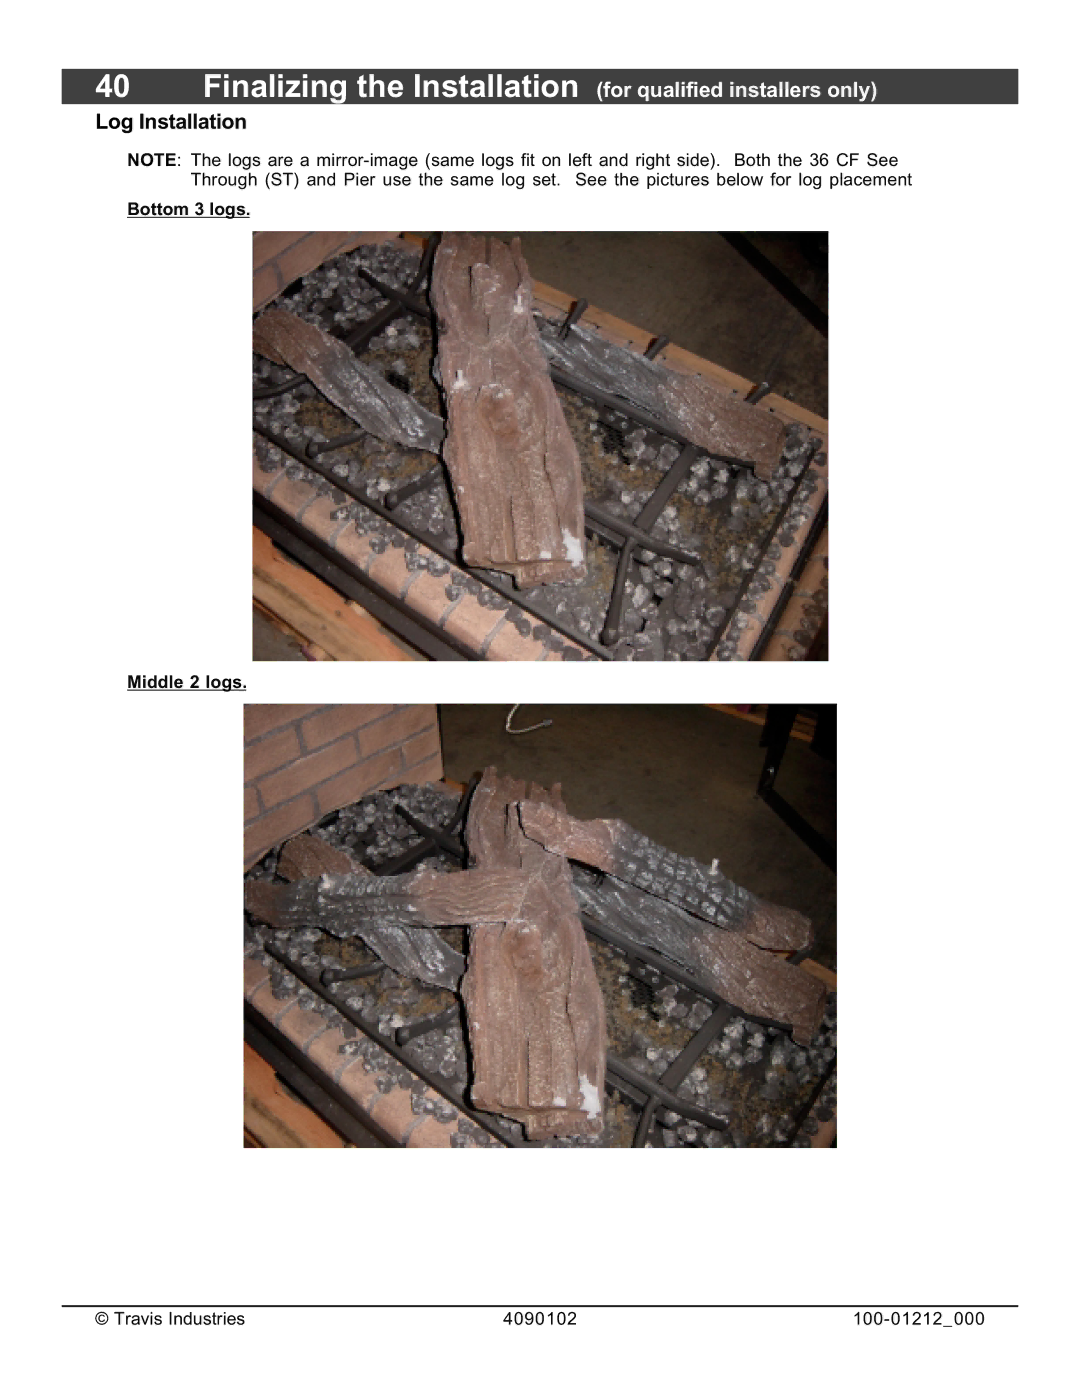
FireplaceXtrordinair 36CF Log Set Installation, Ember Placement, Rock Wool Placement

Page 39

Finalizing the Installation (for qualified installers only)

39

Log Set Installation

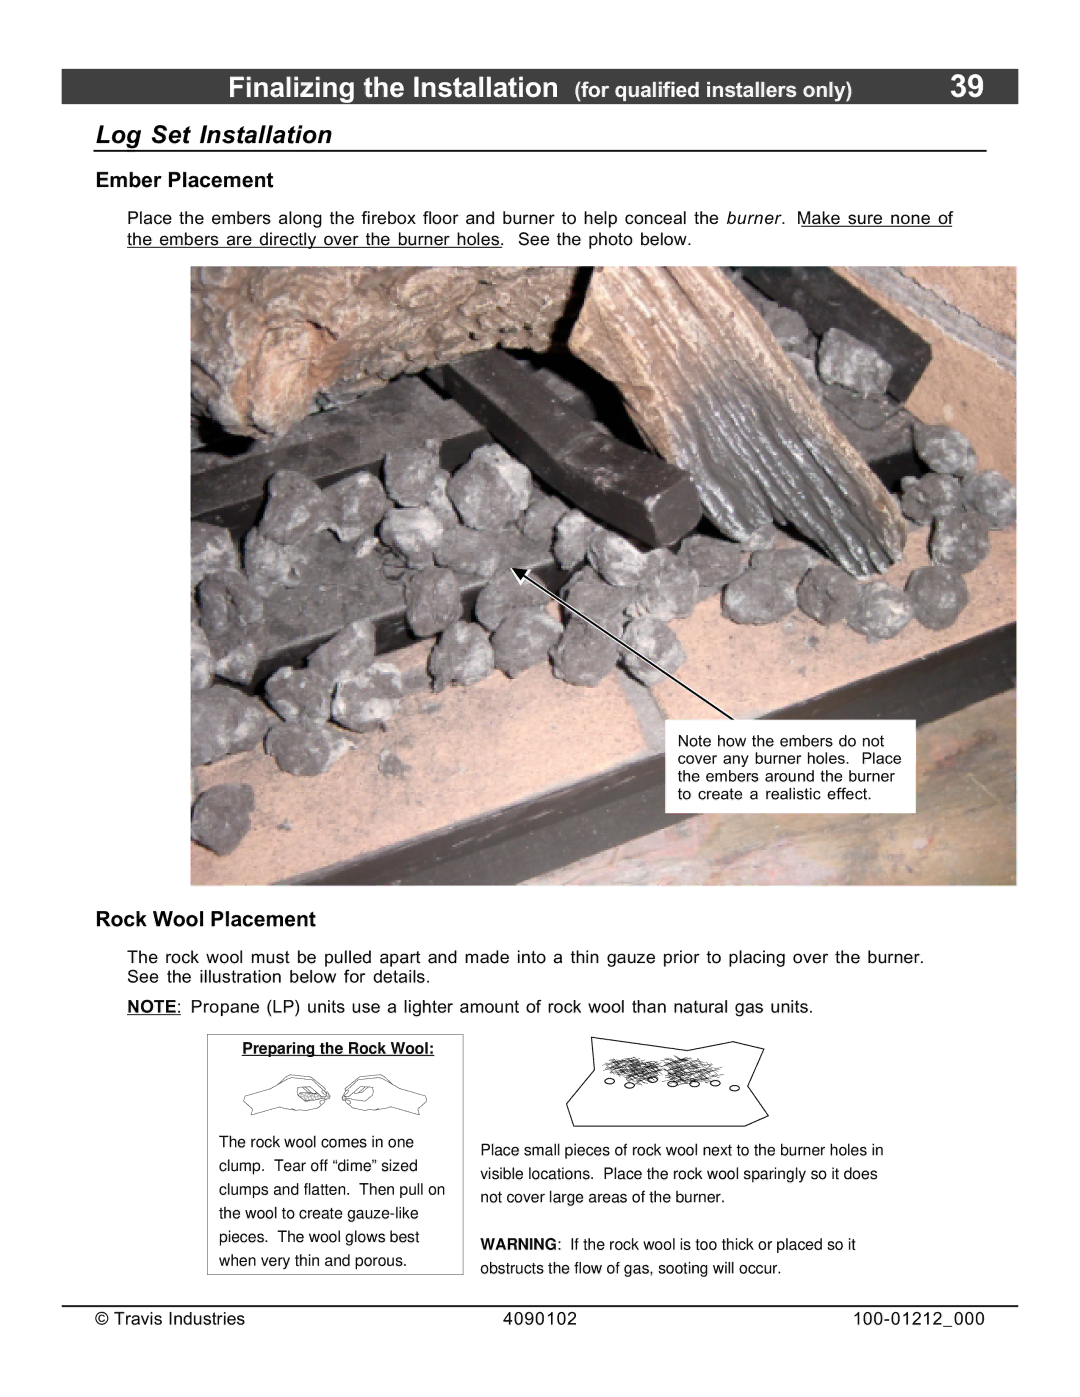
Ember Placement

Place the embers along the firebox floor and burner to help conceal the burner. Make sure none of the embers are directly over the burner holes. See the photo below.

Note how the embers do not cover any burner holes. Place the embers around the burner to create a realistic effect.

Rock Wool Placement

The rock wool must be pulled apart and made into a thin gauze prior to placing over the burner. See the illustration below for details.

NOTE: Propane (LP) units use a lighter amount of rock wool than natural gas units.

Preparing the Rock Wool:

The rock wool comes in one clump. Tear off “dime” sized clumps and flatten. Then pull on the wool to create gauze-like pieces. The wool glows best when very thin and porous.

Place small pieces of rock wool next to the burner holes in visible locations. Place the rock wool sparingly so it does not cover large areas of the burner.

WARNING: If the rock wool is too thick or placed so it obstructs the flow of gas, sooting will occur.

© Travis Industries

4090102

100-01212_000

Image 39
Contents CF ST/Pier Gas Fireplace Overview Listing Details 2IntroductionTable of Contents Safety Warnings Safety PrecautionsSafety Precautions Dimensions Features and SpecificationsInstallation Options SpecificationsRecommended Installation Procedure Packing ListAdditional Items Required Massachusetts Requirements Preparing the Fireplace Stand-offs Fireplace Placement Requirements ClearancesRaised Fireplaces Back Minimum Framing 36 CF ST See ThroughFront Framing Dimensions 36 CF PierAttaching Stand-Offs to Framing Required Electrical Connection Do not route the wires over the top Fireplace Battery Pack / Learn Switch InstallationSteps for Installing the Battery Box and Learn Switch Installation Warning Remote SynchronizationBattery Installation Synchronizing the Remote Remote SynchronizationGas Line Requirements Gas Line ConnectionGas Inlet Pressure Altitude Considerations Vent InstallationVent Requirements Approved VentVent Location Vent ClearancesExhaust Restrictor Adjustment Approved Vent Configurations0feet Max 5feet Approved Vent Configuration Rear Vent, Horz. Term 45 ElbowFeet max 0feet 5feet 10feet 15feet 20max Max 0feet 5feet 10feet 15feet 20max Feet Max Feet max 0feet 5feet 10feet 15feet 20max Installation for qualified installers only 0feet 5feet Feet max 10feet 15feet 40feet max Feet 5feet 10feet 15feet 20max Max 40feet max Feet 5feet 10feet 15feet Termination Requirements Flush Hearth Hearth RequirementsHearth Requirements Recessed Hearth Facing Requirements Non-Combustible Facing See Through Mantel RequirementsSteps for Finalizing the Installation Finalizing the Installation for qualified installers onlyAir Shutter Adjustment Finalizing the Installation for qualified installers onlyGlass Frame Glass Trim Glass Frame Removal and InstallationLog Set Installation Ember PlacementRock Wool Placement Log Installation Top 2 logs last 2 logs Picture from opposite side Picture from end Pier only LP Conversion Instructions Finalizing the Installation for qualified installers only Orifice Table Rate Screws Andiron Installation Power Heat Duct Installation48Index