CHAPTER 3: Replacing notebook components
Replacing the LCD front panel
Tools you need to complete this task:
- OR - | Scribe or |
Phillips #0 screwdriver
Screws removed during this task:
•![]()
![]() 2 black M2.5×8 (LCD panel hinges - bottom)
2 black M2.5×8 (LCD panel hinges - bottom)
•![]()
![]() 2 black M2.5×8 (LCD panel hinges - top)
2 black M2.5×8 (LCD panel hinges - top)
• | 13 black M2.5×8 (palm rest |
-base side)
•![]()
![]()
![]() 3 black M2.5×8 (palm rest - top side)
3 black M2.5×8 (palm rest - top side)
![]() To replace the LCD front panel:
To replace the LCD front panel:
1Complete the steps in “Preparing the notebook” on page 51.
2If the notebook has a wireless card installed, follow step 1 to step 4 in “Replacing the wireless card” on page 58.
3Remove the keyboard by following the instructions in “Replacing the keyboard” on page 77 .
4Remove the keyboard cover by following the instructions in “Replacing the keyboard cover” on page 79.
5Remove the LCD panel assembly by following the instructions in “Replacing the LCD panel assembly” on page 83.
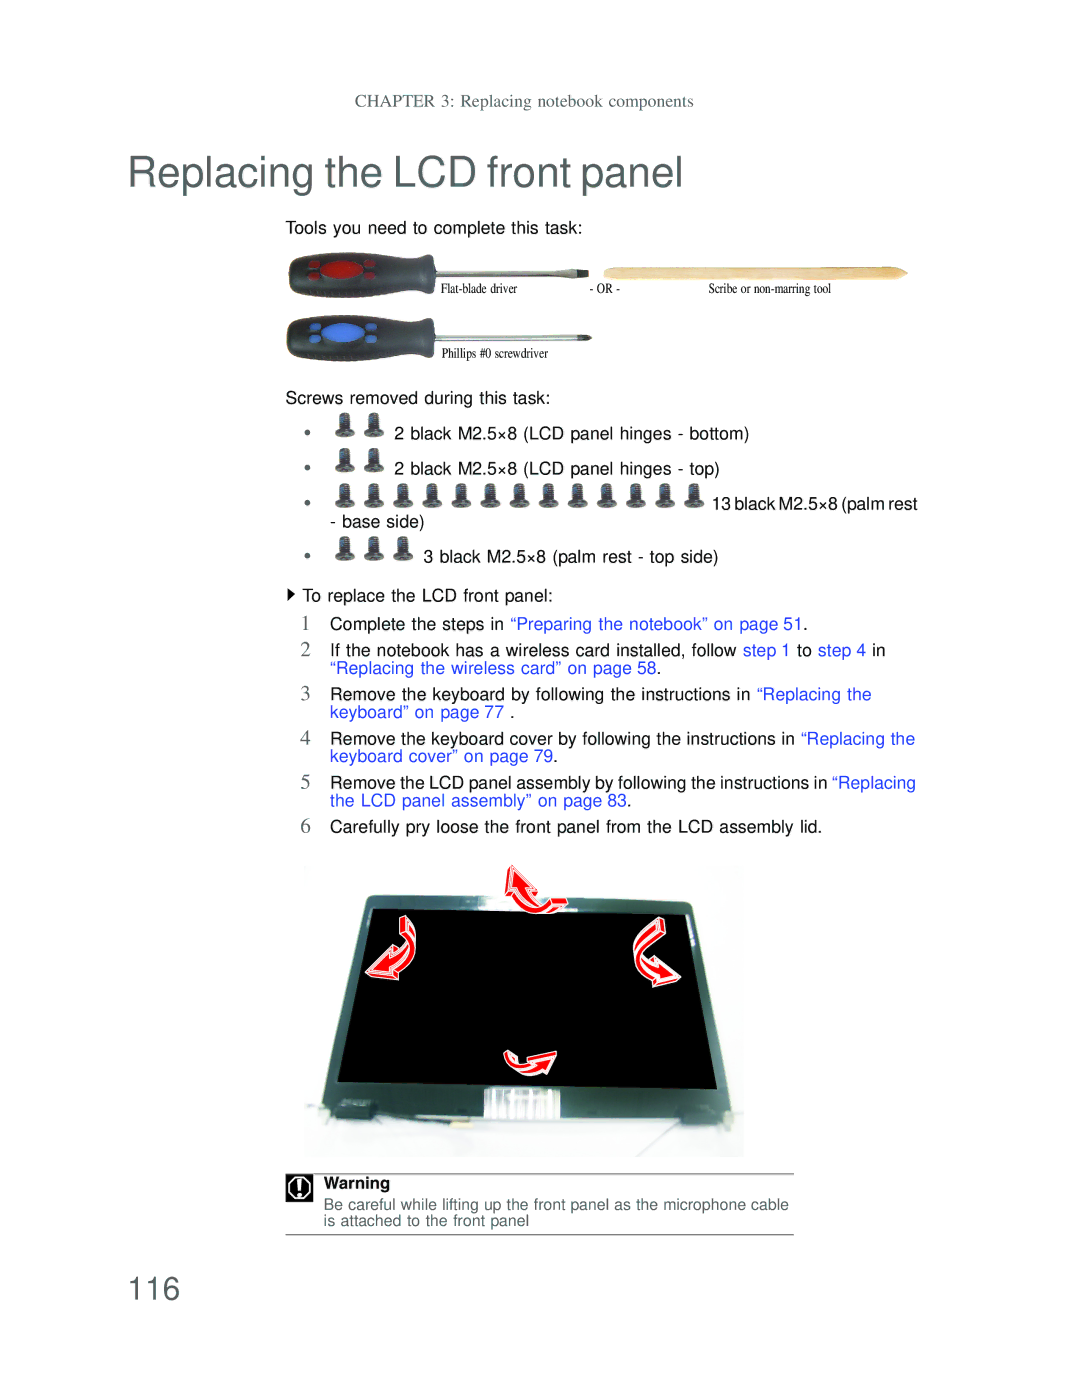
6Carefully pry loose the front panel from the LCD assembly lid.
Warning
Be careful while lifting up the front panel as the microphone cable is attached to the front panel
