Programming Overview - 5
Step 1
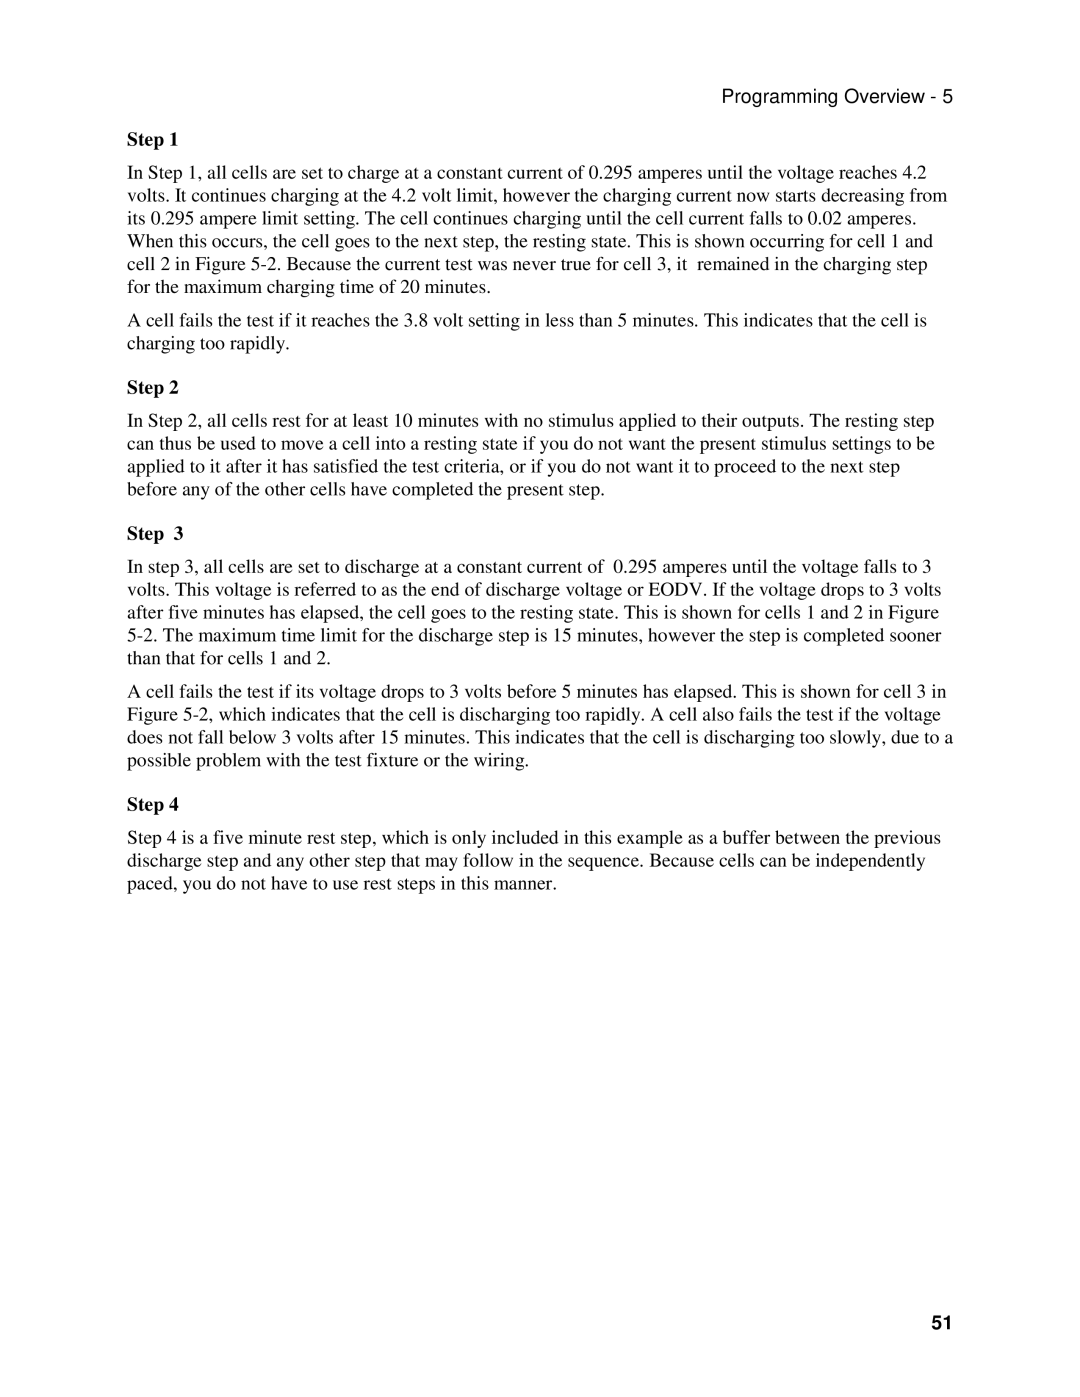
In Step 1, all cells are set to charge at a constant current of 0.295 amperes until the voltage reaches 4.2 volts. It continues charging at the 4.2 volt limit, however the charging current now starts decreasing from its 0.295 ampere limit setting. The cell continues charging until the cell current falls to 0.02 amperes. When this occurs, the cell goes to the next step, the resting state. This is shown occurring for cell 1 and cell 2 in Figure
A cell fails the test if it reaches the 3.8 volt setting in less than 5 minutes. This indicates that the cell is charging too rapidly.
Step 2
In Step 2, all cells rest for at least 10 minutes with no stimulus applied to their outputs. The resting step can thus be used to move a cell into a resting state if you do not want the present stimulus settings to be applied to it after it has satisfied the test criteria, or if you do not want it to proceed to the next step before any of the other cells have completed the present step.
Step 3
In step 3, all cells are set to discharge at a constant current of 0.295 amperes until the voltage falls to 3 volts. This voltage is referred to as the end of discharge voltage or EODV. If the voltage drops to 3 volts after five minutes has elapsed, the cell goes to the resting state. This is shown for cells 1 and 2 in Figure
A cell fails the test if its voltage drops to 3 volts before 5 minutes has elapsed. This is shown for cell 3 in Figure
Step 4
Step 4 is a five minute rest step, which is only included in this example as a buffer between the previous discharge step and any other step that may follow in the sequence. Because cells can be independently paced, you do not have to use rest steps in this manner.
51