B - Calibration
Accessing Calibration
Calibration control is accessible by one of three methods:
♦the Agilent MCCD Configuration Screens,
♦API calls over the LAN,
♦the
Note: Transfer calibration can also be run by pressing the Cal button on the rear panel.
Agilent MCCD Configuration Screens
You can calibrate the Agilent MCCD using the Agilent MCCD Configuration Screens on your PC. Chapter 2 describes how to run this program.
To calibrate the Agilent MCCD using the Agilent MCCD Configuration Screens, flip the Port B switch (#4) on the back of the Agilent E4370A down (from Normal to Configure) and run the HyperTerminal program. When the Agilent MCCD Configuration Screens appear, select 4 to calibrate the Agilent E4370A MCCD mainframe and the Agilent E4374A Charger/Discharger.
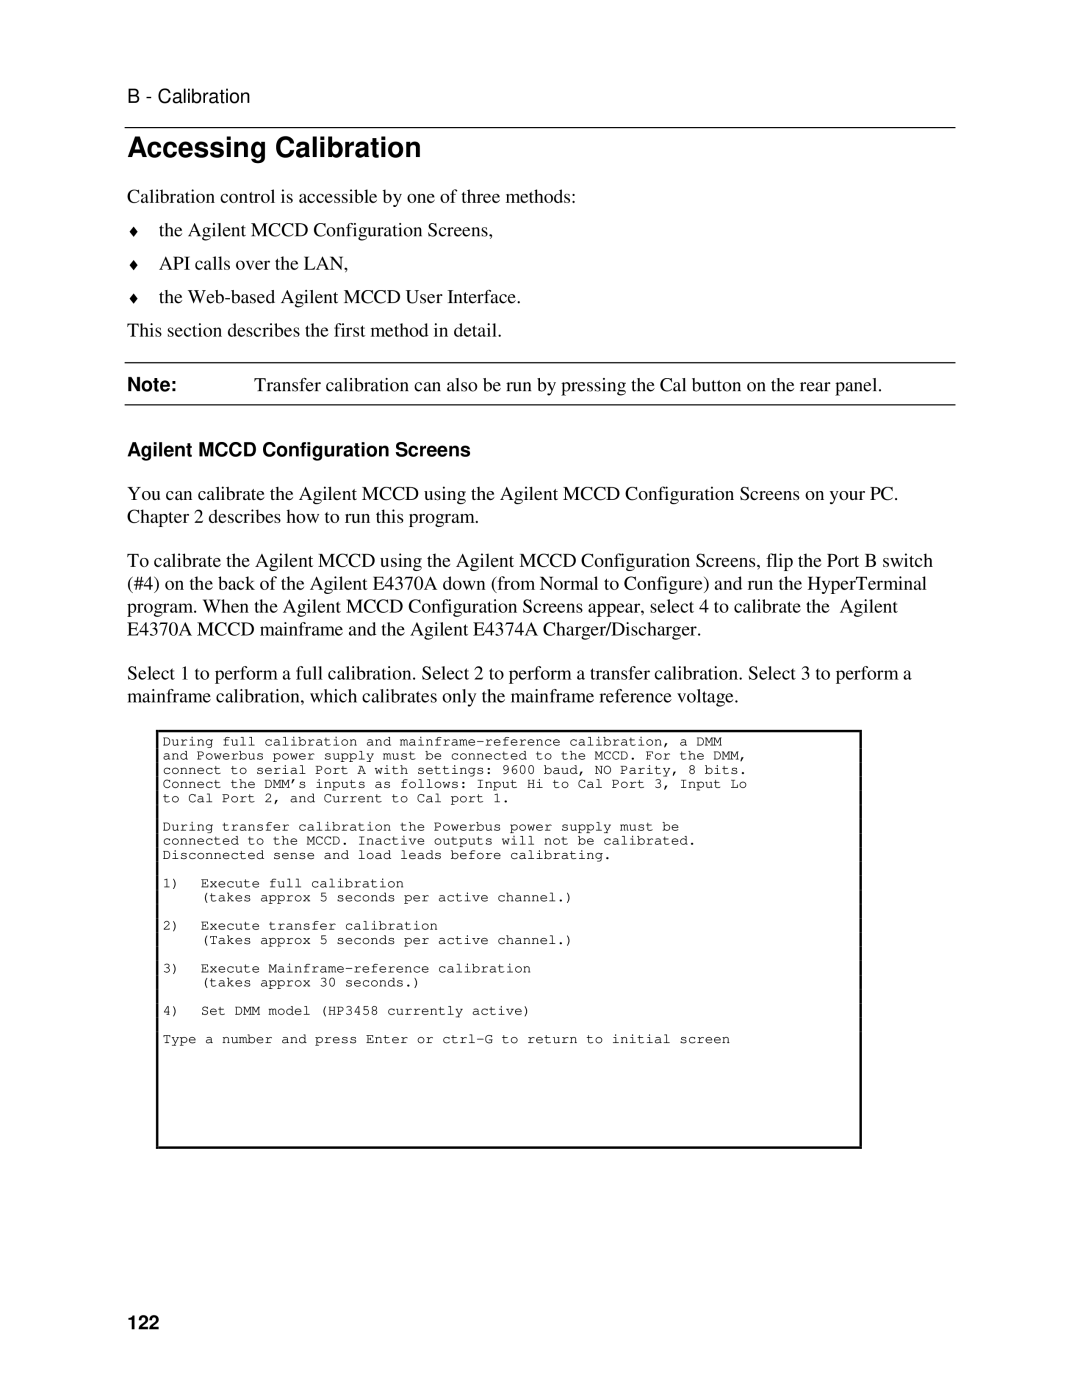
Select 1 to perform a full calibration. Select 2 to perform a transfer calibration. Select 3 to perform a mainframe calibration, which calibrates only the mainframe reference voltage.
During full calibration and
During transfer calibration the Powerbus power supply must be connected to the MCCD. Inactive outputs will not be calibrated. Disconnected sense and load leads before calibrating.
1)Execute full calibration
(takes approx 5 seconds per active channel.)
2)Execute transfer calibration
(Takes approx 5 seconds per active channel.)
3)Execute
4)Set DMM model (HP3458 currently active)
Type a number and press Enter or